Hacking your class set of iPads can help students learn. If you are ready to make vocabulary study more interactive, come along! Let’s review the primary cognitive processes involved in active learning. After all, who wants to just use technology to do boring vocabulary drills or study alone?
Active Learning
“Active learning refers to the robust research finding that learning is more durable and lasting when students are cognitively engaged in the learning process,” says Dr. Jay Lynch. “Students need to be involved in active sense-making and knowledge construction.” Effective learning engages students in one or more of three cognitive processes involved in active learning. Those three processes include:
- Students selecting relevant material. Can you imagine students deciding which vocabulary words and/or concepts they are unclear about and then working to better understand them?
- Organizing material in ways that make sense to them. Students can use technology, such as websites or apps, to make sense of unfamiliar words and/or concepts.
- Blending prior knowledge with new information. Students can create concepts maps that connect their own learning with new information.
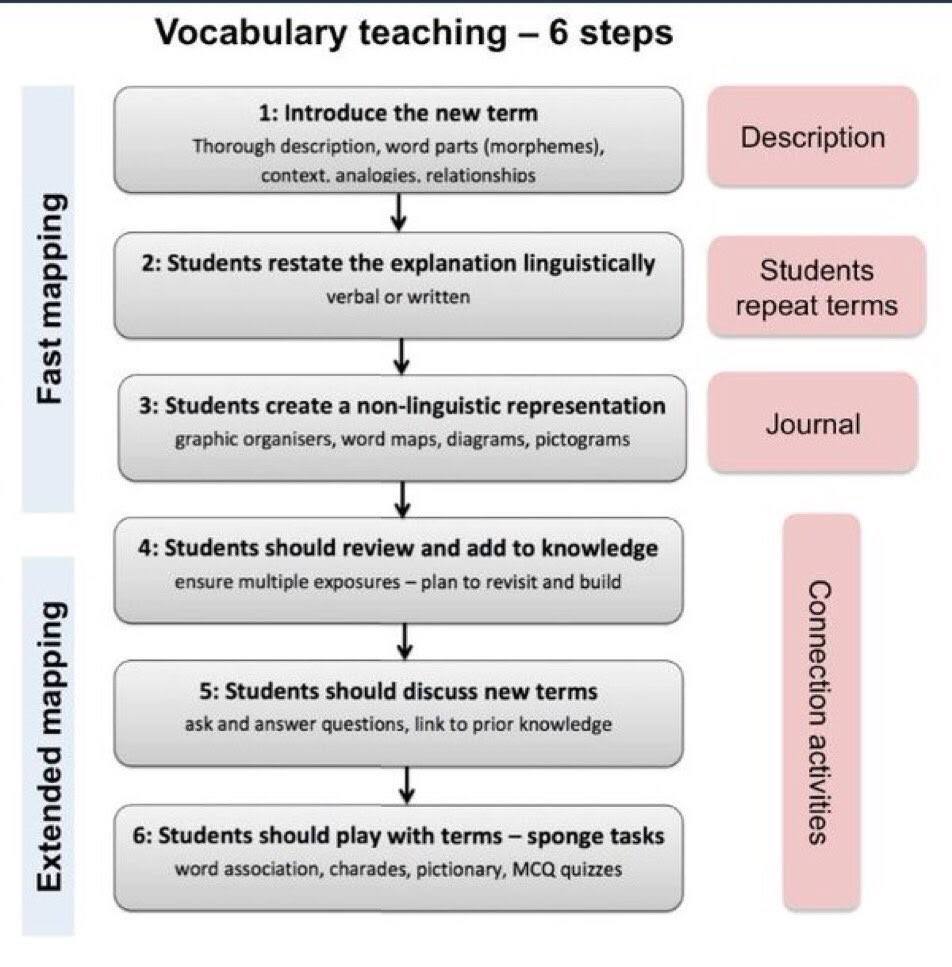
Six steps from Robert Marzano in this tweeted diagram shared via @ImpactWales highlight what we can do as teachers to assist students.
Six Steps to Vocabulary Teaching
Students should be introduced to new vocabulary via the following six steps. Take a moment to study the diagram, then join me as we explore a variety of iPad apps that can assist students in active learning achievement.
Hacking Your iPad for Active Learning with Vocabulary
The classroom teacher can help students create non-linguistic representations using iOS apps like the descriptions shown below:
- Students can put their vocabulary words in the mouths of historical figures or others using the PhotoSpeak app (click to see sample lesson), which makes it easy to take a photo and represent it. Students can audio record themselves and then match it to a photo of a person.
- Pupils can create a compare and contrast chart, exploring a vocabulary word and its relationships with other words, using Doodle Buddy (click to see more activities).
- Learners can create a photo collage of pictures/images that represent the vocabulary word using Moldiv.
- Students can capture or locate a photo that represents their vocabulary word and, using the Perfect Captions app, students can add a caption to the picture. Older students can also create dialogue in the image, if historical or featuring different actors, to explain the meaning of the vocabulary term or use it appropriately.
Each of these activities takes advantage of a different app; however, using an app like DoInk’s Green Screen (find out more), you can “app smash” the creations into one video or image. This allows teachers and students to add themselves to the explanation of a compare and contrast diagram created with Doodle Buddy or Perfect Captions.
Extended Learning
Students may also choose to use iPad whiteboard apps to facilitate explanation of a word. For example, a “Draw the Word” activity can help students using a digital whiteboard app. Those include apps like BaiBoard, Educreations, Quick Sketch, ShowMe, Whiteboard, or Whiteboard for Kids. These digital whiteboards allow students to visually represent their concept of a word’s meaning. In some cases, like Educreations, students can also include audio.
To extend student learning about vocabulary, hacking iPads can also involve creating concepts maps using apps like Ideament (iOS, free but $2.99 for full features), iBrainstormer, Total Recall – MindMap, or Penultimate.
Students could also interact with each others’ creations, recording their understanding of a diagram or video-recorded explanation. Using a free service such as Seesaw, students may turn in their work and/or link to other students’ vocabulary terms. They can also leave comments and be inspired by each other’s creations.


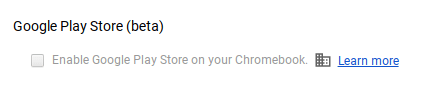 that the option to access the Google Play Store on your Chromebook is enabled in the dashboard. You can check your Chromebook by going to Settings. Scroll down until you see the Google Play Store (beta) section. If the option is greyed out, then you’ll need to bake a batch of cookies to take to the domain administrator and ask if they can enable the feature. (Giving cookies increases the chances of having this feature enabled by 64 percent.) If you log in with your personal Google account on the Chromebook, you’ll notice that it is already enabled. But you do NOT want to use your personal account with your students and other teachers. For safety reasons, you always want to use your district account, even if that means bribing the domain administrator or waiting a few days for it to be enabled.
 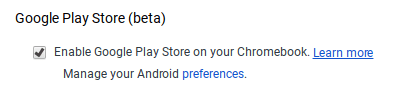 Once the option to enable is made available, you’ll be able to enable it in Settings and manage Android preferences (similar to if you were setting Android preferences on an Android phone or tablet).
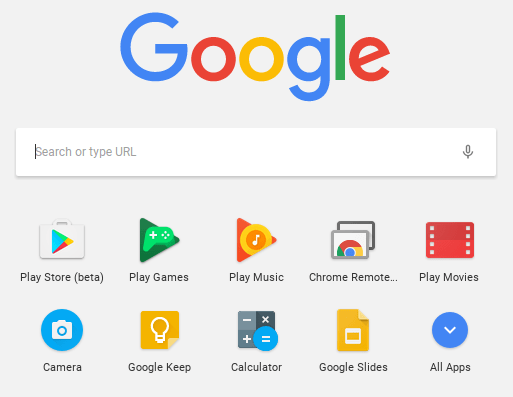 Yippee! You have it enabled. So where it it? Click on the Launcher icon which, by default, is the icon on the bottom left on the shelf. You will now see the Play Store (beta) icon. This beta Play Store is currently a stipped down version of the Play Store you would see if you accessed it through the browser. And yes, you will need to use the beta Play Store to install Android apps. When accessing the store via the browser, your Chromebook will not be an option in the dropdown list of compatible devices. Once you click on the beta store, you will recognize the various categories to help you narrow down what type of app you are looking for. If the developers have not completely finished updating the app in question, it may be available as a beta version. When I spot checked several of the Android apps I have on my phone, almost all were available and ready in the Play Store. You might even find that some app developers have made their product available as a Chrome app (that you install via the Web Store) and an Android app (that you install via the beta Play Store). Either way, once installed, they will appear in your launcher window.
 Autodesk SketchBook – Whether it is illustrating, diagramming, or sketchnoting, you’ll find this to be a simple app to use. When done, save the image to your Chromebook.
 Trello – More than just a to-do list app, Trello can help you keep track of projects. You can work alone or collaboratively with classmates to keep track of project-based learning activities.
 Trading Cards – This isn’t your traditional trading card maker. Templates provided include fictional person, real person, fictional place, real place, object, event, and vocabulary. Once you enter information on the front and back of the card, you can share it as a photo to your photo gallery.
 Pic Collage – Share your message with pictures! Pic Collage lets you start by selecting your photos and then adding them to a grid with templates (start with a themed background) or freestyle (begin with a blank slate and add to it). You can also easily add text and search for photos on the internet to add to your collage.