With many teachers finding that flipping their classroom makes for more engaging lessons and discussions in class, it’s no wonder that it is one of the growing trends in education. Whether you teach early elementary, advanced academics in high school, or any level in between, you may find that it is a great fit for your class as well. Depending on the needs and maturity of your students, the tools you use can vary. What works for one grade level may not be the best match for another. As you evaluate tools for use in your flipped lesson cycle, consider the following questions:
- Is this tool free for my students to use, user-friendly, and customizable to best fit their learning needs?
- Does the tool offer me (as the teacher) a variety of ways of interacting with the students, such as a quick feedback loop, data collection options through quizzes, and ways to extend and/or differentiate the information for students who need additional (or different) information?
- If the tool uses videos, which platform can it pull from (YouTube, Google Drive, Vimeo, etc.)? And, do my students have access to that platform?
Now that you have several questions to help you evaluate flipped tools, let’s take a look at several. Below are a few of my favorite to recommend. These have a fairly simple learning curve for the teacher and have some nice features that you can take advantage of for free.
- YouTube Editor – Record and edit right within YouTube. You can add simple transitions, background audio (already curated for you), and even intros and outros…if you want to get fancy. When you are done, you can save it to your YouTube account and share it as needed. [Tutorial Video]
- Screencast-o-matic – This handy utility is great for creating simple screencasts. You have the option to screencast from a web-based tool or download a small utility file that runs on your computer. [Tutorial Videos]
- EdPuzzle – Pull from a variety of video sources and create interaction throughout your video…or copy lessons that other EdPuzzle users have created and tweak to meet your students’ needs. [Tutorial Videos]
- TubeChop – If you just want your students to watch a video but want to trim it to a specific section, TubeChop is your answer. Once you “chop” the video, you’ll get a TubeChop URL to share with your students. [Tutorial Video]
- VideoNotes – This tool is great for secondary students! Create a file that has the YouTube video on the left-hand side and a simple notetaking section on the right-hand side. Students take notes while they watch the video…and it even syncs their notes to the location of the video at the time of typing! And, it connects with Google Drive making their work shareable. [Tutorial Video]
- Movenote EDU – Get fancy when flipping your lesson by creating your own picture-in-picture video that allows you to show images, MS Office files, and PDFs. Once shared, the students can watch and download all the documents as a single PDF. [Tutorial Video]
- Renderforest – Make your introductory videos look even more professional with this free resource. Registration is required.
Other tools to investigate might include: PresentationTube, OfficeMix, Camtasia Studio, Doceri, Explain Everything, Educreations, or TouchCast.
Regardless of which tool you use, remember to keep it focused on the learning objective. Lastly, consider your audience when determining the length of your videos. It’s better to have several smaller videos (2-5 minutes each) rather than one long, 15-minute video. With these tools and your teaching skills, you are sure to create engaging lessons that make flipping your classroom a success!
This blog was updated with additional resources on August 8, 2017.


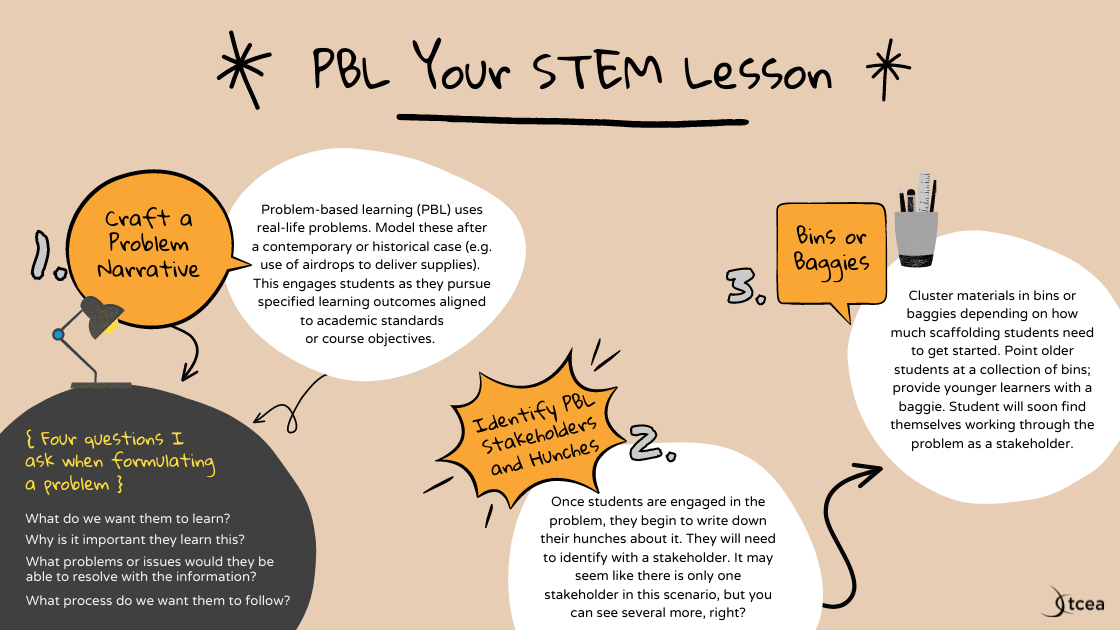
 Once students are engaged in the problem, they begin to write down their hunches about it. They will need to identify with a stakeholder. It may seem like there is only one stakeholder in this scenario, but you can see several more, right?


