

“Student engagement” has become the catchphrase ever since students were at home, partaking in online learning. Yes, this phrase is a very important piece of learning, but what does it really mean? When students are fully engrossed in a lesson, they are truly engaged. But how do we get them there? How do we plan for this? Learning shouldn’t be “sit and get.” Learning should be doing. Let’s take a look at one tool that will get students collaborating and learning by doing in no time: FigJam!
What is FigJam?
Google Slides and Nearpod both have some great attributes and activities to get kids thinking, speaking, and learning, but many times, the activities that Nearpod or Slides have to offer don’t lend themselves completely to our youngest learners. How can these students take part in a more rigorous lesson while still feeling completely engaged in the learning? One way to engage young students is by using FigJam. FigJam is an online collaborative whiteboard tool that can be used by learners of any age for a variety of activities and learning goals. Let’s dive into some FigJam activities that we can use while learning a little bit about the different tools it has to offer!
The FigJam Tool Menu
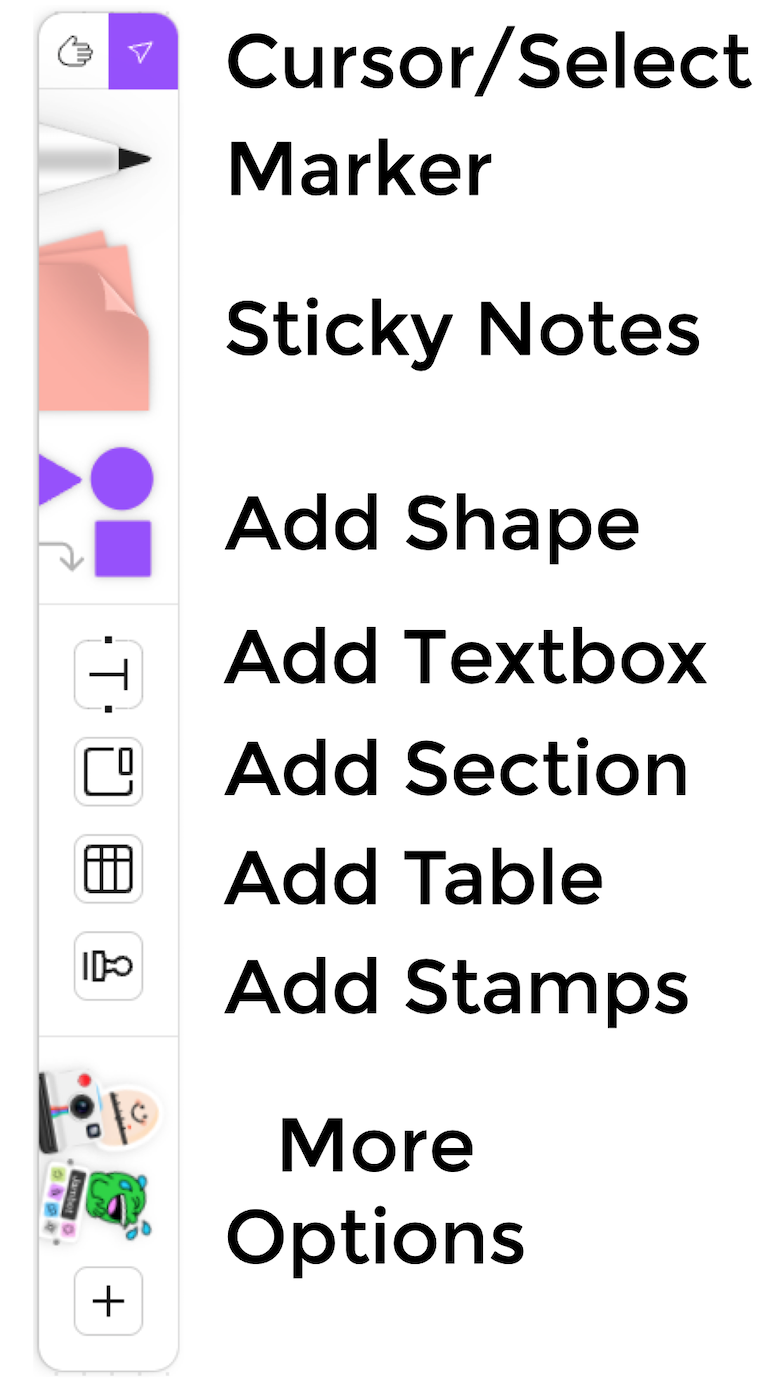
Here is the tool menu in FigJam and, as you can see, it has quite a few tools for teachers and students to use.
The Marker
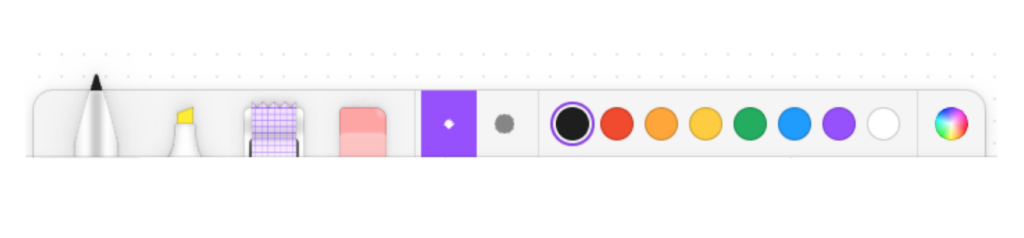
Let’s start with the marker, and explore some cool ways our students can use it! So what does the marker do? Well, for starters, it will allow students to free draw. When the marker is selected, the user will be able to choose the marker width, as well as the marker color. There are only two sizes for the marker width, but as you can see, you can choose one of the preset colors, or you can customize the color to your liking!
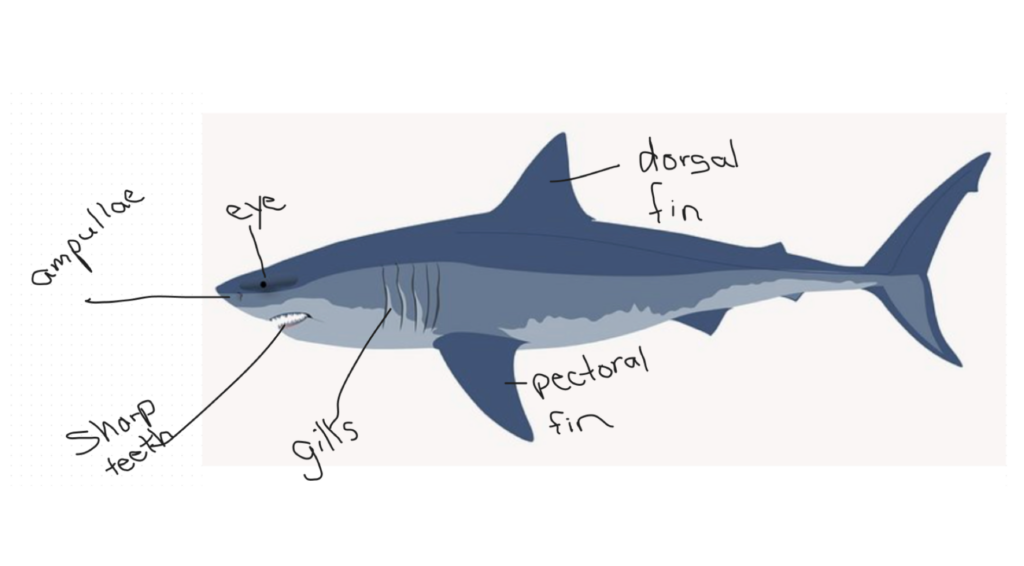
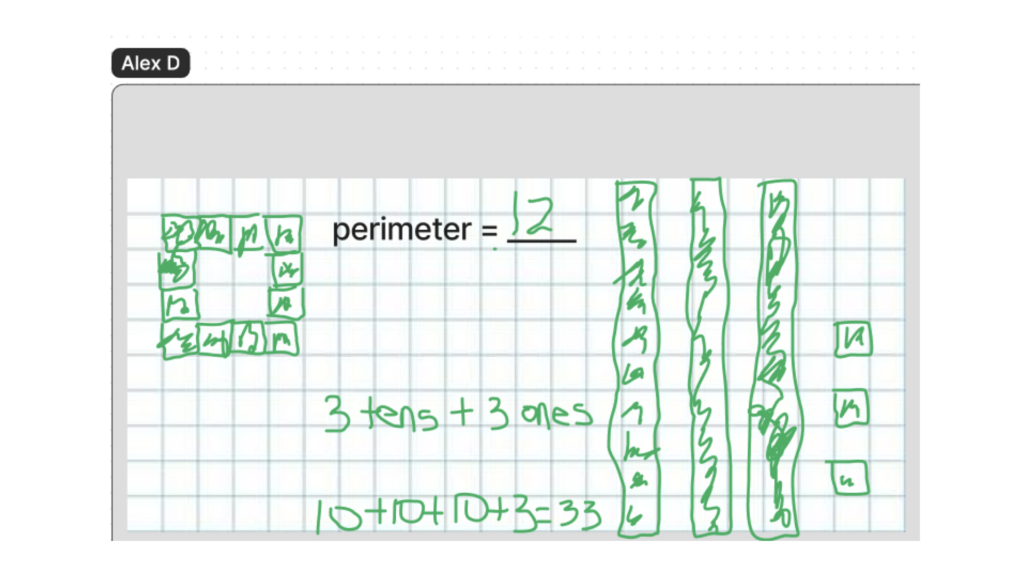
Using the marker tool, students can label parts of an object. Here, we have a shark. The student was able to label the parts using the vocabulary words that were learned during the lesson. FigJams can become interactive science journals in this way!
Adding and Customizing Sections
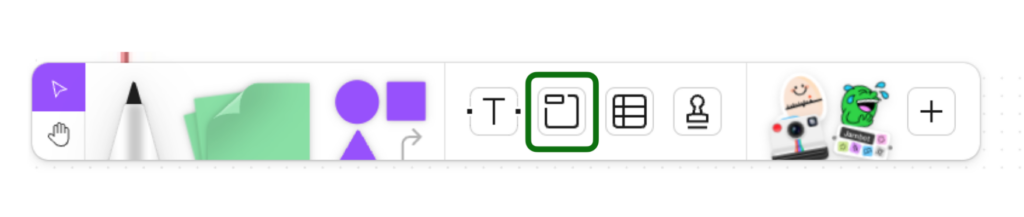
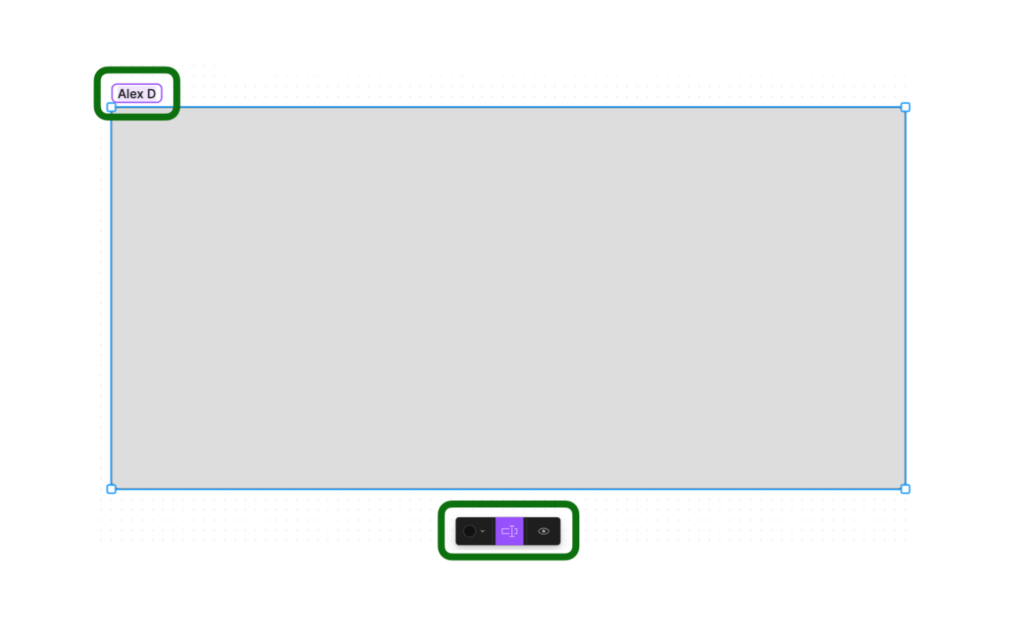
How did the image get placed into this FigJam project so that students could label it but not delete it? It is quite easy! FigJam does not have backgrounds for you to choose from, so you will have to upload your own images to your projects. My suggestion? Break up your project into sections, which will make it easier to download or copy. First, start by clicking the Section button.
You can make the section as large or small as you would like, but if you are adding images, you want to ensure the size of your section is large enough for the image to fit inside. Once you get your section as you like it, you can rename the section. I will rename each section using my students’ names.
Adding an Image
Now that the section is ready, I can add an image to it. I click on the plus sign on the right-hand side of the FigJam menu, click More, and choose Media.

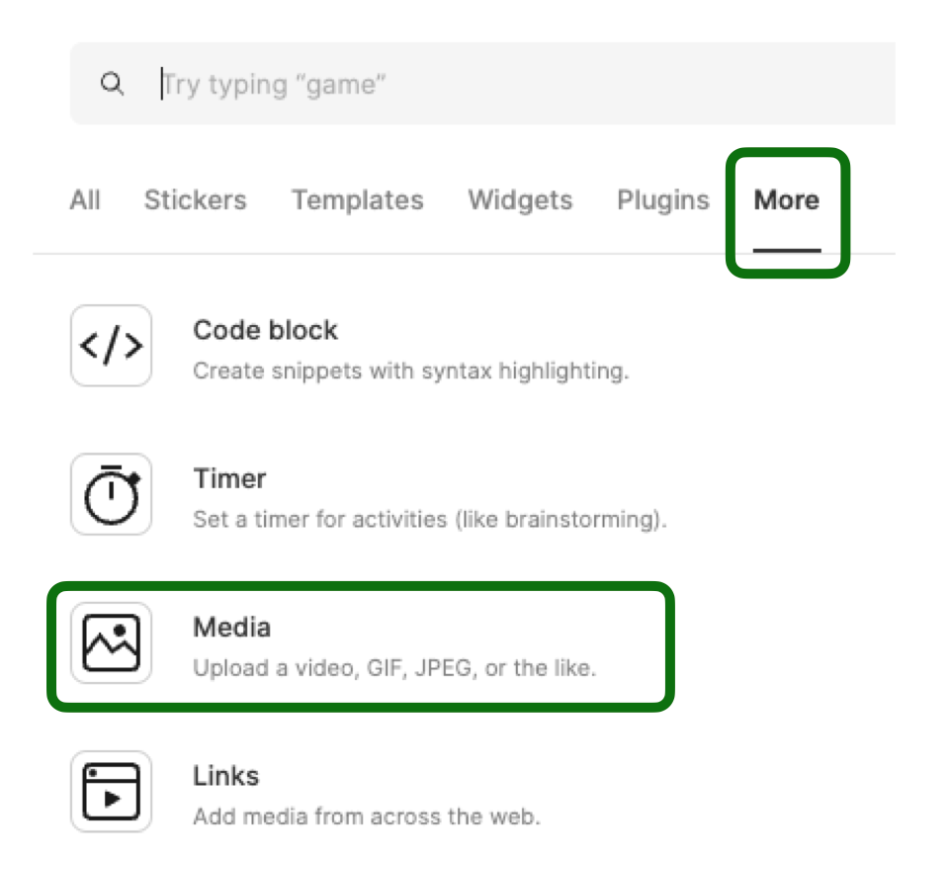
This will allow you to upload media files from your computer. You can upload images, videos, or even GIFS. However, only one GIF will be animated in each section. Once I insert my image into a section, I can resize it to my liking. Then, I’m ready to lock it so students cannot move it.
Locking Images in FigJam
To lock an image, click on the Quick Actions menu in the top left corner of your project. Select Object, and then click Lock/Unlock selection.
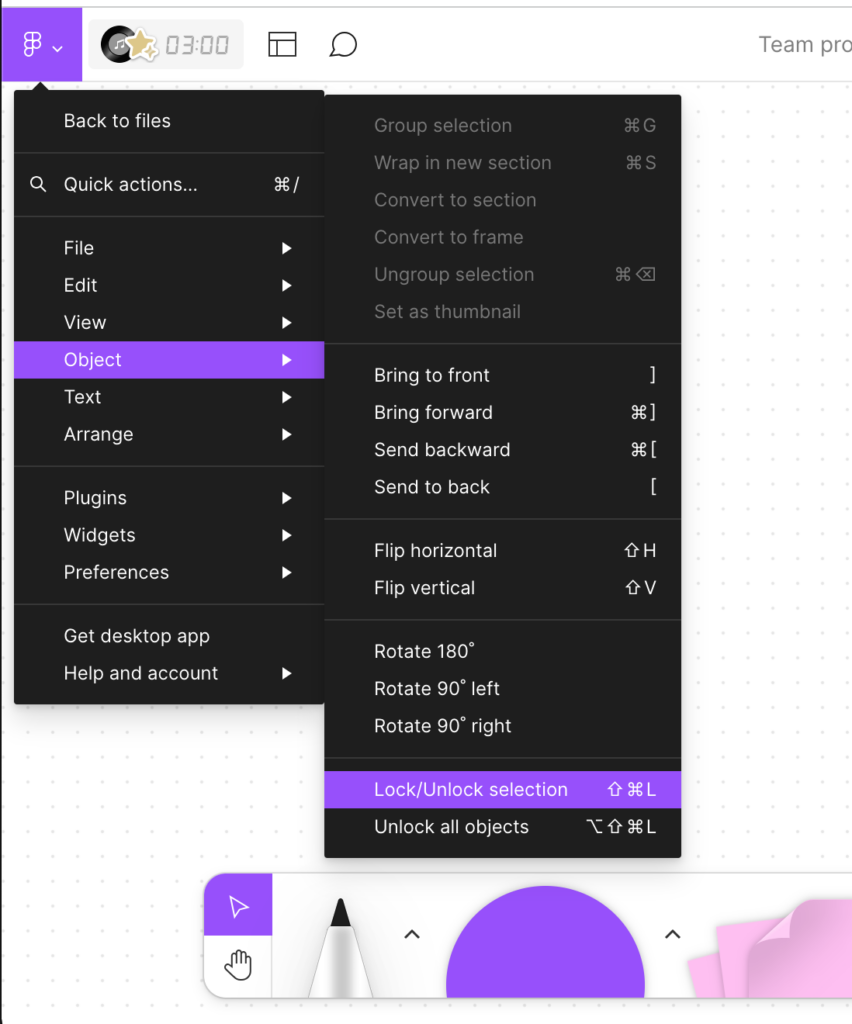
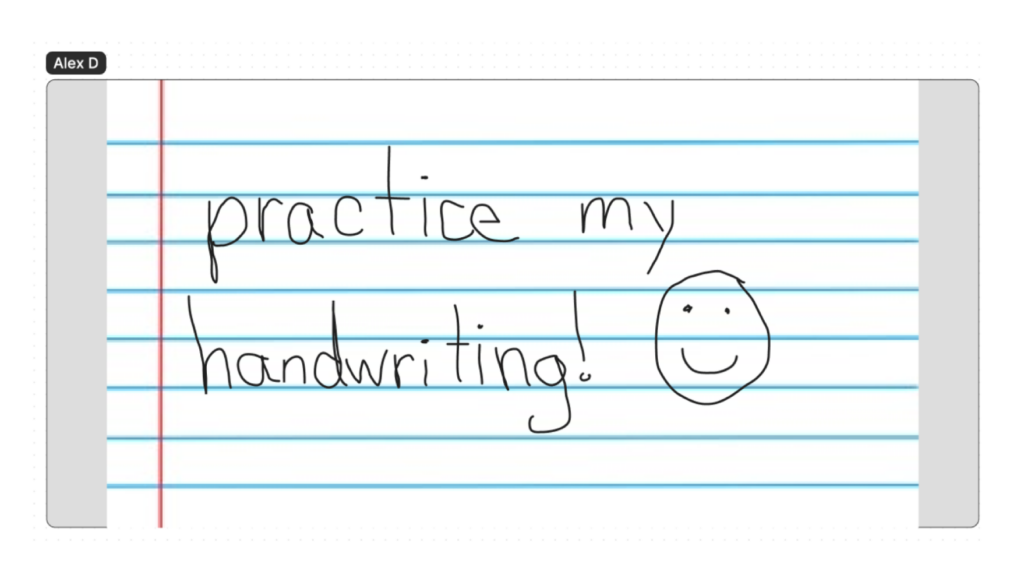
Once the section is locked, students will not be able to move it, which will make it easier for them to annotate in FigJam. You can add images of lined paper for handwriting practice, thinking map templates, and even graph paper! You can use just about any image that you search for, just be mindful of copyright.
The Textbox Tool
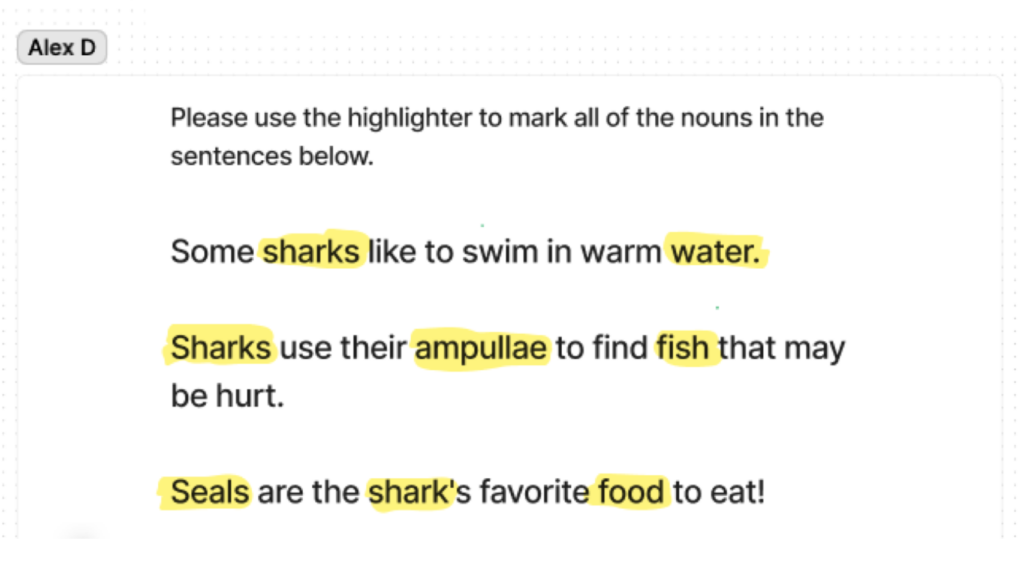
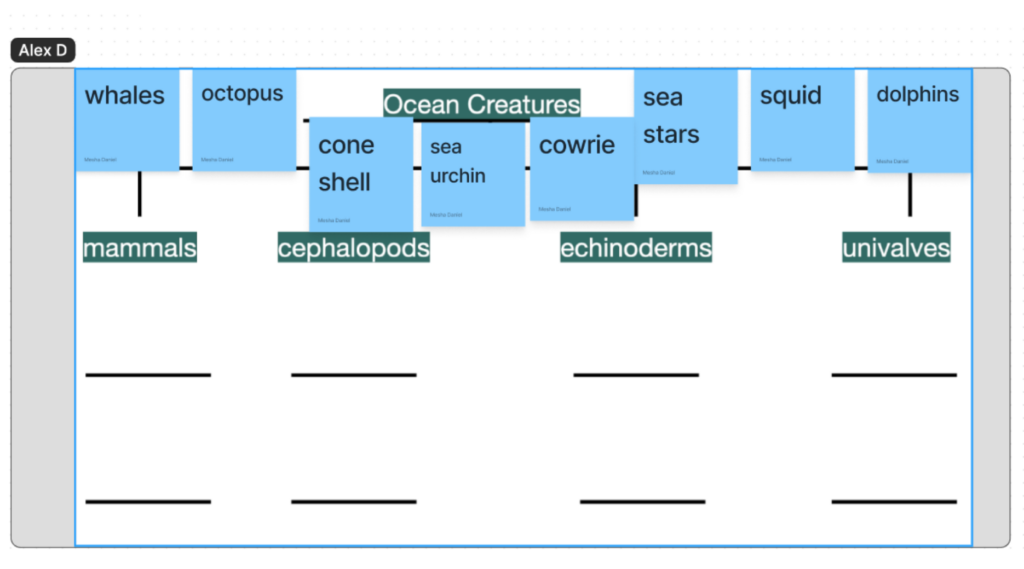
The textbox tool in the FigJam tool menu allows teachers and students to add typed text to the project. The text tool can be used to create engaging activities for students in many different ways! Take a look at this section. With just a few sentences about what we are studying in science, a teacher can turn a lesson on parts of speech into a much more engaging, and meaningful one. Students are now learning about sharks and nouns!
FigJam Sticky Notes
Sticky notes can be easily found in the FigJam tool menu. They can be added for providing feedback, giving quick, eye-catching directions, and other student communication. Students could also use them to deliver information. The sticky notes come in several colors, and the text type and size can be adjusted.

There are also options for adding bold, strikethrough, and links. Yes, that’s right, you can add links! The size of the note can be customized, and they can be moved anywhere on the project canvas. There is even an option to hide or show who wrote the note.
Spotlight Me
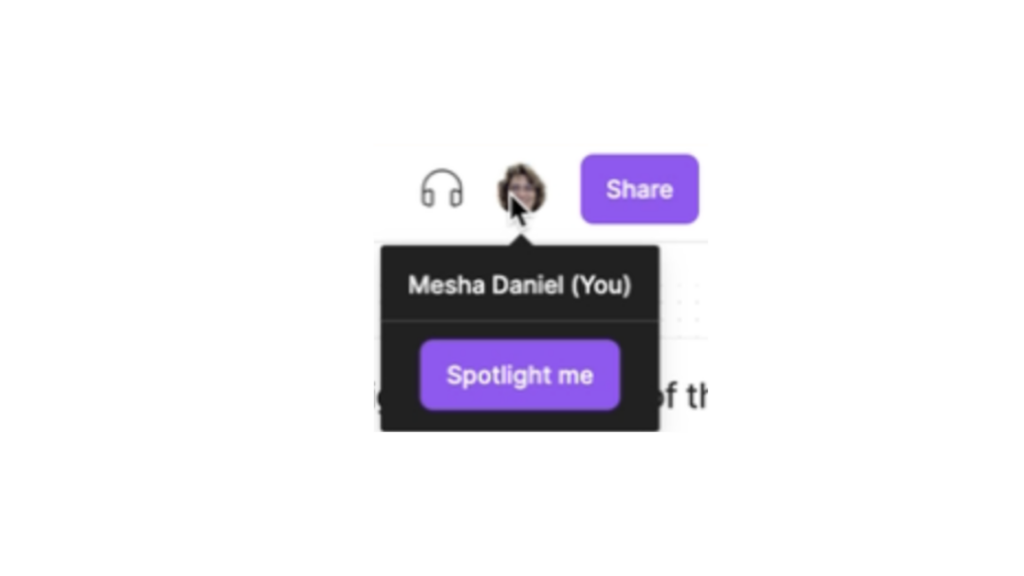
A really neat feature that can assist when students are not in the same room, or if they are in the same room and you want to show them something on their screens, is Spotlight Me. If you have many students inside your FigJam project, you can turn on the spotlight so that students can “follow” your every move. This allows the teacher to model a lesson effectively without the need for a document camera. Simply click on your profile picture in the top left corner of the FigJam, and click the Spotlight Me button. Students will then be able to “follow” and watch what you do on your screen on their own screen.
If you have signed up for an educator account and been approved (it’s free!), you will also be able to use your microphone to narrate your way through the lesson!
Additional FigJam Features
There are many other features in FigJam that are available from the tool menu, such as adding tables, stamps, and stickers. There is also a timer and a music player that will play for anyone in the project and a fun voting app. These tools are great for getting students engaged and creative when responding to questions or tasks within the FigJam.

Sharing and Exporting from FigJam
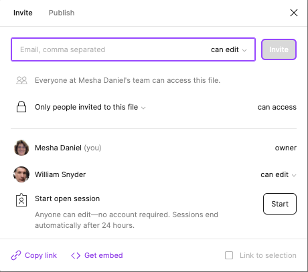
So, how do you share this amazing tool with others? Click on the Share button in the top right corner of your FigJam project and you have many options. You can choose to share the entire project or you can share specific sections. The choice is yours!
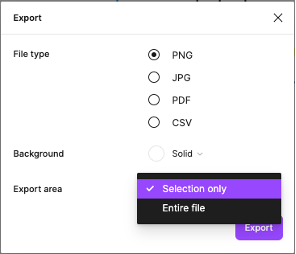
Students and teachers also have the ability to export the FigJam project. All projects can be exported as PNG, JPG, PDF, or CSV file types, and you will have the choice of exporting the entire project or just a section. Using the export tool, students can app smash with document or presentation applications to create an even more amazing learning opportunity!
We have only covered the tip of the iceberg of FigJam! Sign up for a free Educator account and get started using the amazing tools and templates in this easy-to-use application.
Featured Image: Screenshot by Emily Horn: FigJam’s Templates for the Classroom pop-up
4 comments
Hi,
Great article, those Figjam have a age restriction for student to create an account and does younger students even need to create an account to interact with it? Thanks
Hi Arthur! Thanks for reading! It works very similarly to Google Docs. You can click share in the top right corner and choose “anyone with a link” can edit, view, comment… but if you choose edit, they will need to sign in to edit (they can sign in using Google if you are a Google school). You can also share with individual email addresses, but the same rule applies. In the Terms of Service, it states: “3.1. Who may use the Services. You may only use the Services if you are old enough to consent (by yourself and not by a parent or guardian) to share your data under applicable law. For example, you must be 13 years or older under most United States’ law, or 16 years or older under California or European Union law. If you are using Figma Community, you must be at least 16 years or older.”
How do you add students into a figjam?
Hi Jacquie, thanks for reading! It works very similarly to a Google Doc. You click Share in the top right corner, and you can share as “anyone with a link” can edit, view, comment…or you can add your students’ email addresses to share it with them and give them edit/view permissions. If you choose “anyone with a link” when sharing, you just need to share the link with them to give them access. If you’re using Google Classroom, here is a good video: https://youtu.be/OUeiCSdMTBg?feature=shared