Ready to explore 3D printing projects for the incredible micro:bit mini-computer? If so, you’ve come to the right place. Learn about micro:bit 3D printed peripherals. Before we jump into 3D printing, let’s take a moment to revisit what a micro:bit is.
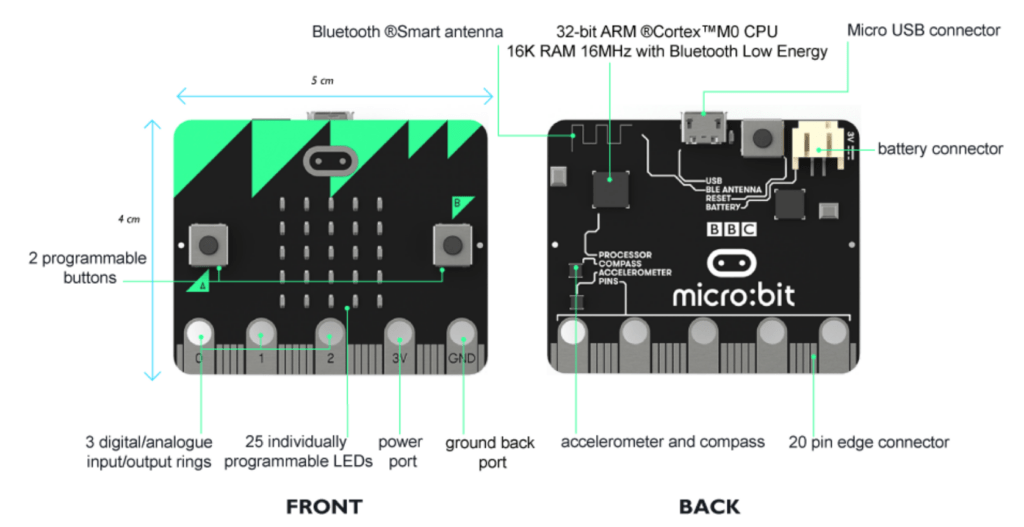
Meet Micro:bit
“The Micro Bit (under $24 to start) was designed to encourage children to get actively involved in writing software for computers and building new things, rather than being consumers of media,” says Sebastian Anthony. The process is simple. You could summarize it in this way:
- Create code
- Save code
- Get (a.k.a. download) code
- Copy code to the device
You can watch a getting started video series from SparkFun on the device. SparkFun has tons of activities, such as this weather:bit example. Since the micro:bit has been available since 2015, there are many exciting projects and video tutorials available already. The device features its own website, so if you get stuck, you can find assistance. Get the free Microsoft Micro:bit curriculum shared April, 2018.
Want to see a simple project idea? See this Rock-Paper-Scissors game via Matt Moore:
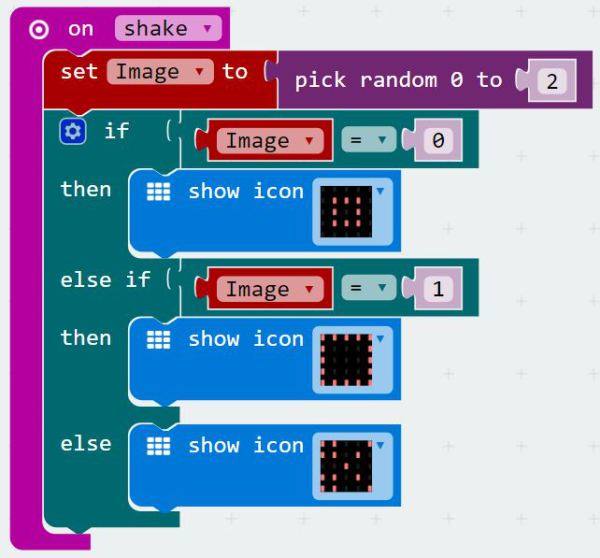
Ready to go bananas over micro:bit? Try this next. As you may have noticed, you will need to learn some coding. Wait, wait, don’t hyperventilate.
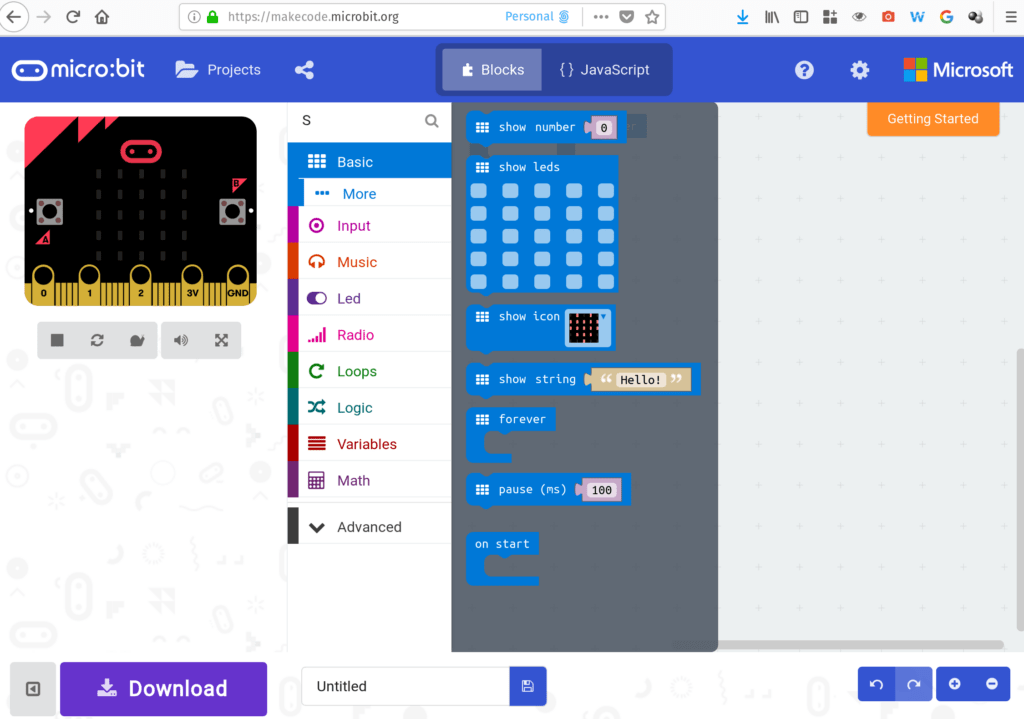
The web-based MakeCode editor open on a GNU/Linux computer. See? The editor is cross-platform.
Make Code, Create Magic
Micro:bit is a test kit for various types of coding. Although there are various code editors that work with micro:bit, an excellent choice is Microsoft’s MakeCode. Note that you can use MakeCode, a web-based code editor, on Chromebook and iPad (for iPads, you can use the Bluetooth connection to copy code to the device). MakeCode works in a variety of settings and relies on both block and text editors. As I mentioned in my Codeate with Minecraft Coding Projects blog entry, MakeCode can be used to build and execute actions in a virtual world. The implications are awesome.
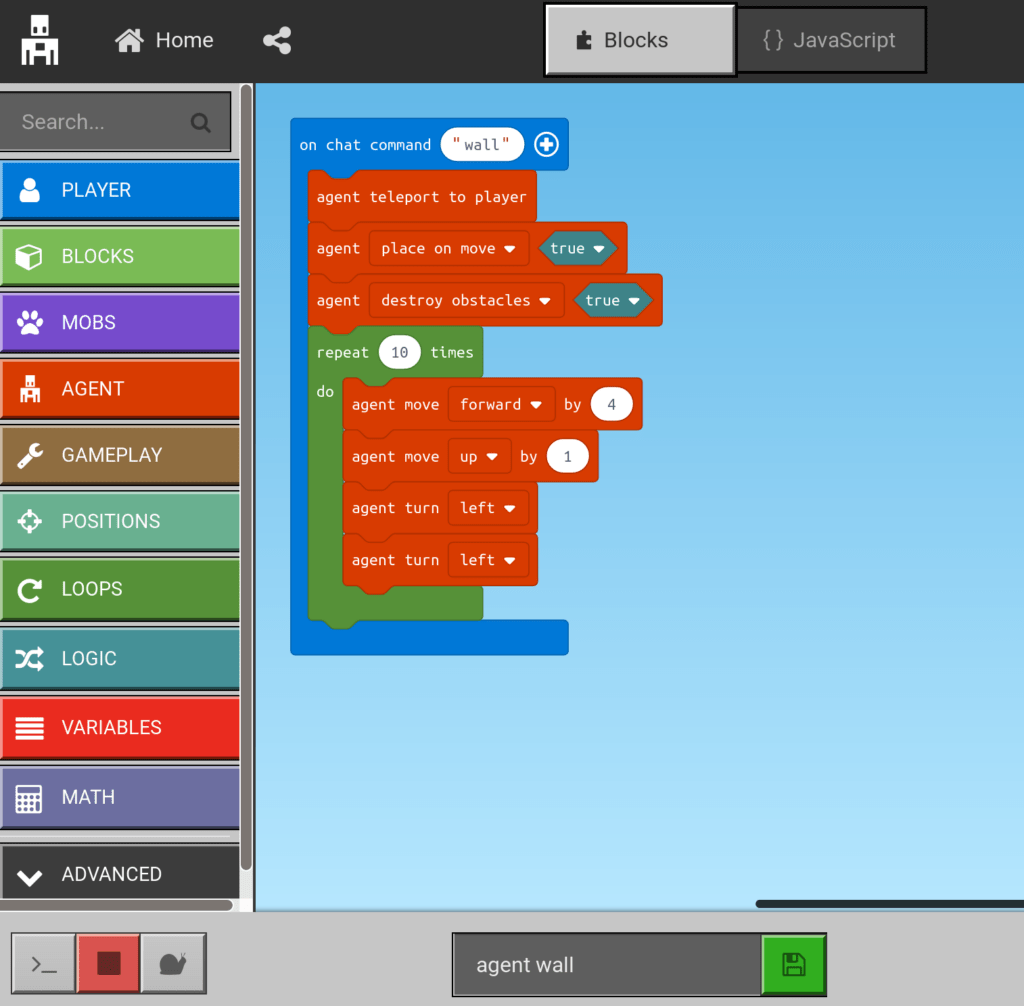
What your students learn in one environment (e.g. micro:bit) are transferable to the other (e.g. Minecraft). For teachers getting started with Minecraft and MakeCode, there’s a course (get the HTML version or OneNote Notebook) written for teachers new to computer science or those who have never taught it. Students learn about events, coordinates, variables, iteration, conditionals, functions, arrays, and more.
Join a BBC:Microbit Community? Are you a teacher and interested in connecting with a vibrant community? Join the BBC micro:bit Facebook group (Hint: The micro:bit has 25 programmable LED lights).
Make Games
“Dad, when I grow up, I want to be a game programmer,” said my son. If micro:bit had been around, the journey might not have ended in failure. From games like FlappyBird to LEGO to Traffic Lights, there are many opportunities for students to succeed (and fail) while making games. Won’t you consider introducing students to coding and making with MakeCode and micro:bit? There are many benefits and the research is just starting to come in.
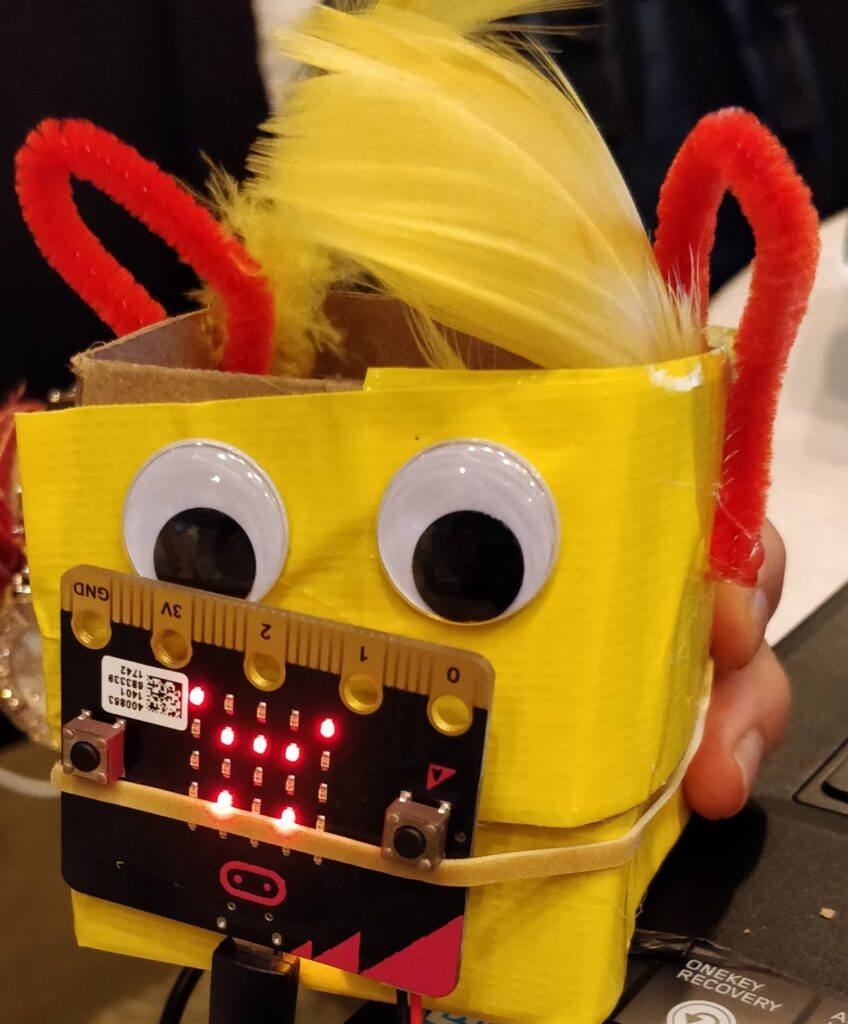
Photo of Deepah Gandhi’s micro:bit emoji character. This was made at the Microsoft E2 Conference.
Micro:bit and Coding Research
Wondering why even do this? Check out this research from the BBC, which deployed one million devices in the United Kingdom at the seventh grade level:
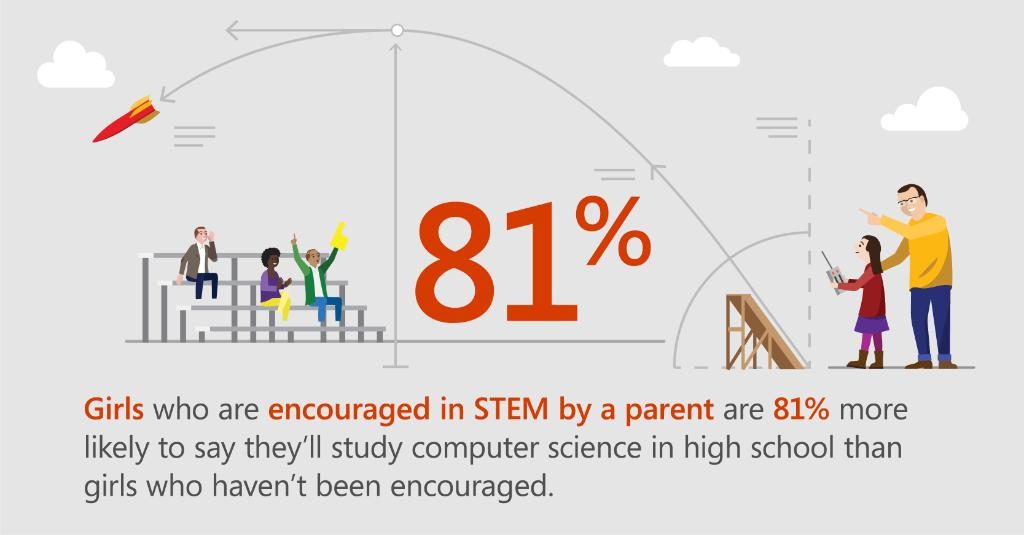
Get the full infographic here via Microsoft’s blog, What’s New in EDU?
- 70% more girls said they would choose Computing as a school subject after using the micro:bit.
- 90% of students said the micro:bit showed them that anyone can code.
- 86% of students said the micro:bit made Computer Science more interesting.
- 85% of teachers agree it has made ICT/Computer Science more enjoyable for their students.
- Half of teachers who’ve used the micro:bit say they now feel more confident as a teacher, particularly those who say they’re not very confident in teaching Computing.
Creating with the micro:bit and coding editors is possible. You can combine it with other inexpensive technologies like 3D printing.
Micro:bit 3D Printed Peripherals
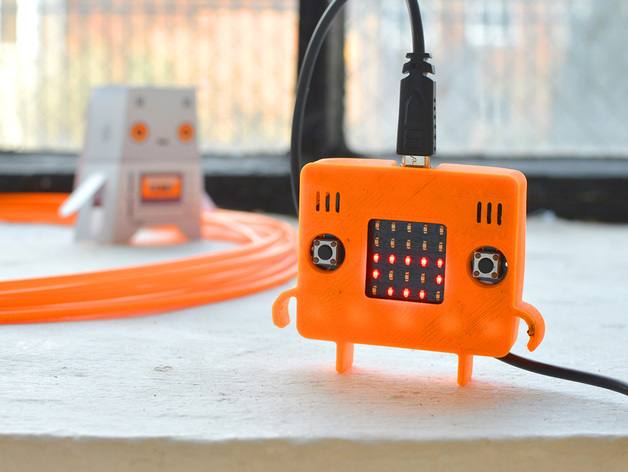
Now that you’ve had a chance to revisit all the awesomeness that is micro:bit, let’s take a quick look at 3D printed peripherals. Like a naked baby, in its raw form, the micro:bit can be a bit awkward to handle. Wouldn’t it be neat to 3D print a case for the micro:bit? Take a look at some examples below.
Curious about these MyMiniFactory creations? Get the STL file for 3D printing online
You can find these examples online at the MyMiniFactory. Per their website, “MyMiniFactory is a community platform for the sharing of 3D printable files and is the official 3D printing partner for the micro:bit.”
One of my favorite examples includes the egg timer for hard boiled eggs. Like the other examples, you get access to the STL file needed for 3D printing as well as the hex file needed for your micro:bit. Consider these instructions, abbreviated for space.
Step 1 : Print your egg timer
Simply download the STL file of the timer on this page.
Step 2: Flash your micro:bit !
You can download the code by clicking on the link below or on the zip file on this page. Click on the button “Compile” to download the code on your computer. Then, drag and drop the file into the micro:bit icon on your computer section.
Isn’t that amazing? Not to be left behind, Thingiverse also features a micro:bit collection.
You can save and open these designs in child-friendly tools like Tinkercad, LeoCAD, or, for older students, AutoDesk’s Fusion 360 or SketchUp Pro (available free via TCEA to public schools). Other tools are available that rely on block coding (just like Scratch and MakeCode), such as BlocksCAD.
Get Started Now
What are you waiting for? The convergence of cheap mini-computers like the micro:bit, web-based code editors like MakeCode with free tutorials, and 3D printed peripherals make classroom learning engaging, educational, and exciting. Perhaps your classroom or school might be interested in creating a smaller version of the micro:bit display shown below?
Featured Image Source
Curious about the 3D printed micro:bit watch case? Learn more here.
Updated: Note that this blog was updated with new resources on 04/05/2018.

 Do you teach any of the Technology Applications or Career and Technology Education courses where students learn to use Adobe products such as Photoshop, Illustrator, InDesign, Lightroom, Premiere, etc.? Or do you want to enhance your creative Adobe skills for personal projects and enjoyment? If either of those are true, then you definitely want to attend the Adobe Academy on June 19-20! Besides networking with other creative educators, you’ll have concurrent sessions to choose from in order to gain fresh ideas, polish your Adobe skills, and take your curriculum to the next level. You’ll learn from other Adobe-using educators in this hands-on event. For more information about this academy go to
  If you are one of the many Microsoft-using educators, you will find the Microsoft Academy a perfect fit. On July 12-13, you can experience a wide array of Microsoft tools to help you extend your learning and gain fresh ideas of how to use the tools with your students and fellow educators. Whether you are using Office365 in the cloud or are using a not-quite-so-new version, join in on the active sessions and take away new ideas. For more information about this academy go to
  Calling all Googlers! Learn from some of the Googliest educators around at our interactive Chromebook Academy on July 26-27. There will be great sessions for Google Suite administrators as well as for teachers integrating Google Suite in their classroom. You’ll learn about the most current features and how you can use them to maximize your impact with students. Add-ons, scripts, hyperdocs, Slides, Forms, and more will be explored so that you can get what you need to take your students to the next level! To learn more about the Chromebook Academy, go to


 What tool has changed most radically from all others? The answer is, in a word,


")