Looking for STEM tools and toys for young learners? In this blog entry, we explore some highly-rated toys and tools. We also discuss inspiring girls to get into STEM, Do It Yourself STEM projects, and video ideas. Designed to heighten STEM learning experiences for youngsters, each may be worth investigating further.
The Rationale for STEM Tools and Toys
Many future jobs require STEM skills. One approach for accomplishing that involves providing young learners with STEM tools and toys.
Beth Holloway, director of the Women in Engineering Program at Purdue University, says toys that help children figure out how to turn their ideas into reality – toys that let them design and build something, for instance – are a great first step in inspiring them to consider a STEM (science, technology, engineering, and math) career. “Toys like that will help children realize that they can make an impact on the world through their ideas,” she says. (source)
Holloways points out that STEM tools/toys can have an impact on young women, too. “Parents need to provide girls with toys that indulge their feminine side, but also those that allow them to feel the sense of accomplishment that comes from designing and building something,” says Holloway. Let’s remember, though, that most STEM jobs are focused in the coding area. To engage girls, STEM activities need to 1) Make coding as a creative and collaborative activity; 2) Teach computational thinking; and 3) Add real-world problem solving (source).
Engaging Young Women
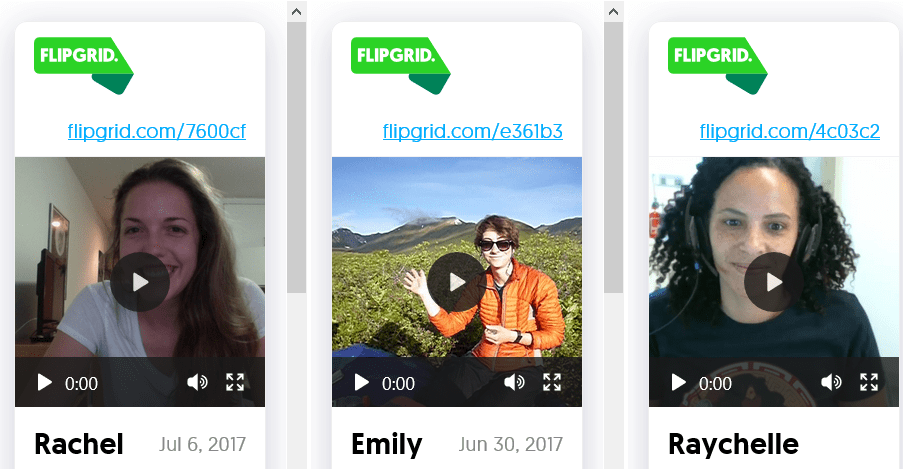
Want to inspire girls with real life stories from STEM women? Introduce them to the 1,000 STEM Women project. The goal of the project is to provide an easy-to-access resource for K-12 learners that makes meeting amazing female STEM role models possible. Take a look at Engineer Girl for more inspiring women engineers sharing their stories.
Here are some examples from the 1,000 STEM Women Project:
Ready to explore some STEM tools and toys? Let’s get started with some Pinterest Do It Yourself (DIY) projects.
DIY STEM Projects
“Where did you get your idea for that project?” I asked a second grade teacher who was sharing a STEM project at a San Angelo, Tx TCEA area conference. “Pinterest!” she replied with a smile. “I find most of my ideas there.” To be honest, it had never occurred to me to look on Pinterest. Yet you can find many DIY STEM projects appropriate for home or classroom there. Here are my top five favorite Pinterest boards:
- 1,008 STEM Projects
- 877 STEM Education Projects
- 201 Do It Yourself (DIY) STEM Projects
- 137 DIY STEM Projects for Kids
- STEM Projects
STEM Videos for the Do It Yourself-er
You can also combine DIY projects with a video, similar to the updated versions of the practical learning Mr. Wizard television show introduced to some of us in our younger years. Who wouldn’t want to make their own electromagnet? Now you can catch videos via Instagram, too. Some of my favorite science-focused Instagram images and/or videos include:
- Physics Fun (@physicsfun)
- STEMkids (@stemkids)
- Planetary Society (@planetarysociety)
- Exploratorium (@exploratorium)
Why not create your own Instagram sharing space? Or explore YouTube for STEM DIY projects, such as these from Lanakila Malua, Brittany Hogan, and Red Ted Art. You can find even more project ideas in video form. Check out Curiosity Machine, Exploratorium Video, and PBS Design Squad Videos (requires Flash).
STEM Activity Idea: Create Short Instagram Videos as a Student STEM Challenge by Ben Newsome
With a point of the camera and using some simple content creation apps, your students could be documenting the science experiments, challenges, and questions that are raised in your classroom for other classes to learn from, plus they’re a good reflection tool in their own right. By using InstagramTM as the medium, you could set a science communication challenge to your students whereby they have to explain a given concept to their peers. You could run this as a competition across your school in a similar way to Alan Alda’s Flame Challenge, whereby people from around the world compete to create a compelling explanation of a science topic that an 11-year-old could find interesting and entertaining (eg. What is energy?).
If you have your own Pinterest board or curated list, why not share it? More on how to share at the end of this blog entry.
STEM Tools and Toys
These toys and tools present various approaches. Often, parents and teachers are looking for “turnkey” solutions or kits. There are many kits that can be used in a home or classroom setting. Here are my top three favorite tools and/or toys, along with links to websites where you can find more ideas. What would you add or include that I haven’t?
- Sunprint ($11.59): “The SunPrint Solar Paper lets you makes beautiful pictures by placing objects on the paper and exposing it to the sun. The paper undergoes a chemical change. The Sunprint paper can be used for a creative, solar art project,” says the Amazon description.
- Cubetto ($222.95): TCEA’s Ashley Weiler introduced me to Cubetto. Montessori-approved, this is a “coding toy for girls and boys ages 3 and up. It takes coding out of the screen and into the real world with a programming language you can touch. Children help Cubetto, a friendly wooden robot, navigate a magical world by writing their first programs using hands-on coding blocks.”
- Tynker app + Parrot Mambo Minidrone ($): Learning to code with algorithms (sets of instructions that are repeated to automate and simplify coding) is fun with the Tynker app (Android/iOS) and the Mambo drone. Learners can “experience the thrill of flight and accomplishment as they learn to program Parrot drones using Tynker’s intuitive visual programming language. Children can pilot drones through extreme maneuvers, grasping objects and flying aerial combat missions, all with the power of code.”
Helping young children build a strong foundation in coding can build key future ready skills. What’s more, you can encourage participation in the annual STEM Video Game Challenge for middle and high school students.
Want to explore some more?
Check out these various sites recommending STEM tools and toys. Don’t forget, TCEA is curating a STEM-focused padlet with many more resources. Share your favorite STEM ideas, tools, toys and websites in this Padlet.


 Captioning is required by law. Relevant law includes

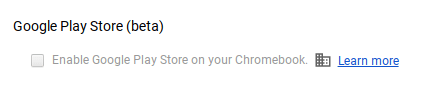 that the option to access the Google Play Store on your Chromebook is enabled in the dashboard. You can check your Chromebook by going to Settings. Scroll down until you see the Google Play Store (beta) section. If the option is greyed out, then you’ll need to bake a batch of cookies to take to the domain administrator and ask if they can enable the feature. (Giving cookies increases the chances of having this feature enabled by 64 percent.) If you log in with your personal Google account on the Chromebook, you’ll notice that it is already enabled. But you do NOT want to use your personal account with your students and other teachers. For safety reasons, you always want to use your district account, even if that means bribing the domain administrator or waiting a few days for it to be enabled.
 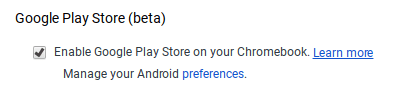 Once the option to enable is made available, you’ll be able to enable it in Settings and manage Android preferences (similar to if you were setting Android preferences on an Android phone or tablet).
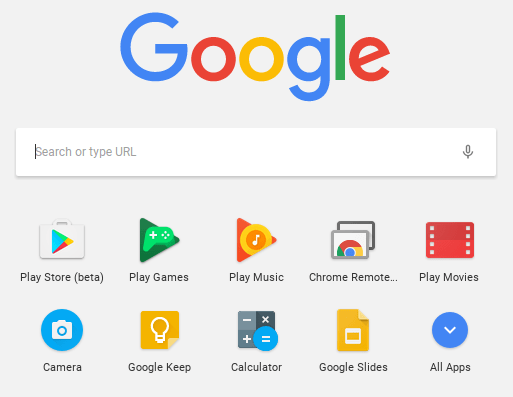 Yippee! You have it enabled. So where it it? Click on the Launcher icon which, by default, is the icon on the bottom left on the shelf. You will now see the Play Store (beta) icon. This beta Play Store is currently a stipped down version of the Play Store you would see if you accessed it through the browser. And yes, you will need to use the beta Play Store to install Android apps. When accessing the store via the browser, your Chromebook will not be an option in the dropdown list of compatible devices. Once you click on the beta store, you will recognize the various categories to help you narrow down what type of app you are looking for. If the developers have not completely finished updating the app in question, it may be available as a beta version. When I spot checked several of the Android apps I have on my phone, almost all were available and ready in the Play Store. You might even find that some app developers have made their product available as a Chrome app (that you install via the Web Store) and an Android app (that you install via the beta Play Store). Either way, once installed, they will appear in your launcher window.
 Autodesk SketchBook – Whether it is illustrating, diagramming, or sketchnoting, you’ll find this to be a simple app to use. When done, save the image to your Chromebook.
 Trello – More than just a to-do list app, Trello can help you keep track of projects. You can work alone or collaboratively with classmates to keep track of project-based learning activities.
 Trading Cards – This isn’t your traditional trading card maker. Templates provided include fictional person, real person, fictional place, real place, object, event, and vocabulary. Once you enter information on the front and back of the card, you can share it as a photo to your photo gallery.
 Pic Collage – Share your message with pictures! Pic Collage lets you start by selecting your photos and then adding them to a grid with templates (start with a themed background) or freestyle (begin with a blank slate and add to it). You can also easily add text and search for photos on the internet to add to your collage.
 Diamante Poem – This type of poem is in the shape of a diamond. Each line uses specific types of words (adjectives, -ing words, etc.). What makes it especially nice is that it doesn’t have to rhyme. This app has some examples to illustrate how to write a diamante poem, and it leads you through creating your poem step by step. When you’re finished, you can save the poem as an image to your photo gallery.
  Acrostic Poem – Think of a word and then write a word or phrase for each letter in the word. This app will lead you through creating an acrostic poem and even helps you brainstorm words. Acrostic poems are often used when students write their name vertically and then write out adjectives going across that describe them, but the uses are endless.
  Haiku Poem – This app makes writing this Japanese-style poetry super simple. Walking you through the steps of brainstorming words and phrases and making note of the syllables, you’ll find that constructing one is easy and can be very profound.
  Poems By Heart from Penguin Classics – This well-crafted app introduces students to a wide variety of poetry. Even without the premium downloads, the free ones supplied each come with audio that highlights the lines as the poem is read with inflection. Students can record themselves reading the poem and even earn poetry points by memorizing them.
  POETRY from The Poetry Foundation – Let students encounter a wide variety of poetry in this app. They can discover titles by spinning the category wheels (emotions and events) or by searching for a specific author in the index. Poems that have audio are indicated with a small speaker icon, great for extra support for struggling readers/writers as well as students who may benefit from hearing it read aloud.