

Feedback. We all want it and need it in order to better our craft and refine our skills. Sometimes, as teachers, we lose sight of the importance of instant feedback for our students, which dilutes the relevancy of some of their learning opportunities.
The Timing of Feedback Matters
Think about your life as a teacher. Go back to a time when your classroom door opened, and an administrator walked in, pen and pad in hand. You were having a walkthrough, or maybe even an evaluation. You were nervous. Well, everyone gets nervous when the boss is watching, right? You completed your lesson, and you felt pretty good about what you’d done. But when you turn around, the administrator had already walked out. There was no note, no smile, not even a goodbye.
The nerves return as your mind begins to create stories in your head of what your administrator might be thinking. “Did I do ok? Did I say the right thing?” You second-guess yourself and wonder when you will know exactly how you did. You check your email every hour for the rest of the day and the day after that. By the third day, you have completely forgotten that you even had a walkthrough, and direct your focus only on your class. A couple of days later, an email comes in, stating you have a new walkthrough to view. “Oh yeah,” you tell yourself, “I forgot about that walkthrough.” You open up the email to discover you did just fine, and you close the email and get back to work. Did you even look at the notes that the admin wrote about your walkthrough? Probably not, because it was a while ago now, and it doesn’t matter that much anymore.
Do you think our students go through the same type of scenario? Do you think they are interested to see how they did on a quiz or an assignment? The answer to both is yes. Study after study has found that any type of instant feedback is much more powerful than awesome, excellent, delayed feedback. The power of instant feedback can turn a student’s trajectory 180 degrees with just a few simple words.
Google Forms and Instant Feedback
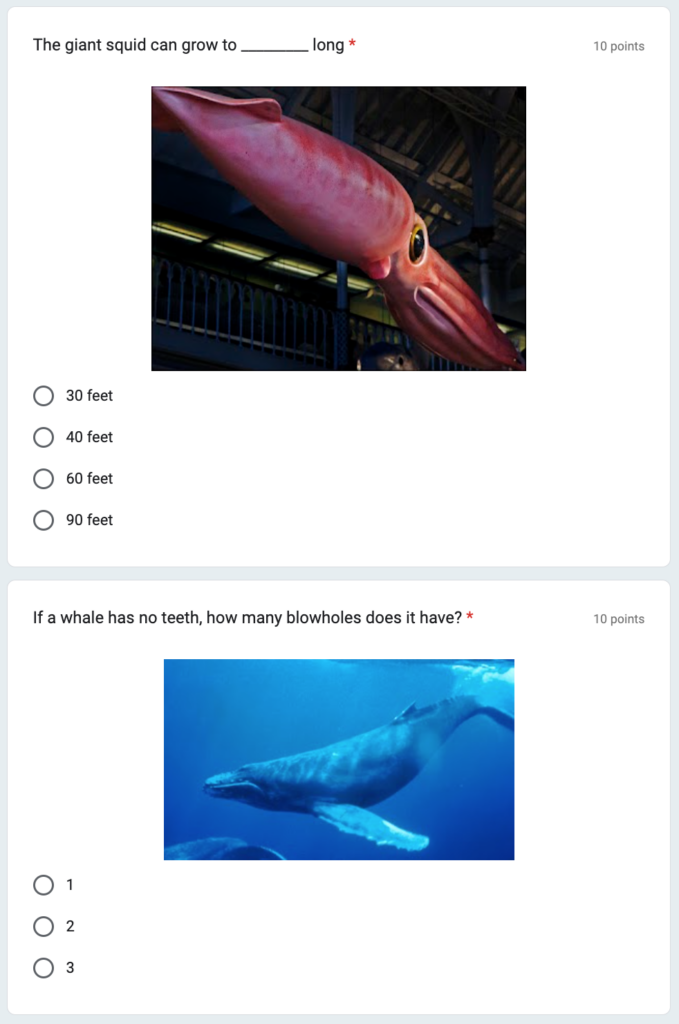
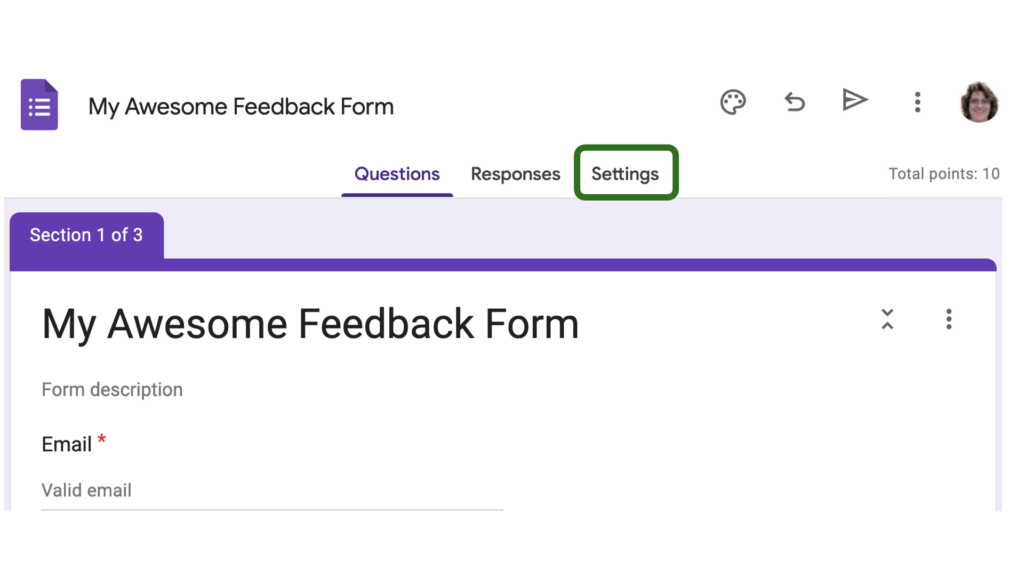
Now, instant feedback is not giving back a quiz or assignment on Monday that was turned in Friday afternoon. There were probably over 100 events that happened to that student on Saturday, and the same for Sunday. When Monday rolls around, they receive their work back with all of your wonderful comments on it, and those comments mean hardly anything to them because it was so long ago. We need to give instant feedback, and Google Forms can help us. Take a look at an example quiz, and let’s go through the steps for creating your own.
1. Open your Google Drive and create a Google Form.
First of all, you need to have a new Google Form opened up and ready to go. So, how do you start your day? You drive to work. Open up your Google Drive, click “New” in the top left, and scroll down to choose “Google Forms” from the list.

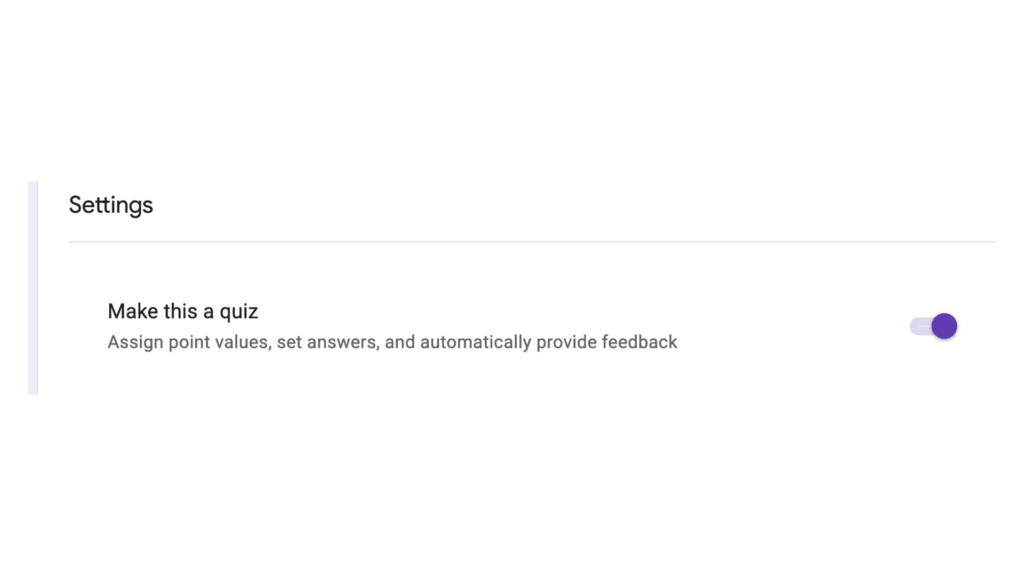
2. Name your form and make it a quiz.
Now, you have a brand new Google Form open, and you’re ready to make something awesome! After you name your form, go up to the “Settings” tab.
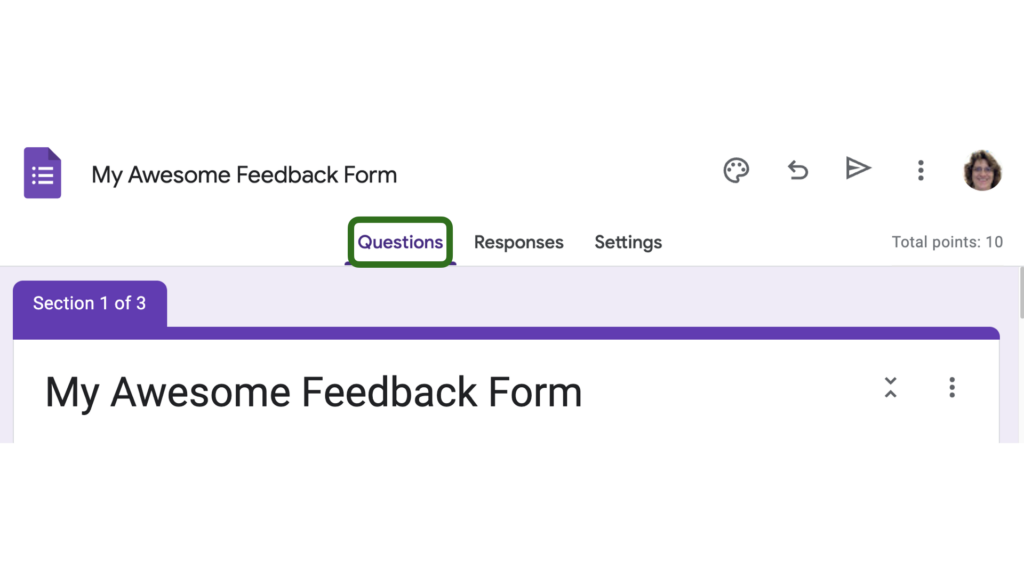
You are going to want to make this Google Form a quiz, so turn on the setting, “Make this a quiz.”
3. Add questions to your quiz.
Let’s add the questions to our quiz, and determine what type of feedback we will provide for the answers the students choose. First, click on the “Questions” tab.
Now, we will start with the first question. I recommend that questions 1 and 2 ask for the first name and last name of your students. Notice that Google automatically chooses the short answer question type, but you will need to click on the “Answer key” to make a couple of changes.
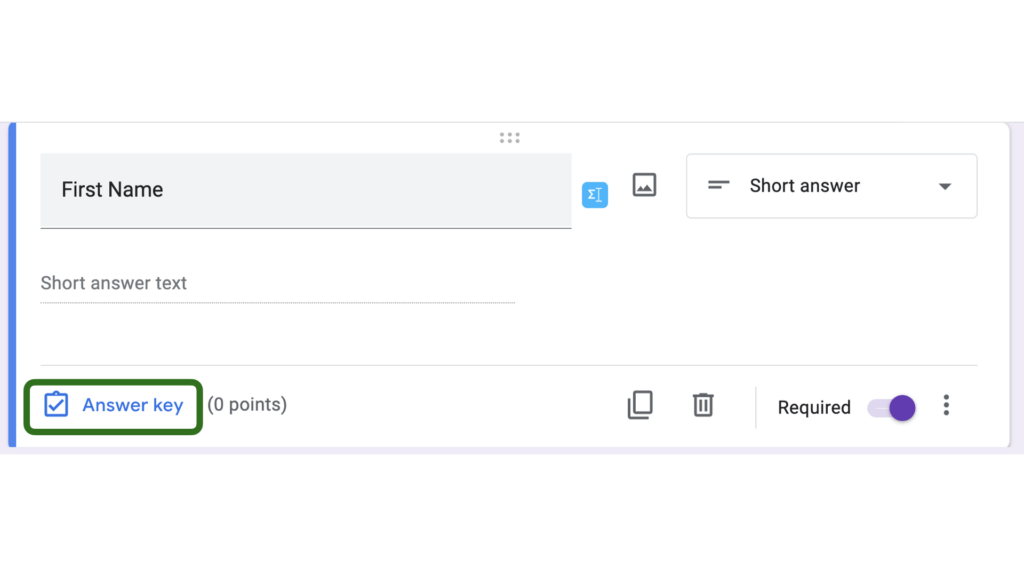
Change the point value to zero on both of the name questions. You don’t want these marked incorrect!

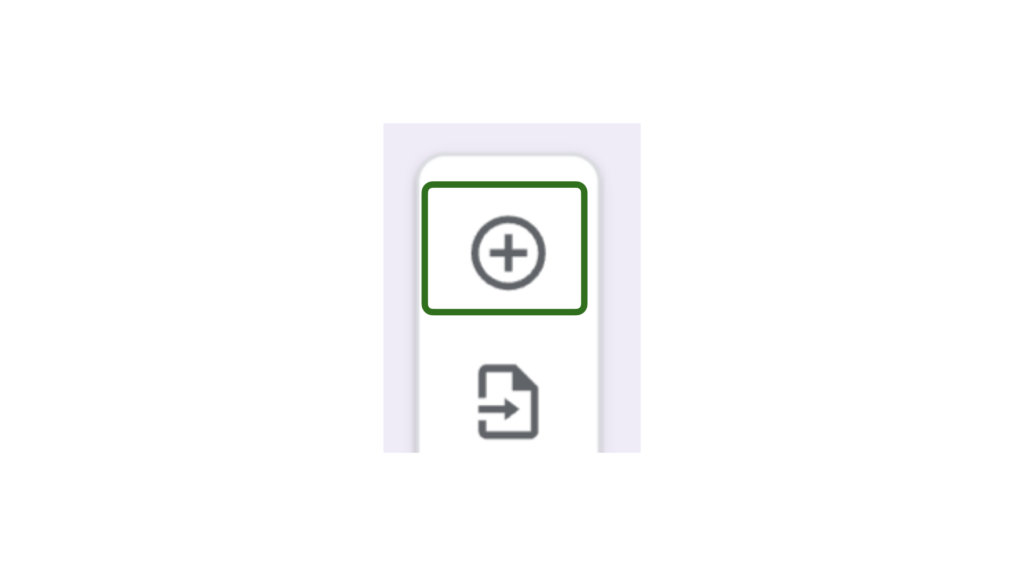
Now you’re ready to add your questions. Remember, to add a new question, just click the plus sign in the floating menu on the right.
4. Mark the correct answer and add point values for each question.
After you’ve added all your question and answer choices, you’re ready to choose the correct answer for each question and add point values. To choose the correct answer, click on “Answer key” in the bottom left of the question box.

Add your point value, and choose the correct answer.
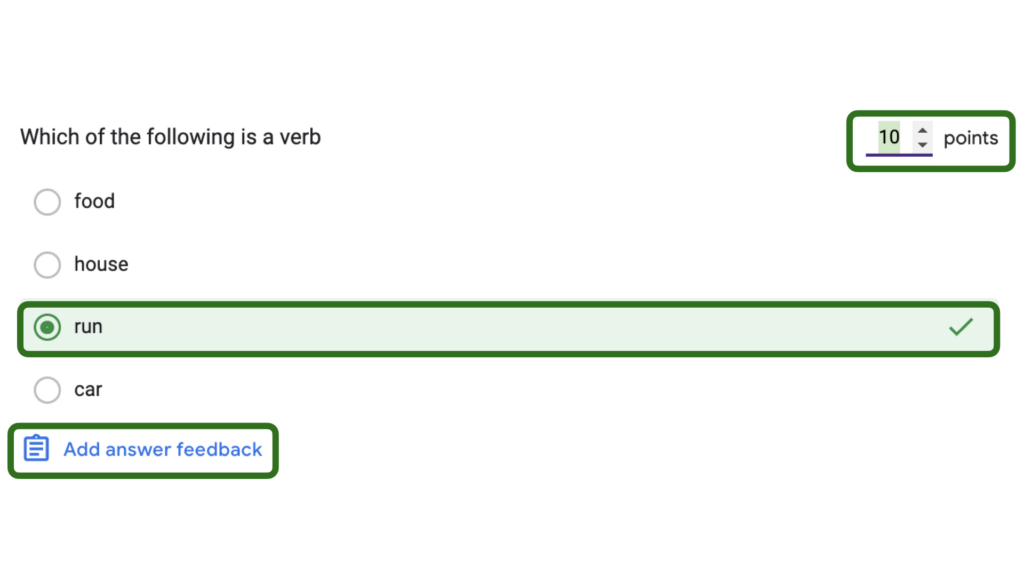
5. Add feedback for incorrect and correct answers.
Once you’ve selected the correct answer and added the points value, click the “Add answer feedback” button in the lower left corner. A pop-up window will appear, asking for you to add feedback for incorrect answers, correct answers, or both. You can type whatever you would like in the feedback window.
6. Add resources to your feedback!
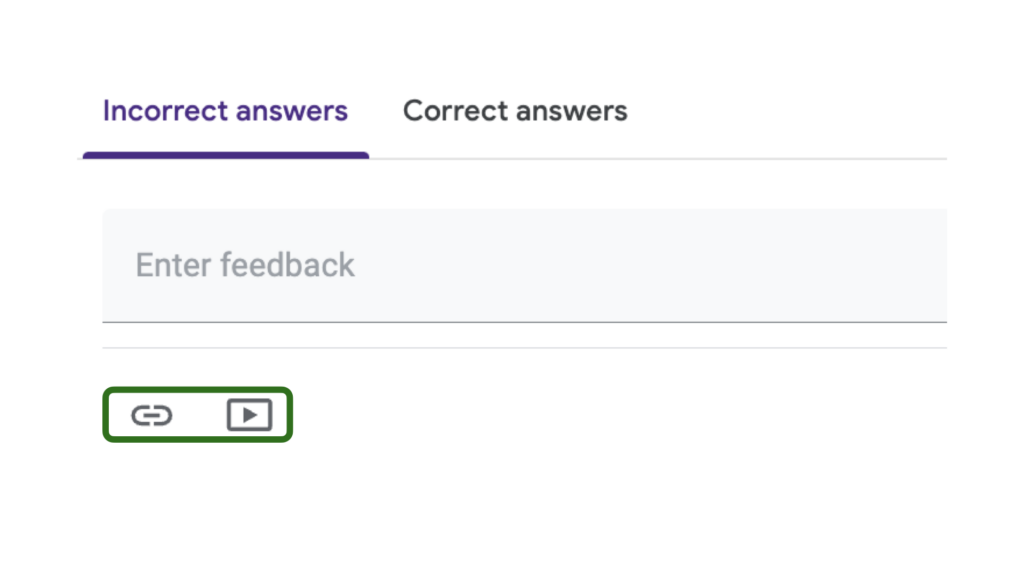
But, did you notice? You can also add links and videos to your feedback as well! Maybe you would like students to review a video on your concept since they missed the question, or you want to give kudos when students get questions correct. The choice is yours! Plus, you can add as many links or videos as you like. Feedback is powerful, so use it wisely with your students!
Giving Feedback Through Branching Answers
Another great way you can add feedback is by branching answers. This means that in Google Forms, you can set up sections with feedback for each question and send students to a specific section based on their answers.
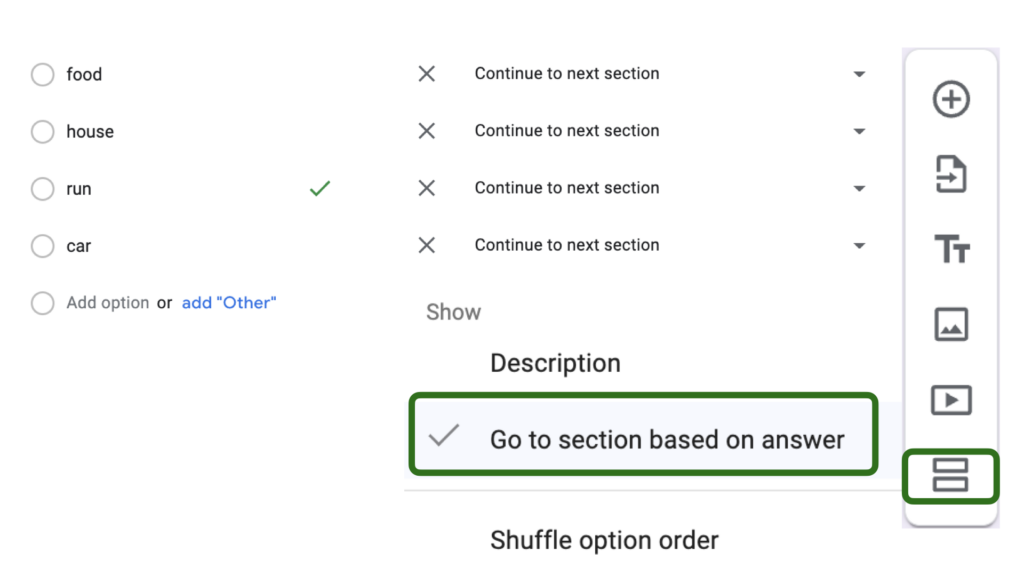
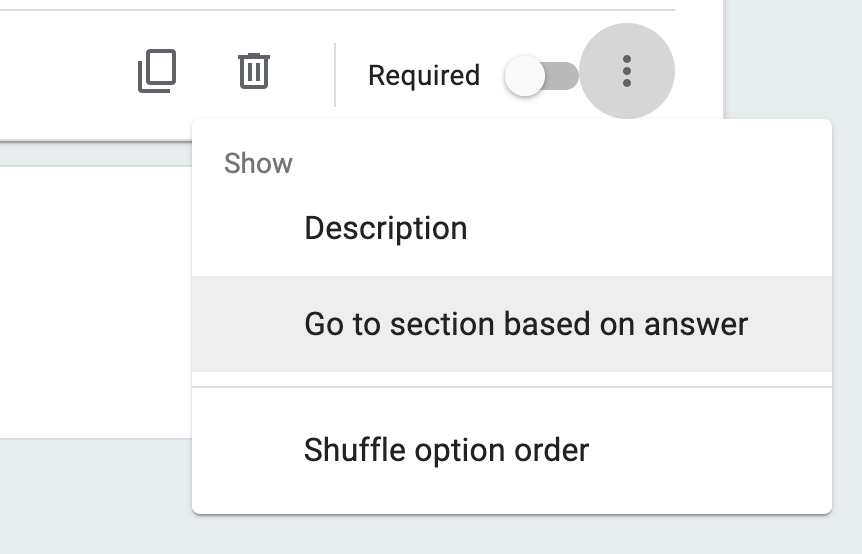
Let’s look at the question from earlier. If I click on the three dots in the lower right corner of the question, there is an option to “Go to section based on answer.”
In order to use this feature, you’ll need to add sections to your quiz – a correct answer section and an incorrect section for each question.
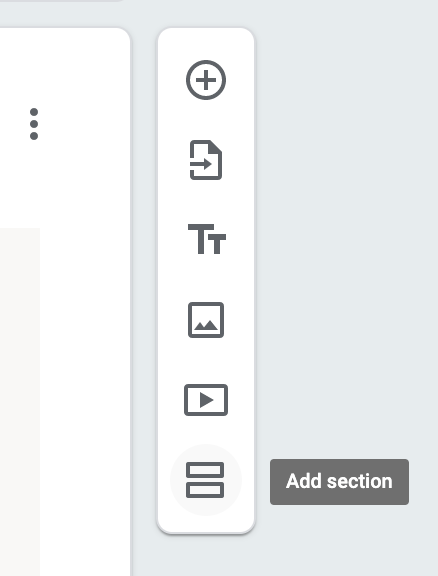
To add sections to your form, in the form menu on the right side of the page, click on the icon that looks like an equal sign.
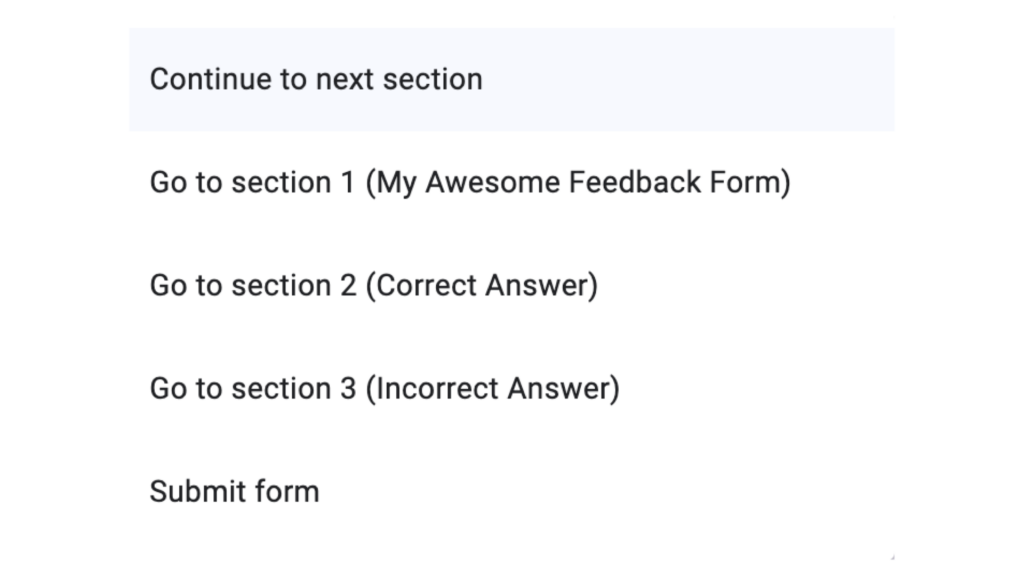
I named the section “Correct Answer,” and right below, I can add my feedback to students. I click the equal sign again, and name that new section “Incorrect Answer.” And I can add links. Amazing!

Now that I have two sections in my Google Form with my feedback added based on the correct or incorrect answer to the question, I can go back to my question and map it. Click on the 3 dots in the lower right corner of the question, and choose “Go to section based on answer.”
Click on the disclosure arrow to the right of “Continue to next section” to choose where the student will go next based on the answer choice.

If the student got the answer correct, you will send them to the “Correct Answer” section. If they got the answer incorrect, you would send them to the “Incorrect Answer” section for feedback.
Google Forms is so much more than just a way to make a survey. Take advantage of all of the wonderful tools that Google Forms has to offer you and your students – like giving immediate feedback to impact learning. Do you have any special ways you’re currently using Google Forms? Leave a comment to tell us about it.
Mesha is a TCEA 2023 presenter! If you’re into all things Google, check out her sessions to get even more great information. Pricing goes up on January 10, so register soon to get the discount!
1 comment
Please add me to your mailing list.