

“How are you sharing your iPad’s screen?” asked a session participant. The question comes up every time I present and need to show off my iOS device’s screen. Whether it’s an iPad or iPhone, the ability to share my iOS screen with the audience is critical. Before we explore various solutions available, let’s revisit why screen sharing remains important.
Why Share Your Screen?
“Most human behavior is learned observationally through modeling: from observing others, one forms an idea of how new behaviors are performed, and on later occasion,s this coded information serves as a guide for action,” says Albert Bandura, social learning theorist. Screen sharing facilitates teacher modeling. Research, as pointed out in various studies, has shown that “modeling is an effective instructional strategy in that it allows students to observe the teacher’s thought processes” (source).
When showing others how to use technology in the classroom, whether for PreK-12 or adult learners, the learning facilitator (a.k.a. teacher) engages in task or performance modeling. The purpose of this is to allow students to first observe what is expected of them. The goal is to increase their level of comfort when it is time for them to engage in a new task or performance.
When modeling how to use an app, such as Seesaw, Nearpod, Voxer, Shadow Puppet EDU, or Doodle Buddy, the teacher makes actual steps taken to operate an app visible for the students. Modeling also serves as a way to scaffold students’ own efforts. When they master their own approach to a technique or use of technology (e.g. green screen weather forecast or lesson), then they can engage in student-centered modeling.
Tools You Can Use
In each of these approaches, including task or performance modeling, student-centered modeling, and/or modeling as a scaffolding technique, being able to share the screen of your mobile device remains important. An important consideration for each of these is that both your laptop and iOS/Android device must be on the same wireless (a.k.a. WiFi) network. Keep in mind that the speed of that WiFi network will affect your ability to connect.
Aside from having the $49 Apple dongle (e.g. lightning to VGA or HDMI) for your iOS device as a backup, let’s take a look at three solutions that make screen sharing possible. The process for each of these tools is the same:
- Purchase the screen sharing solution of choice for your Mac or Windows laptop.
- Start the screen sharing program on your laptop (which is connected to the digital projector or large screen television monitor).
- Turn AirPlay on your iOS device and look for your laptop’s name (you can also set the name in the preferences for each program).
- Select your laptop via Airplay Mirroring (swipe up from the bottom of your screen).
- Screen sharing is now enabled and available with the mobile device screen shared.
Technical Note: In most cases, both devices (teacher’s computer and student iOS device) must be on the same WiFi subnet. Also, in Bonjour and mDNS multicast must be allowed on your network.
Here’s a quick listing of the tools available:
Tool #1 – Air Squirrels’ Reflector
Air Squirrels’ Reflector ($14.99 with education pricing available) serves as a low-cost alternative to the $49 cable. Most of us, when we present, treat our mobile device as a special guest star, on for a few minutes and then turned off after the explanation is over. With Reflector Teacher, I have had several students simultaneously display their iPads on the big screen that is projected. Reflector also features screen recording, and shares the sound from your device via your laptop’s sound system. This is ideal when screen-casting. Supported mobile devices include iOS and Android. Newer versions of Reflector are available in various modes, such as:
- Reflector Teacher ($14.99): Use your computer to mirror student devices to a connected digital projector
- Reflector Director($6.99): Control Reflector Teacher from a mobile device. Reflector Director enables you to remotely manage your Reflector Teacher program on your computer, making it easy for you to be away from your computer.
- Reflector Student(Free): Connects student mobile devices to Reflector Teacher on protected networks. This app on the students’ device works as a signal enhancer. It makes finding the teacher’s Reflector Teacher computer easier in a multiple wireless access point (WAP) environment.
Tool #2 – Splashtop’s Mirroring 360
This robust solution offers many features. You can use Mirroring360 to “wirelessly mirror & record your Chromebook, iPad, iPhone, Android, Windows, and Mac screens to your PC or Mac without the need for hardware or cables” (Source). You are also able to broadcast your computer screen to up to forty recipients’ devices via a shared web link. Mirroring360 also comes with a product, Mirroring Assist, that you can use to lock in the signal on a protected network. This is the equivalent feature to Reflector Student. It is quite a rich solution provider with a variety of custom features and costs.
Let’s take a look at some simpler tools you may want to also consider.
Tool #3 – X-Mirage
Another tool that works well for iOS devices is X-Mirage ($16). Although sporting fewer features than Reflector 2, it does a great job with a simple interface.
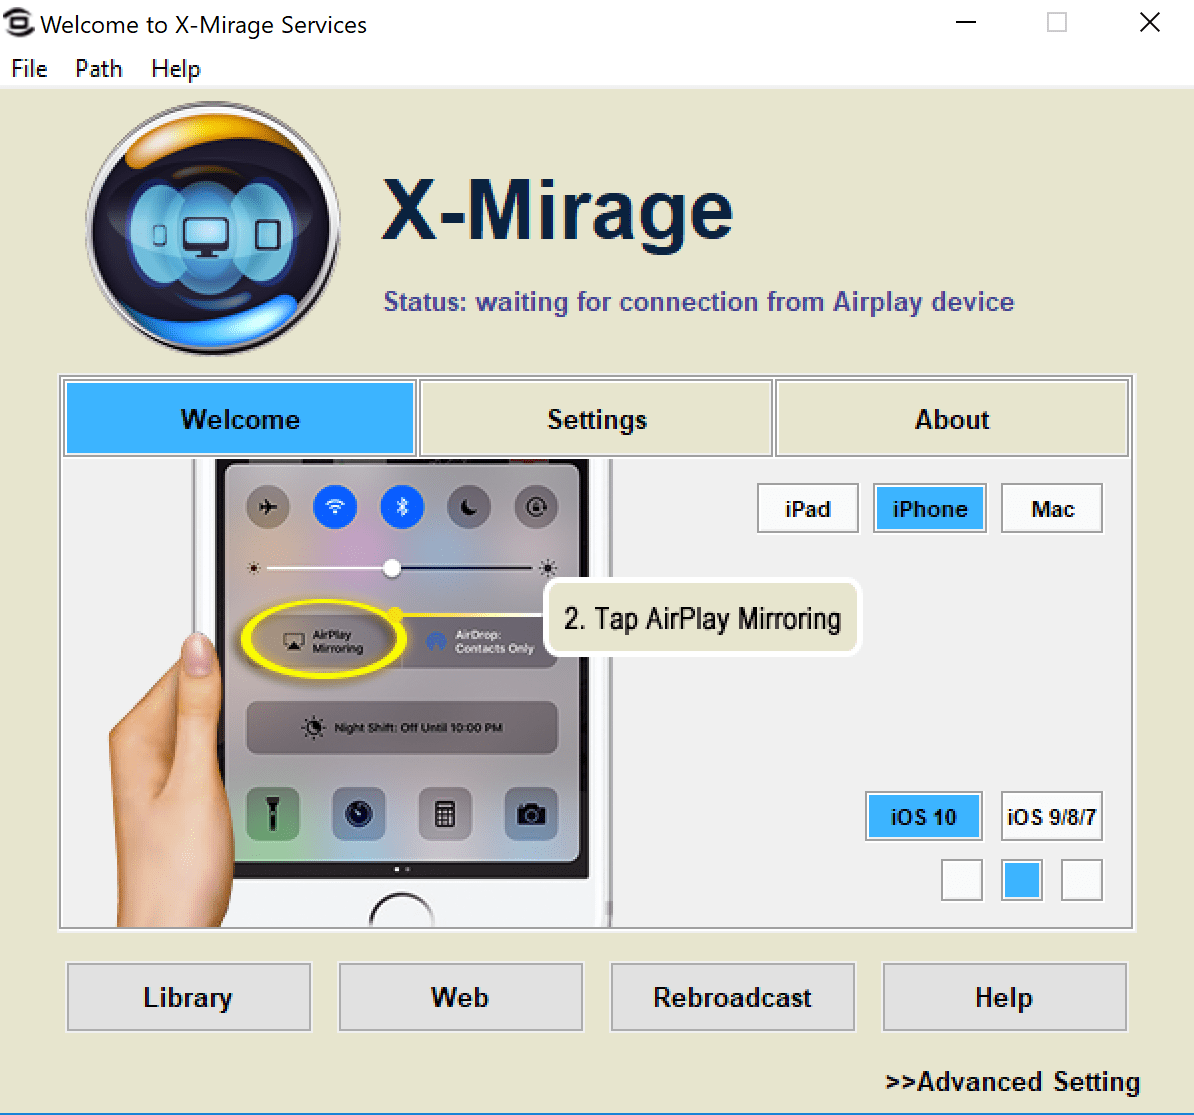
X-Mirage recently added a feature to record the microphone to enable voice-overs for tutorial videos.
Tool #4 – LonelyScreen
At the Elementary Technology Conference in Galveston recently, Matt Montez made me aware of this no-cost tool, LonelyScreen. Like the other solutions, it offers these features:
- Cast AirPlay to PC/MAC.
- Share on the big screen.
- Capture and save.
LonelyScreen does work, if not quite as elegantly as the other AirPlay receivers on this list. Of course, that makes it a free alternative for schools to use in lieu of Reflectors 2 or X-Mirage.
Modeling Made Simple
Are you ready to model the use of mobile devices for instructional purposes in your classroom? Then take a look at the three solutions for sharing your iOS screen mentioned above and let me know which one is your favorite in the Comments below.
Update: This blog was updated with new content on 04/12/2018.