

“How does the jigsaw method work in my mathematics class?” asked Jessica. I was standing at the left side of the room. I had asked session participants for questions. The participants had been reading about various evidence-based strategies. That question made my mind go blank. “What did I know about using jigsaw method in a mathematics classroom?” While I could extrapolate its application, I didn’t have specific examples for math like I did for science or history.
How Should I Have Responded?
When you get a tough question you’re not prepared for, it’s an opportunity to invite further discussion and learn more. While I had a response that appeared to satisfy the questioner, I felt like I had responded with less than 100% certainty. For me, the response should have had these three components:
- A quick overview of the jigsaw method, perhaps with a hands-on activity
- A specific example of how a teacher could implement the jigsaw method in their classroom, no matter the grade level.
- Stories from those who had put the jigsaw method into action in a math classroom
In this situation, I didn’t have the second two. So, I wrote this blog entry to deepen my learning. Let’s explore these three specific response components.
Component #1 – An Overview of The Jigsaw Method
On the website, Jigsaw Your Mathematics Classroom, the author shares several goals:
- Learn the jigsaw method and how to implement it in a mathematics classroom.
- Design a jigsaw lesson that can be used in your mathematics classroom.
- Develop an assessment that appropriately evaluates student understanding after the completion of a jigsaw lesson.
“The jigsaw technique is a simple, well-structured cooperative learning structure that emphasizes both individual accountability and achievement of group goals, both of which are critical for improved student learning in cooperative settings.” (Source: On the Cutting Edge course design workshops)
You could walk people through a jigsaw activity, or have them watch “The Gummy Bear” video.
The Gummy Bear Jigsaw
Take a moment to watch this gummy bear video featuring The Jigsaw Classroom:
Then, reflect on these questions:
- What is the significance of the color of the gummy bears?
- What are the gummy bears expected to do?
- What is the difference between the groups before and after they switch around? Why is this important? What did they do after they switched groups?
- What does the teacher do while the gummy bears are working? What suggestions could you make about the teacher’s role during this activity?
What a fun way to introduce students and/or educators to the jigsaw method. Let’s study it a bit more.
How the Jigsaw Method Works
There are multiple types of jigsaw methods. The main problems with incomplete jigsaws techniques appear below:
- Less effective readers share misinformation with the group. Everyone gets the misinformation, interfering with understanding.
- A failure to see how their assigned part fits within the whole
- Critical thinking that results from analysis and synthesis doesn’t happen (Source: ASCD’s Let’s Get Jigsaw Right).
The successful jigsaw method takes these steps:
- Home group splits up into expert groups to explore a specific aspect of a topic.
- Regroup into home groups to discuss findings from each expert group.
- Split into expert groups to consider the whole in light of home group insights.
In step one, students focus on exploring the information offered. In step two, students engage in summarizing, questioning, and clarifying content with others. In step three, students bring their insights from the home group back to their expert groups. A critical part of the third step is meta-cognition, synthesis, and analysis. This results from conversations with others in the group.
You can see how this works in this 2011 video featuring Elliot Aronson, credited with the jigsaw method. You can find a bank of activities that rely on the jigsaw method online. Let’s take a look at the structure of one activity,
Why the Jigsaw Method Works
Wondering why the jigsaw method works? Here’s a bit of background on this powerful instructional strategy:
The jigsaw technique is a method of organizing classroom activity that makes students dependent on each other to succeed. It breaks classes into groups and chunks assignments into pieces that the group assembles to complete the (jigsaw) puzzle. The Jigsaw Method enjoys an effect size of 1.20. This makes it one of the most effective instructional strategies you can use.
This effective strategy can accelerate student growth up to three years in one academic year. In fact, the jigsaw method involves students reading new information. They discuss it with others who have read the same information. This allows them to extend their learning. Then, students move to new groups where they teach their peers about what they read. They also learn new information from group members (Source: John Hattie, Keynote address, TCEA 2022 Convention and Exposition).
Other Benefits of the Jigsaw Method
Wondering if there are other benefits to the jigsaw method? There are. Here are a few:
- Direct engagement by the students with the material. Instead of having material presented to them, they are able to interact with the material directly, which fosters depth of understanding.
- Practice in self-teaching. This is one of the most valuable skills we can help them learn.
- Practice in peer teaching. This skill requires students to understand the material at a deeper level than simply asking to produce on an exam.
- Improvement in social-emotional learning. This includes increased feelings of autonomy, competence, and intrinsic motivation (Hänze & Berger, 2007).
- Speaking the language of the discipline. The jigsaw method helps students become more fluent in the use of discipline-based terminology
- Team-building. Students contribute to the group and take ownership of the work.
- Encouraging cooperation, active learning, and promoting the valuing of all students’ contributions (source)
Now that you know a little about the jigsaw method, let’s dig into specific examples for mathematics.
Component #2 – Specific Examples for Math
Many of the examples you will find online for the jigsaw method focus on science, history, and/or nonfiction texts. But what about mathematics? Is the jigsaw method only for literacy? Let’s take a look.
Below, you will find two examples. You may find that certain grade levels and types of activities may lend themselves to the use of the jigsaw method. The key is in how you set up the expert group organizers.
Example One: Transformations and Symmetry
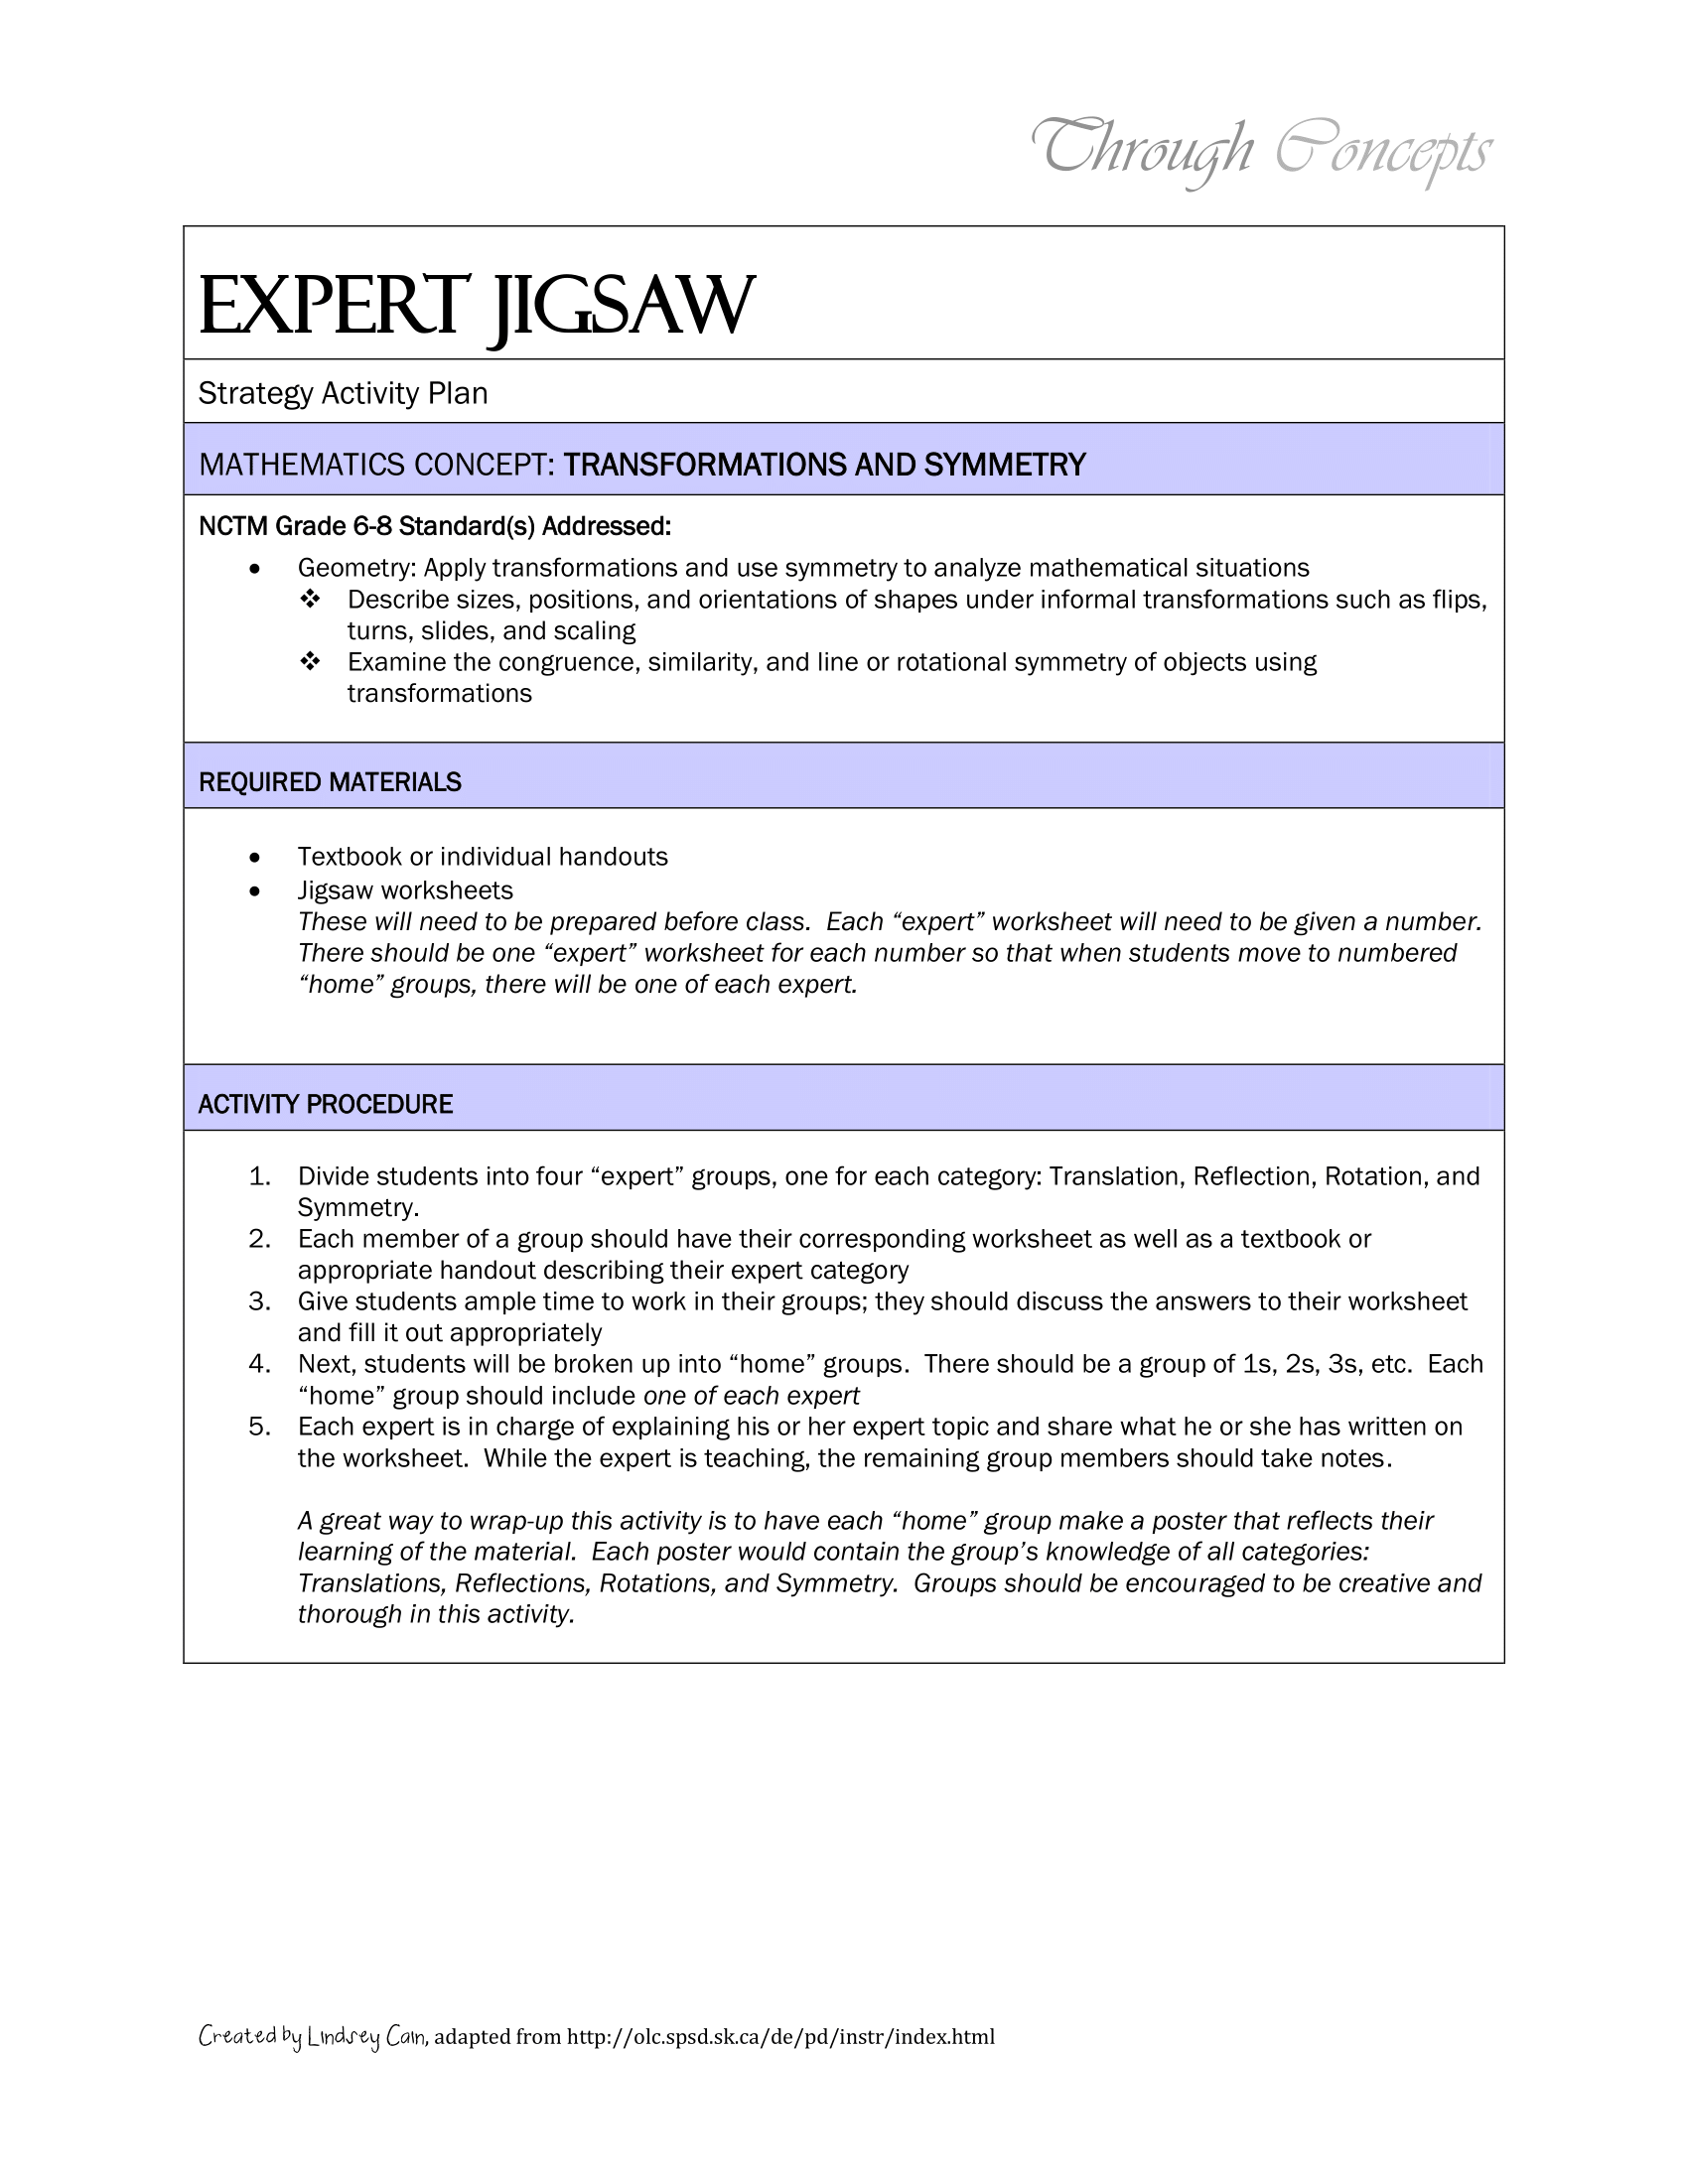
As you can see in the example above, Lindsey’s effort employs jigsaw to support a mathematics lesson. The jigsaw method organizer that students rely on differs from the one you might use in a science or history classroom. The questions, as you will see below, are more focused. Sentence stems include:
- What is…
- In your own words…
- Look…translate…
- Draw your own example
Each organizer specific to an expert group is customized to a specific action that students must take. Each expert group engages in a transformation and symmetry activity.
Example Two: Algebra II
While a lot of time is spent on “organizing a jigsaw,” it’s a lot less time than you might think. Katie Elder, an instructional coach, describes how a colleague led an Algebra II class (edited for brevity):
Preparation
-On the day of the lesson, the teacher shared the learning objective and reviewed the academic vocabulary with students.
-Each student received their own organizer with one problem on it, the problem that their expert
group would solve.-The students worked in an independent way, without interaction with peers, on their problems.
Expert Group
-They students met together in their pre-assigned expert groups.
-Working together, they discussed the problem, shared their responses, and looked for errors in their work.
-After five minutes, each student felt sure that they could explain the procedure for solving the problem to their home groups.
Home Group
Students returned to their home groups to share how they solved the problem.
After students listen to problem-solving approaches in their home group, they jot down any insights.
Expert Group
Students return to their expert group to share insights other students in their home group may have shared.
After all students have shared insights gleaned from the home group, students leave the expert group and return to home group one last time or engage in a shared activity (e.g. Flipgrid).
The Teacher’s Role
The teacher walked from group to group, paying special attention to the groups who had received the lowest-level problem, but answering questions and guiding all students toward correct solutions.
When students moved again, this time into home groups, each student took a turn using a small whiteboard to write out their problem, wait while the other students copied it onto their organizer, and then “worked the problem” on the board, discussing each step. To lower anxiety and increase confidence, the students considered low in their groups went first (students were grouped into X, Y, and Z expert groups, so these were X students). Then Y students taught their problem, and then Z students. Again, the teacher visited each table, listening to explanations, offering suggestions, and answering questions.
“The lesson went well. Students responded positively, and there was 100% engagement in each of the classes. Although we have not had time to check in with the teachers to look at test score data, the math teachers whose classes we worked with both commented on how glad they were to see some of their low students speak with added confidence and some of their quiet students speak at all! One teacher even commented on how a student who perpetually “checks out” was working well beyond his normal contribution.” (Source: Katie Elder guest post)
Component #3 – Jigsaw in the Math Classroom
Student inactivity in a math classroom can cause low interest in mathematics. One strategy that increases students’ activity is the jigsaw method (Source: Adopting Jigsaw Instructional Strategy for Improving Students’ Interest in Mathematics). One question the researcher in the aforementioned study asked:
“Do students differ in interest towards mathematics when taught using jigsaw, Individual Personalization and Conventional Strategies?”
Compared to other approaches, jigsaw enjoyed the highest interest of the three approaches explored. Findings suggested these conclusions:
- Mathematics teachers should embrace the use of the jigsaw method, along with traditional methods of teaching math.
- Teachers should not discriminate among students with high, average, or low socioeconomic status.
Another study focused on high school students revealed these findings:
- Teachers should design activities through the jigsaw technique to promote mathematics understanding.
- Students should practice, solve, manipulate, reason, and perform via the jigsaw technique.
- The jigsaw technique helps students make connections across mathematical skills and concepts, and other disciplines.
- After using the jigsaw technique, students should have time to discuss how they perform in solving mathematical activities.
Addendum: My Approach to the Jigsaw Method
Here are the steps I use when relying on the jigsaw method. I put them together after reviewing how others organize their jigsaw activities. You may want to review my steps, as well as how others approach them, then write your own.
Reminder: Don’t cut out those final steps that includes experts returning to and from home groups to analzye and share findings from discussions. The more discussion about insights and additions, the more learning that happens.
In Your Home Group (5-10 minutes)
- Students are divided into groups of three to six people each. This is your home group.
- Number off from one to x so that each person in the group has a number.
- Each member of the home group will be responsible for learning and teaching one “chunk” of content to your peers. Each content chunk corresponds to your assigned number.
- Take a look at your content chunk. Spend about 8 minutes reviewing it (teacher adjusts timing as needed). Jot down the big takeaways or key points in this jigsaw notes organizer.
- When time is up, go join your expert group, the people who have the same number as you, to begin the activity.
Expert Group (5-10 minutes)
- Introduce yourself (1-2 minutes).
- Share your takeaways with each other, with each learner, adding something not previously mentioned.
- Discuss your insights and why you think those takeaways are important.
- Return to your home group when time is up.
Home Group for Reporting (10 minutes)
- You now have just two minutes each to teach the others in your group what you learned in your expert group.
- Use the resources/notes you created as you share.
Expert Group for Reflection
- Take one minute each to share your Home Group’s insights
- What do those insights mean in light of what you know as Experts? Discuss.
Feature Image Source
Photo by Hans-Peter Gauster on Unsplash
2 comments
I love this jigsaw strategy. I frees teachers while the students do the work. Indeed the more students discuss their findings and insights, the more learning occurs!
You’re exactly right, Pauline! How are you using it in your classroom?
Miguel