Ever find yourself wishing for an amazing icebreaker you can use with a group of educators? An old familiar one is often best. Faculty icebreakers either tell you nothing or take twenty minutes to set up and twenty more to debrief. You can build a better one yourself using Gen AI and vibe-coding. After making it, you can host it on free tools you already use (e.g. Google Sites), and watch a live results chart grow. The whole setup takes about fifteen minutes the first time. After that, the activity lives in a single shareable link. You can do this and more with vibe-coding using $20 a month tools like ChatGPT, Claude, and/or Gemini. This blog shows you how.
Special thanks to Peggy Reimers for providing the initial prompt for this activity. I only made slight modifications to it. You can see it at the end of this blog post.
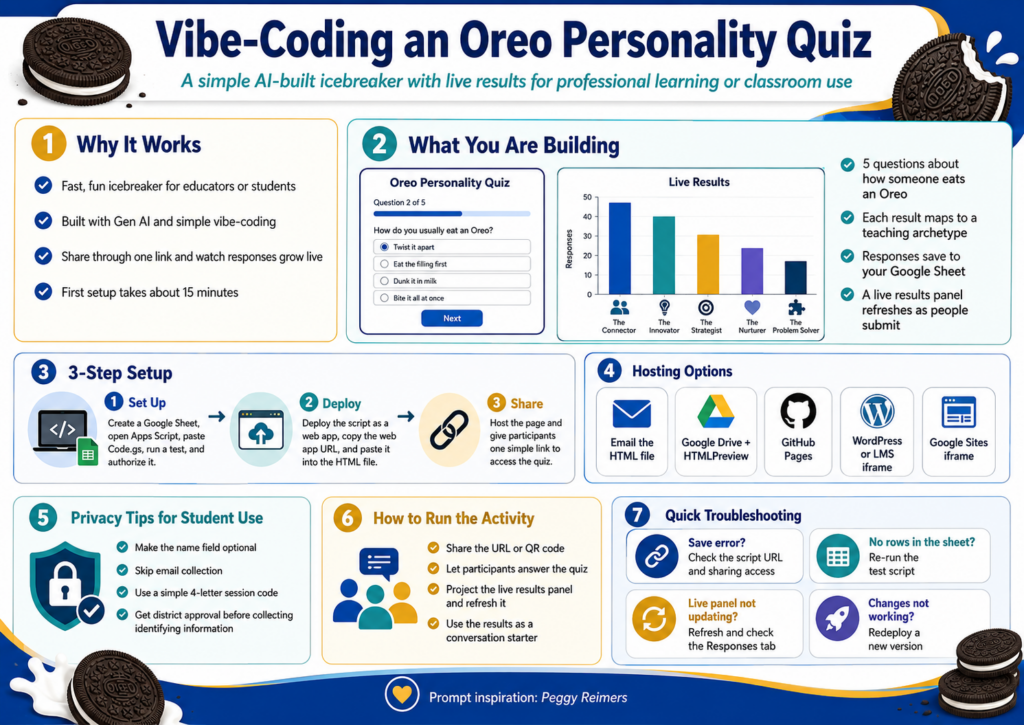
What You Are Building
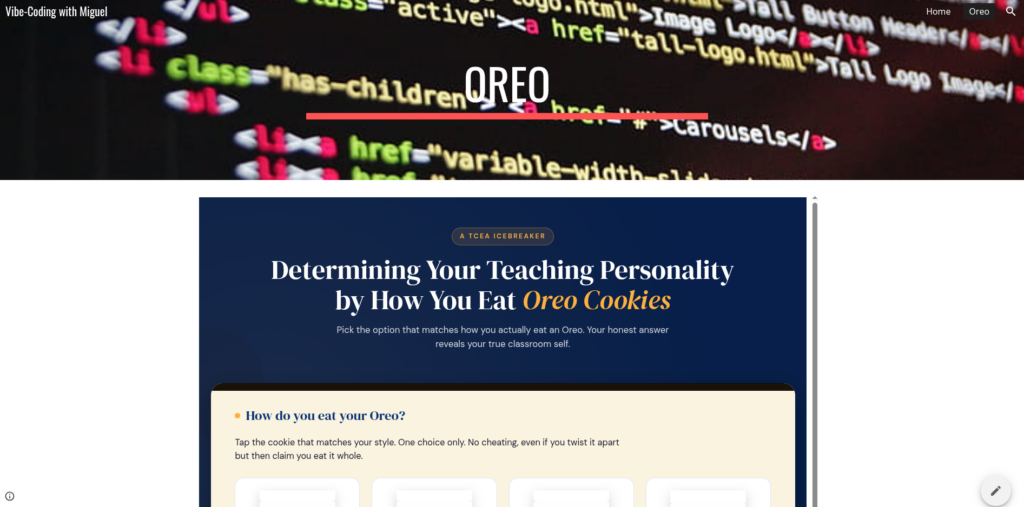
The activity is simple. Five questions ask how someone eats an Oreo. The result maps to a teaching archetype, with a short description that becomes a conversation starter. Names go into your own Google Sheet. A live results panel on the same page refreshes as people submit. No vendor account, no subscription, no student data leaving your district drive.
Ready to begin? Let’s get started. Note that if you want to REALLY start from scratch, go to the end of this blog post and copy the prompt. Then, paste it into your BoodleBox, ChatGPT, Claude, or Gemini solution. Remember, everything is hard when you start, but it gets easier after you do it 1000+ times.
Step 1: Set Up Your Sheet and Script
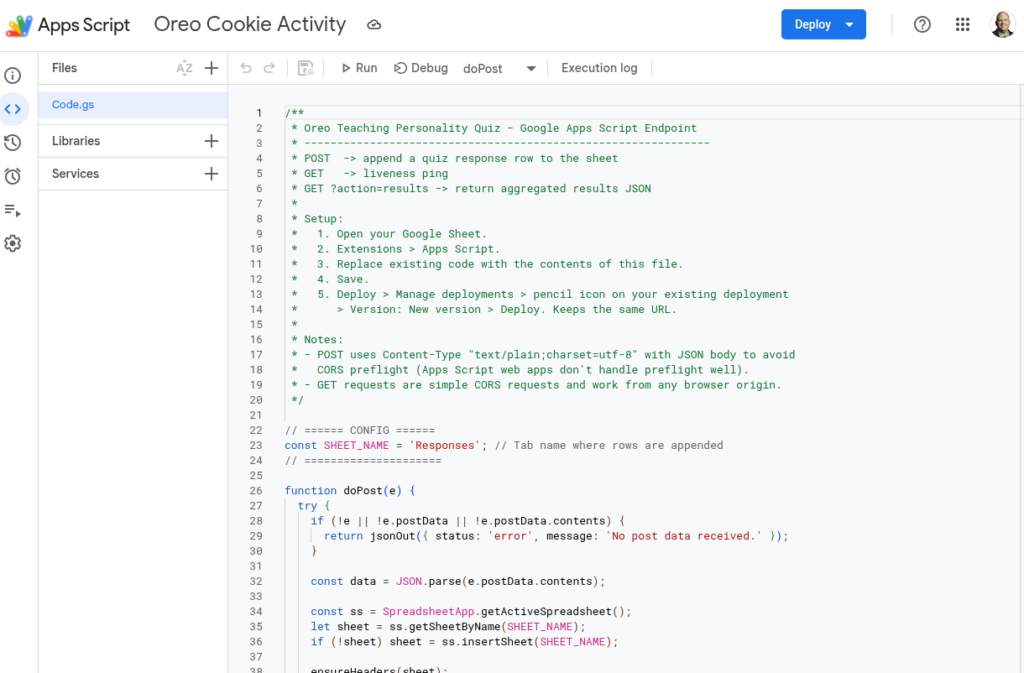
Open Google Drive and create a blank Google Sheet. Name it something obvious like “Oreo Quiz Responses.” From inside that sheet, click Extensions, then Apps Script. A code editor opens in a new tab. You can see an example online.
Delete the sample code. Paste in the Code.gs file from the project bundle, save, and name the script “Oreo Quiz Endpoint” when prompted. Run a test by selecting testWrite from the dropdown next to the Run button. Google will ask you to authorize the script. Approve it. If a warning appears about an unverified app, click Advanced, then “Go to project (unsafe),” then Allow. That is normal for scripts you wrote yourself and have not published as a public app.
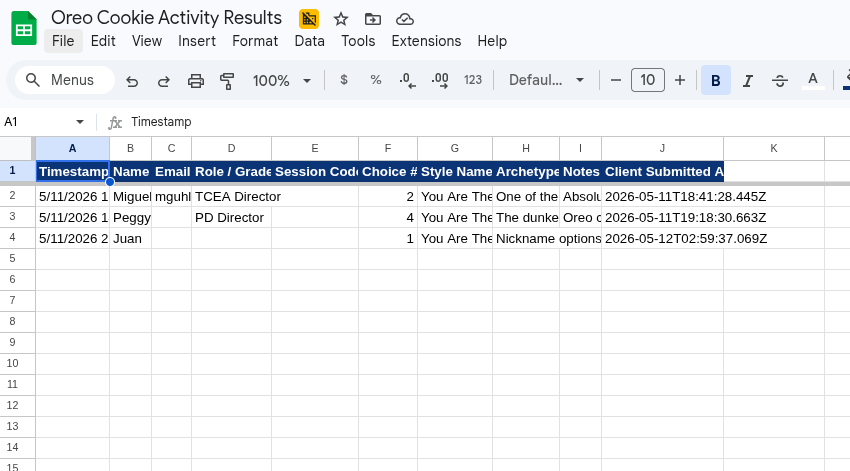
Switch back to your sheet. A new tab called Responses should have one test row, which you can delete. The script is now talking to your sheet.
Step #2: Deploy the Script and Paste the URL
Back in the Apps Script editor, click Deploy in the top right and pick New deployment. Click the gear icon next to “Select type” and choose Web app. Fill in:
Description: Oreo Quiz v1
Execute as: Me
Who has access: Anyone
Click Deploy and copy the web app URL. Open the HTML file in any plain text editor. Near the bottom, find the line that reads APPS_SCRIPT_URL = "PASTE_YOUR..." and replace the placeholder with the URL you just copied. Save the file. That is the entire connection.
This is what that looks like:
Did You Know?
TCEA’s self-paced AI Essentials for Educators offers 17+ CPE hours, walks you through the essentials of vibe-coding on any chatbot you care to use (e.g. BoodleBox, ChatGPT, Claude, Gemini). It’s a steal for $49 for individuals, or $34 in bulk pricing with 10 or more.
Step #3: Get the Page in Front of People
You have four hosting options, ranked easiest to most polished:
Option #1: Email the HTML as an attachment. Anyone who downloads and opens it gets the quiz. Some email systems block HTML attachments, so test first
Option #2: Upload the file to Google Drive and share throughHTMLPreview, which renders Drive-hosted HTML
Option #3: Host it free on GitHub Pages for a permanent URL like https://yourname.github.io/oreo-quiz/. Add about ten more minutes. See example.
Option #4: Embed it in your school WordPress or LMS using an iframe. Best for a polished classroom or PD experience
Option #5: Embed it in Google Sites using an iframe. Easy and simple to use if your code is straightforward (you won’t know until you try). See screenshot above or view online in Google Sites.
For a faculty meeting, the GitHub Pages route is worth the extra ten minutes. You will reuse the link.
A Key Point: Privacy Before Students Touch It
For colleagues and staff, real names and emails are fine. For students, treat the data the way your district expects:
Make the name field optional so students can submit anonymously
Skip the email field entirely. Email plus another identifier is what triggers most privacy rules
Use a session code instead of names. Ask each student to pick a four-letter code they will remember, so they can find their own result without typing real identifiers
Get district approval before recording any identifying information
The good news is that the data goes to your Google Drive, not a third-party platform. That usually shortens whatever approval process you do have to run. Data is saved to your Google Workspace for Education account storage, which is where Google Classroom data lives as well.
Running It in a Session
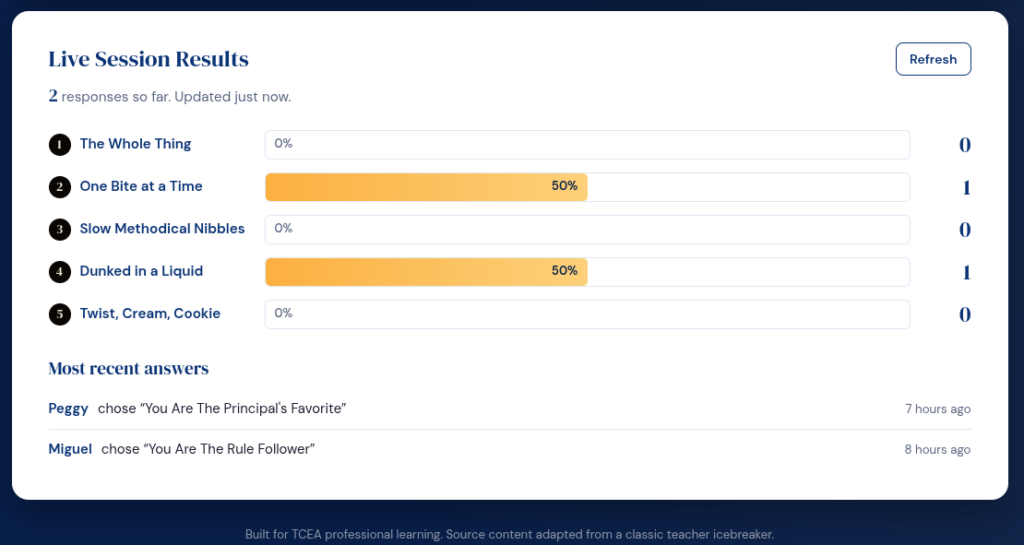
The activity runs about ten minutes start to finish. Project the URL or share it through chat or a QR code. Give a one-sentence intro: “Pick how you actually eat an Oreo, see what kind of teacher that makes you, and add your name so we can see the class results.” While people answer, pull up the live results panel on your screen and refresh every minute. The bars grow as responses come in.
Use the descriptions as a conversation starter: ask which result felt accurate and which one felt wrong, and why. The second question is where the real talk happens. Remember to have fun with it.
Quick Troubleshooting
Symptom
First thing to check
“Could not save right now” message
URL missing in the HTML, or deployment access is set to “Only myself” instead of “Anyone”
Sheet shows no new rows
Re-run testWrite in Apps Script. If that fails, recreate the script from inside the sheet
Live results stuck at “Waiting for the first answer”
Click Refresh on the panel and confirm the Responses tab has rows
You edited Code.gs and now nothing works
Deploy, Manage deployments, edit your existing deployment, change Version to New version, redeploy
Sample Prompt
Want to give it a start from scratch yourself? Here’s the prompt I started with:
Create a self-contained html file that will make this into an online interactive…use TCEA blue and gold colors, but give everything an Oreo cookie feel. I want to save the results to Google Sheets. Please provide the AppScript code for that, and give me a readme file and setup instructions
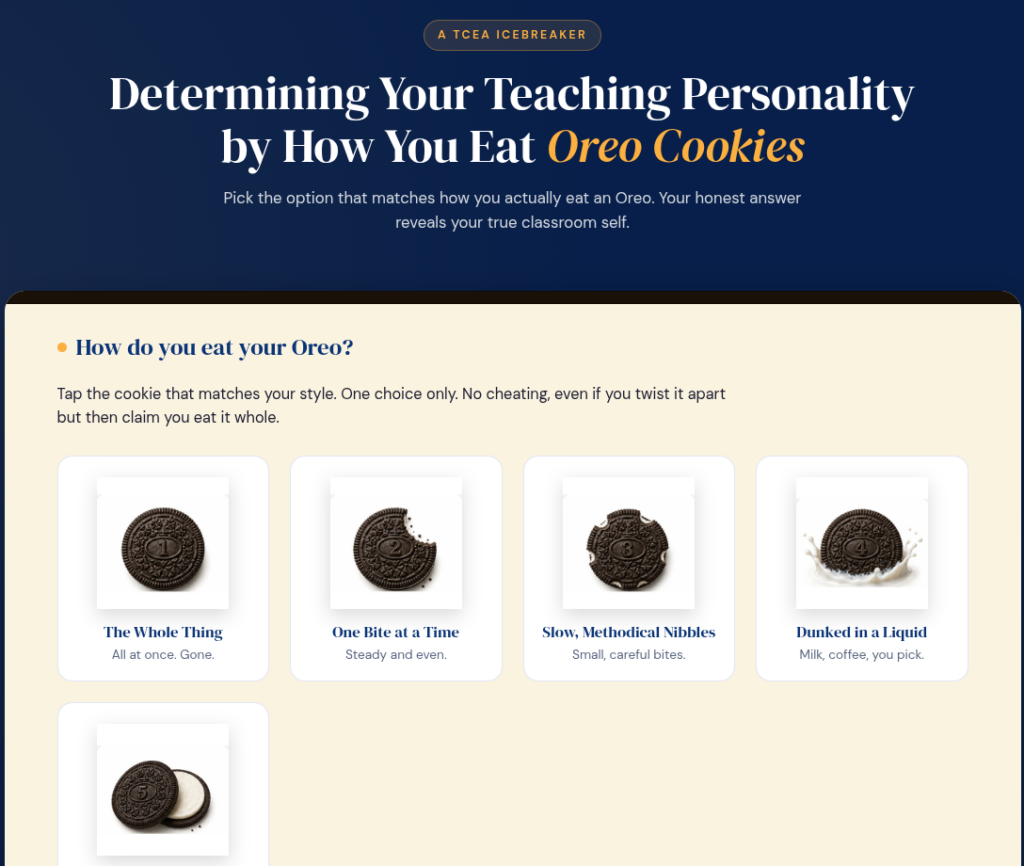
Determining Your Teaching Personality by How you Eat Oreo Cookies 1. The whole thing all at once. 2. One bite at a time. 3. In slow and methodical nibbles. 4. Dunked in a liquid. 5. Twisted apart, eat the inside, then the cookie. 1. You are the teacher that no one messes with. Your nickname could be Mother of Dragons, Chuck Norris, or the Terminator. 2. You are one of the 5.4 billion billion that eat their Oreos this way. You follow the rules. Your lesson plans are always turned in on time and never late for your extra duties. But stay out of the fast lane if you are only going the speed limit. 3. You’re tidy and orderly. Probably the word that comes to mind is meticulous. Your students come to class with sharpened pencils, backpacks organized, and homework turned in on time. I am guessing your students always ask for extra credit projects. 4. Your Oreo is always dunked in some kind of liquid, be it milk, coffee, wine or whiskey. Your principal loves you, as you always volunteer for extracurricular activities: dances, field trips, and sporting events. You want to be the dunkee at the Fall Festival. All is good as long as you have your concealed flask. 5. This means you consume life with abandon, you are fun to be with, exciting, carefree with some hint of recklessness. But no one should trust you with his or her children.
While I don’t know the source for this version, there are many variations online, such as this one. My next project? Dice-breakers. I can’t wait to get started.
Looking for an activity that builds connection, encourages collaboration, and gets everyone talking? Try a collective resume!
This engaging icebreaker is perfect for both staff and students. It helps groups reflect on their shared experiences, strengths, and even a few fun facts. Whether you’re kicking off professional development or getting to know your new class, this activity strikes the right balance of meaningful and light-hearted.
For Teachers: Our Collective Resume
Divide your staff into small groups—by grade level, subject area, or something totally random (hello, color-coded candy sort!). Then challenge them to complete their collective resume using the template. How many schools have they taught in? How many students have they impacted? What degrees do they hold? This is a celebration of their shared experience and strength as a team.
Template preview:
Total years of teaching experience
Number of schools taught in
Estimated students instructed
Degrees, strengths, and hobbies
Encourage groups to present their resume poster and host a gallery walk to share and celebrate the diverse backgrounds that make your staff amazing.
For Students: The Power of Us – Our Super Stats
This student-friendly version of the resume works perfectly in classrooms of any age. Use it to start building classroom community and making connections from day one. Let students work in table groups or small teams to figure out how many pets they have, how many languages they speak, and what hobbies and strengths make their group unique.
Template preview:
Total years of life experience
Number of siblings and pets
Schools attended
Strengths, hobbies, and languages spoken
Put Your Own Spin on the Activity
Use large chart paper or digital slides for each group to record their answers.
Encourage creativity! Let them decorate their resume or give their group a name.
During the gallery walk, give everyone sticky notes to leave compliments or “likes” on other groups’ posters.
Ready to Try It?
You can download both the Educator Edition and Student Edition templates below to get started. Whether you’re building staff camaraderie or laying the foundation for a supportive classroom culture, these collective resumes are sure to make an impact. And one last bonus—if you would like the Collective Resume forinstructional coaches, you are in luck, as I have created one for that group as well.
Human Bingo is a fun and effective icebreaker activity that fosters connection and learning. Whether you’re an administrator, instructional coach, or a teacher, this simple game can transform your next professional development session or classroom activity. Let’s explore how this simple game can be a valuable tool for building a positive and interactive environment.
What is Human Bingo?
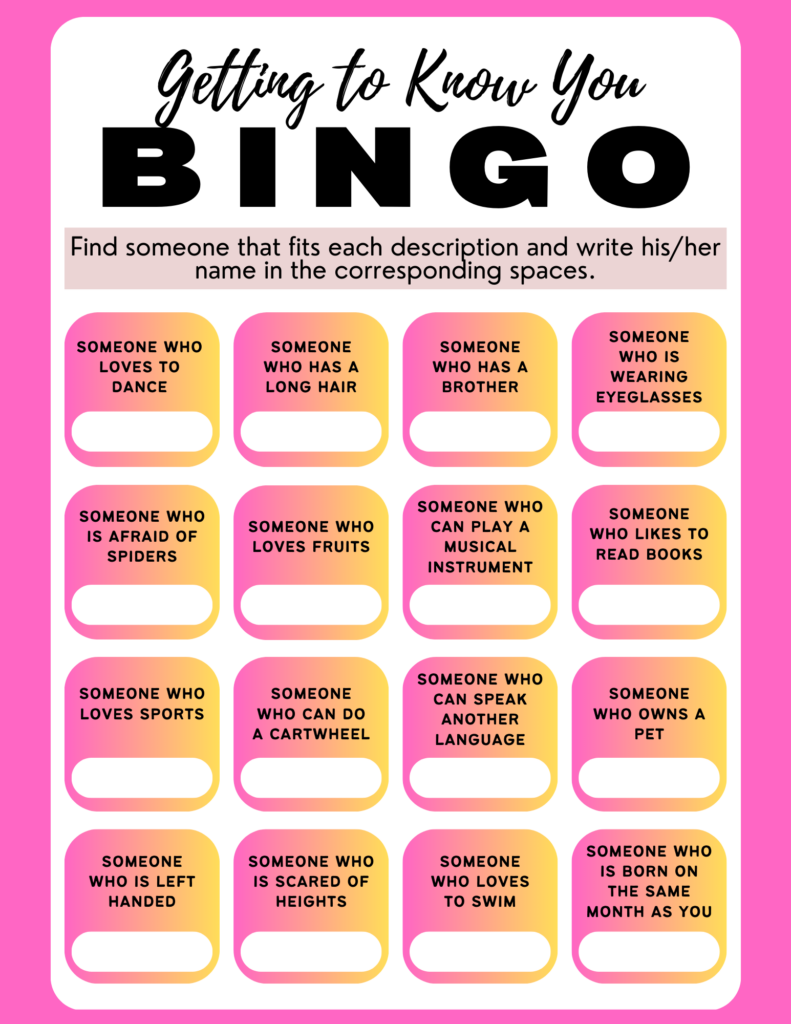
Human Bingo is a game where each participant has a bingo card filled with various statements or characteristics. The objective is to find individuals who match these statements and have them sign the corresponding squares. The first person to complete a row, column, or diagonal yells “Bingo!” and wins the game. This activity can be tailored to suit any age group or subject matter, making it a great fit for diverse classroom settings.
Benefits for Educators and Students
Image by Author, adapted from a Canva template by Krizzia Click on image to get the template.
Human Bingo has many benefits for both educators and students alike. Human bingo:
Breaks the ice: It’s a perfect way to break the ice at the beginning of the school year. It helps teachers and students get to know each other in a fun and relaxed manner.
Builds rapport: Human Bingo encourages participants to interact with people they might not typically approach. This will help foster new connections among staff or students.
Increases engagement: The game’s active nature gets everyone moving and talking. It energizes the room, which will help set a positive tone for further activities.
Reveals hidden talents: Carefully crafted prompts can uncover unexpected skills or experiences within your team or class. It also helps identify common interests.
Is adaptable for all ages: With appropriate prompts, this game works well for both adult professionals and students of various grade levels.
How to Play Human Bingo
Below are instructions on how to play human bingo.
Create Bingo Cards. Develop bingo cards with statements that are relevant to your staff or students. For example, statements like “Has traveled to another country,” “Plays a musical instrument,” or “Loves science fiction movies.” If you are looking for a Bingo template, check out Canva, Bingo Card Generator, or Flippity.
Distribute Cards: Give each staff or student a bingo card.
Explain the Rules: Instruct your staff or students to circulate around the room and find peers who match the statements on their cards. Each matching person should sign the corresponding square.
Set a Time Limit: Allow a set amount of time for the activity, typically 15 minutes.
Announce the Winner: The first person to get a complete row, column, or diagonal shouts “Bingo!” and is declared the winner. You might want to consider giving small prizes to add an element of excitement.
Tips for Creating an Effective Human Bingo Game
To create an effective human bingo game, tailor the statements to your audience and goals. For example, for a teacher workshop, include items like “Has taught in another state” or “Uses project-based learning in their classroom.” If using it in the classroom with your students, tailor the statements to your students. This will ensure that the activity is both engaging and relevant.
You could also adapt the game to review content. For example, use statements related to historical events, vocabulary words, or scientific concepts. In addition, you could use the game to introduce your lesson’s objectives. This way, you can seamlessly transition into your main content after the game is over.
Be sure to encourage interaction. Remind staff and students to introduce themselves and share a little about their interests. This will help them make meaningful connections. Furthermore, you could allow time to debrief after the game to discuss interesting discoveries and how they might inform future collaboration.
Human Bingo is more than just a game – it’s a powerful tool for breaking the ice, fostering connections, and setting the stage for collaborative learning. By incorporating this activity into your professional development sessions or classroom routines, you’ll create an atmosphere of curiosity and openness that can enhance the overall learning experience. So why not give Human Bingo a try at your next gathering? You might be surprised at the connections and insights that emerge from this simple yet effective icebreaker.
If you know me at all, then you know that I am not a fan of icebreakers. While I realize their value and am aware of the research on their use, they still can make me feel uncomfortable. That’s why I was not really excited when I discovered the Daresay Check-In Generator. But then I started using it and my attitude quickly changed.
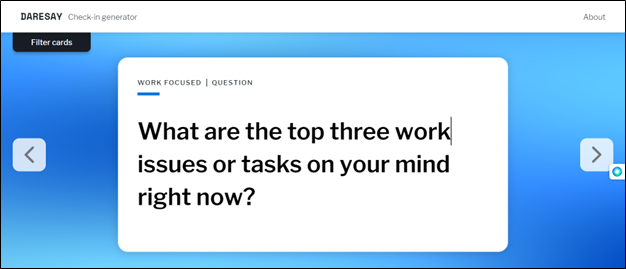
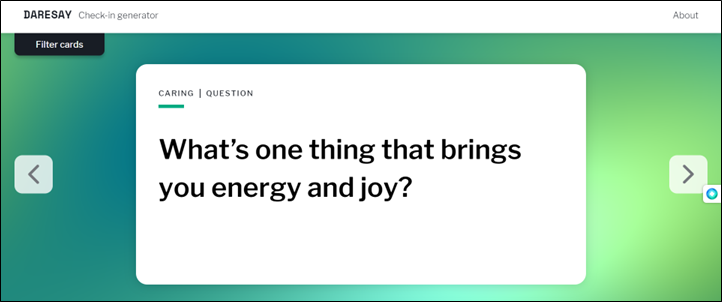
What Is the Daresay Check-In Generator?
The group that created this free online tool use the check-ins to “start meetings and workshops. This gives us room to remind ourselves that we’re all human” and focus on what they are doing as a team. But coming up with a new icebreaker or thought question every time can get tiring. So they invented “filter cards” that anyone can use. Check out their blog on why.
Once you go to the website, you can simply swipe left or right and you’re given a random question to answer and share with someone else or the whole team. Questions might be “If you could rename yourself, what name would you pick?” or “Name something you learned last week.” You can filter the many, man questions depending on the atmosphere that you want to set for the meeting: caring (checking in to see how people are feeling), daring (somewhat harder to answer; takes more thinking), laid back (easy to answer), or work focused.
Ways to Use This Check-In Generator
This is a great tool that can work for you in so many ways with both adults and students.
Regular team meetings
Start of school check in
After a stressful or traumatic event
After a vacation or holiday
Starting a new project or unit
Anytime you want to see how everyone is feeling or thinking
Take a minute to try this simple but effective tool that will save you time, change up your check ins, and help you better see how everyone is doing.
Incorporating icebreaker games, such as summer bingo, for your staff can be a valuable practice. Bingo is a popular game, and I remember playing it often with my family when I was younger. However, what if I told you it’s more than just a fun activity to do with your family? It could be used to unite and strengthen your school staff.
Why Icebreakers Games Are Invaluable
Building Connections
Icebreaker games help create a positive and inclusive work environment by fostering connections among staff members. When employees engage in fun activities together, it breaks down barriers and encourages social interaction. In addition, it helps staff get to know each other on another level. In turn, icebreaker games for staff strengthen relationships and promote teamwork among staff members.
Enhancing Communication
Icebreaker games for staff promote open communication and dialogue among staff members. By participating in these games, staff have opportunities to share information about themselves, their interests, and their experiences. This can lead to increased understanding and empathy within the team. It creates a more open and supportive communication environment.
Improving School Culture
Icebreaker games can boost school culture and can contribute to higher levels of staff morale and engagement. When employees feel connected and comfortable with their colleagues, they are more likely to enjoy their work environment and feel a sense of belonging. This can lead to increased job satisfaction, motivation, and overall productivity.
Facilitating Collaboration
You can also help break down barriers within an organization by creating icebreaker games for staff. When employees from different departments or roles come together for a fun and collaborative activity, it encourages cross-functional communication and collaboration. This can lead to improved teamwork.
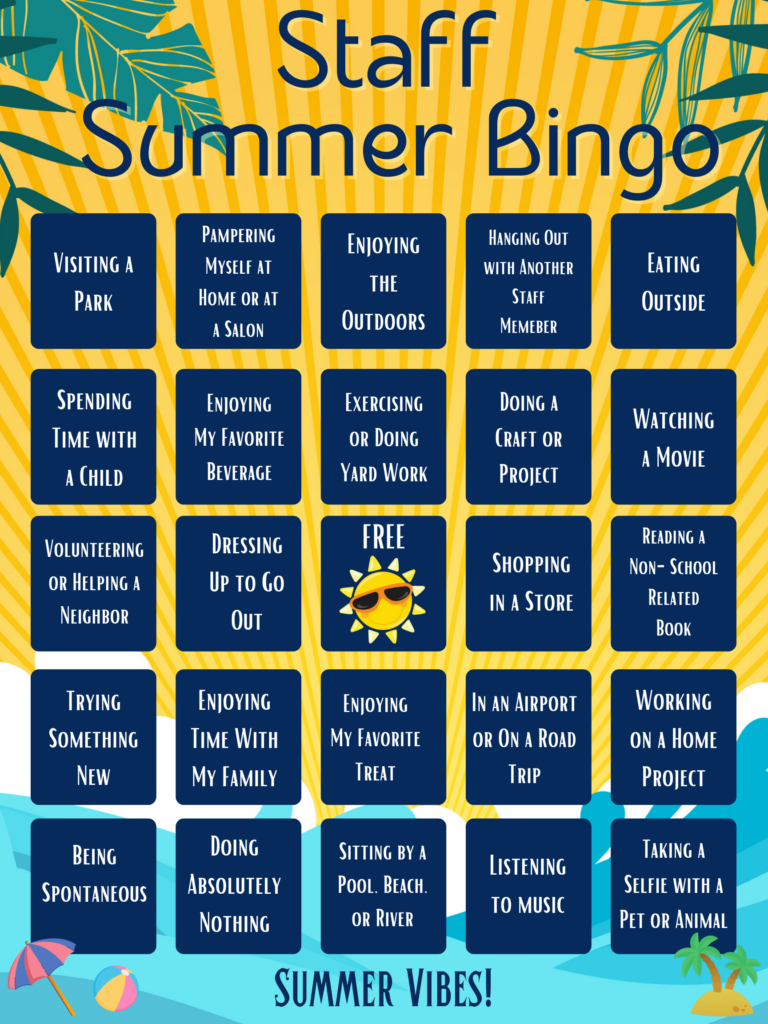
Summer Bingo Game
To help you plan your perfect summer bingo game, we’ve put together a list of tips to help the game run smoothly. We’ve also included sample bingo game that will help you get started.
1. Come up with bingo statements.
The first step to organizing a bingo game is deciding on your bingo statements. For the summer, you can come up with fun statements for your team about summer activities. For example:
Went to the beach
Took a road trip
Watched a movie
Enjoyed time with the family
2. Build your board.
A typical bingo board consists of 24 statements and one free space. Once you’ve come up with your statements, you’ll need to build your board. You can easily create your board in Google Docs or Microsoft Word by creating a table with five rows and five columns. Fill each box with a statement while leaving the center box free.
In addition, there are many online sites that have bingo templates. For example, I used Canva to create my bingo board. Other bingo generator examples include My Free Bingo Cards and Bingo Baker.
3. Share the board and set game rules.
Once your bingo board is built, you are ready to share it with your staff. Be sure to include game rules! For example, is it a regular bingo game or a blackout? How will they submit proof of their completed bingo activities? Is there a time limit or deadline for completing the game? How will you keep all staff updated on the status of the bingo game?
4. Include a prize for the winners.
Prizes are always a great incentive for bingo games because it makes people eager to participate and compete. So consider what prize you are going to give your bingo winners. It doesn’t have to be anything expensive. It could be a lottery ticket, a gift card, lunch delivery, a t-shirt, or a coffee mug. In addition, it could be a prize for when school resumes, like a free jean day.
Overall, incorporating icebreaker games, such as bingo, for staff can be an effective strategy to create a positive work environment and support the overall well-being and engagement of your team.
It’s important to go above and beyond in welcoming your staff back to school as the new school year approaches. Taking that time to make them feel appreciated and welcomed will go a long way toward setting a positive tone for the school year. Let’s take a look at some ideas.
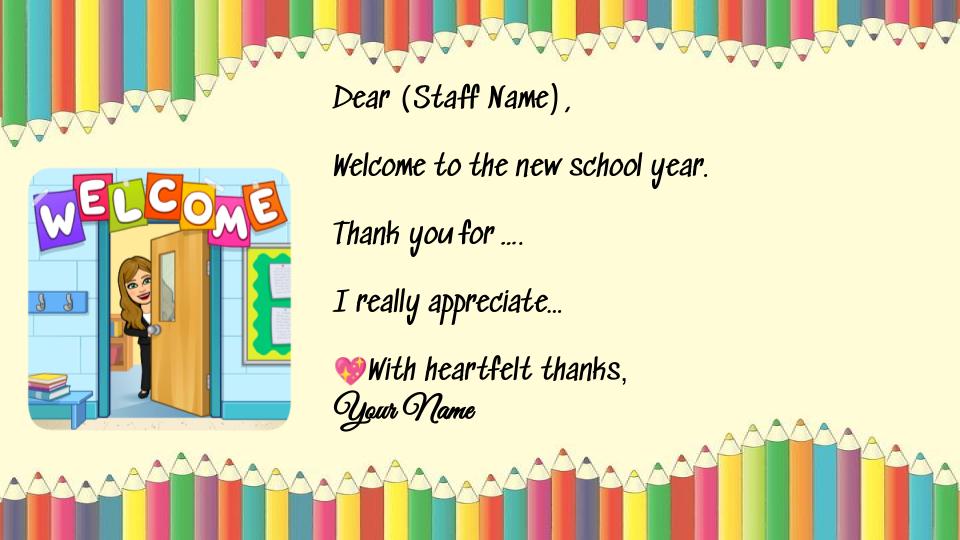
Write a Welcoming Note
Writing a personal note is a simple and effective way to welcome your staff back. You can give them the note on the first day they return from summer break or wait until the first day of school. If you have a large number of staff, you might want to get started now or get some help. If you need a template, check out this Welcome Back to School Note that can be copied and modified. In the note, tell your staff how excited you are for the new school year and how thankful you are for them. Your note will go a long way in showing them how much you appreciate them. In addition, it will help build those strong relationships between you and your team.
Have an Informal First Day Back
There are a ton of meetings when staff come back from summer break. Why not have an informal first day back? Do some ice breakers and getting-to-know-you activities, provide lunch, and keep the schedule light. While I know there is a lot of information to cover at the beginning of school and schedules can be full, remember that the first day back is hard. Some staff might be anxious, so this will help take the pressure off. You’ll find that a lot can still be accomplished even if the first day back is informal.
Give a Self-Care Kit
The start of the school year can be stressful. Give your staff a self-care kit to start the year off right. You can include things like a mug, instant coffee or tea bags, hand lotion, lip balm, gift cards, energy bars, and other snacks.
Another thing you can add to the self-care kit is a gratitude jar. A gratitude jar is a jar filled with reminders of what you’re grateful for. Using small pieces of paper, your staff can write down what they’re thankful for and add a note or two to their jar each week. They can visit the jar whenever they need encouragement and pull out a note or two. Gratitude reminds us of what we have, and research shows that staying grateful can improve our mental health. You can even set up a table where staff can decorate their jars.
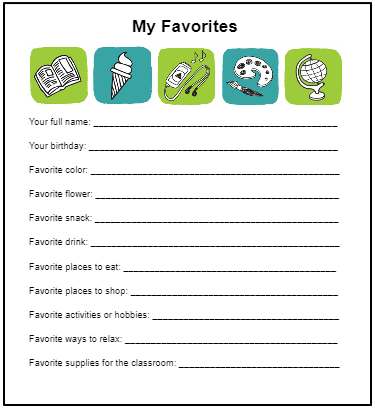
Get to Know Your Teachers
Building relationships with and getting to know your staff is critical. Give your team an opportunity to share special facts about themselves. Icebreaker and team-building activities are perfect examples of how to learn more about your staff.
In addition, have them complete a form that tells you even more about them. The form can include questions like, “What is your favorite snack?” This will help you personalize appreciation gifts throughout the year. Here is an example of things to include on your form.
Create a Memorable “Welcome Back” Video
In this blog post by Dr. Bruce Ellis, you can find ways to welcome your staff back that take little effort but some creativity. You could use Flip to introduce yourself to your team. You could even create a YouTube video and post it online. If you don’t like to be in front of a camera, you can still inspire your staff with video. Explore a variety of inspirational videos at http://bit.ly/educatorsinspire.
These are just a few ways you can welcome your staff back. Also, while they may have been working all year long, don’t forget to include your secretarial staff, the custodial staff, IT staff, and everyone else that makes up the school community.
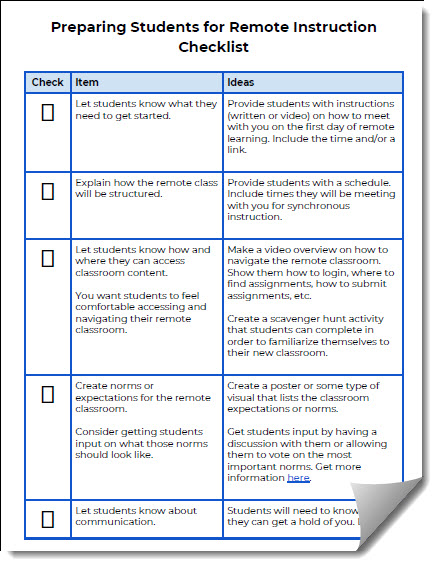
Are you wondering how to prepare your students for their new remote classroom? If so, you are probably not alone. There are a lot of things to consider so that your students can start the year successfully. Begin by preparing the remote learning environment before students “arrive” at school. Then get students oriented to the new environment so that they feel at ease. Below are some suggestions to prepare them.
Getting Started
Provide students with instructions (written or video) on how to meet with you on the first day of remote learning. Include the time and/or a link. If you have a Bitmoji, include that and make the instructions fun and light hearted.
Class Structure
Provide students with a schedule. Include times they will be meeting with you for synchronous instruction.
Navigation
Make a video overview on how to navigate the remote classroom. Show them how to login, where to find assignments, how to submit assignments, etc.
You could also create a scavenger hunt activity that students can complete in order to familiarize themselves with their new classroom.
Expectations
Create a poster or some type of visual that lists the classroom expectations or norms.
Get student input on what the expectations should be by having a discussion with them or allowing them to vote on the most important norms. Get more information about setting norms here.
Communication
Students will need to know how they can contact you. Let them know your preferred method for communicating. In addition, share when they will receive an answer (24 hours, 48 hours, etc.). Post this in your remote classroom.
If you are holding virtual office hours, let students know when you will be available to meet with them and if they need to sign up or can just show up.
Students will need to know how to properly communicate with you and peers in the remote classroom. Be sure communication is addressed in the classroom expectations.
Regardless of what you teach, your students will most likely respond well to an adventure of some kind as opposed to worksheets or traditional whole-group learning. So a fliphunt is perfect for your classroom. But, you might be asking yourself, “What is a fliphunt?” Designed by Kathi Kersznowski (@kerszi), a fliphunt is a scavenger hunt using Flipgrid. It is a fun way of having your students get out of their seats, participate in the learning, and demonstrate their understanding and application.
Organizing Your Fliphunts
Start by creating a grid in Flipgrid to contain all your fliphunts. This will help keep them organized and in one place, a folder to contain them all. Next, create a new topic and give it the name of your fliphunt. Each fliphunt will be a new topic within this grid.
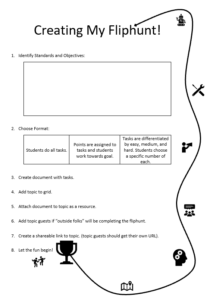
Creating Your First Fliphunt
Begin with your content standards or knowledge and skills you are wanting your students to learn. Identify multiple concepts they will need to demonstrate understanding of. Think of fun ways for them to demonstrate the concept or skill. For the sake of an example, I’ll pull from fourth grade math standards:
(6) Geometry and measurement. The student applies mathematical process standards to analyze geometric attributes in order to develop generalizations about their properties. The student is expected to:
(A) identify points, lines, line segments, rays, angles, and perpendicular and parallel lines; (B) identify and draw one or more lines of symmetry, if they exist, for a two-dimensional figure; (C) apply knowledge of right angles to identify acute, right, and obtuse triangles;…
In Google Docs or Microsoft Word, create a list of tasks (or even a choice board). I created a Google Doc (http://bit.ly/fliphunt4geo) with tasks for the fourth grade geometry lesson. It is up to you whether students complete them in order. In my example, students can go in any order. But, to get credit for each submission, they must name their entry using the task title. This will help students as they review other student work (and as I grade!). If you are creating a fliphunt for someone that is not in your district domain, be sure to edit the topic, select Add Topic Guests, and give them the permission to record videos to the topic; you’ll also need to share the topic guest address/code with them, which is different than the one used by your students or people within your district domain.
Fliphunt Template
Here is a template to guide you through the steps. Once you complete your fliphunt, be sure to share it with other educators by tweeting a link to it using #fliphunt and #flipgridfever. Before you know it, you’ll be making fliphunts for all your classes…and even start creating ones that are just for fun and for icebreakers. When coming up with the tasks, consider having your students submit ideas to be used!
Sample Fliphunt Docs
Getting to Know You Fliphunt
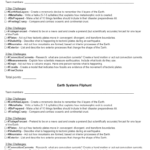
Earth Systems Fliphunt
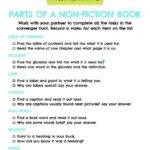
Parts of a Non-Fiction Book
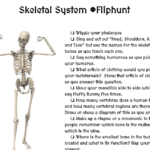
Skeletal System Fliphunt
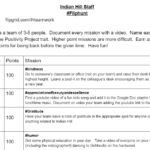
Indian Hill Staff Fliphunt
Geometry FlipHunt
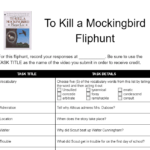
To Kill a Mockingbird Fliphunt
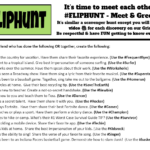
Meet and Greet Fliphunt
What Will You Create?
What content will you use to create your fliphunt? If you still need more ideas and details, check out #fliphunt on Twitter for lots of sharing. Also, be sure to add your ideas to the comments section. Don’t just make it an adventure; make it a fliphunt!
Are you a secret singer? I am. That doesn’t mean that I’m ready for prime time, but you never know when you’ll have your moment. As I travel to provide professional development to schools, I often stay at hotels. Rarely am I put on the first floor, which means I get to ride the elevator. I say “get to” because that’s where I think I sing the best. I only perform, though, if there is no one on the elevator with me – I’m a soloist, you see. I usually hum the note of the elevator ding and then warm up with a scale going up and then back down. Hopefully, I have time to continue after the warm-up and get to sing a song.
You may not be a secret elevator singer, but you will find these tunes memorable. They are made even better since they’ve been turned into parodies that we can relate to as educators. Some you might share with your class while others may be more appropriate for the start of a faculty meeting to get teachers pumped up for learning and networking. Without further adieu, here are my favorite song parodies for educators.
Before He Cheats: Parody of “Before He Cheats” by Carrie Underwood
What would you add to the list? Has your school or department created a parody of a song to showcase the work that you do? If so, share it in the comments below and let others enjoy your production. In the meantime, if you hear singing while you are waiting for the elevator, it might just be me.
The first day of a new school year can be awkward and nerve-wracking for both teachers and students. Why not break the ice that day (or week) with a few, fun, getting-to-know you activities? Giving your students a chance to share special facts about themselves and learn about their teacher at the same time will help ease first-day jitters. And it helps to build a sense of community in the class, an important requirement as they collaborate with each other throughout the year.
Below are some of my favorite icebreaker activities. The activities are fun and easy. Best of all, they help get the first day of school off to the right start. And they don’t require that students take a big risk by speaking in front of everyone or by revealing something too personal.
Emoji Puzzle
Students these days use emoticons all the time. So why not have an icebreaker activity that incorporates them? As your students enter the classroom, hand them an emoji puzzle piece that will match one other student in the class. After all the students are in the class, have them walk around the classroom and try to find the other student that has the matching emoji puzzle piece.
Once they have found their match, students can interview each other or quietly talk about themselves. Give them some guiding questions, just in case they get stumped for what to talk about. (Have them share birthdays, their favorite snack food, best song to listen to while studying, etc. Just make sure it’s nothing too personal.) You could repeat this activity each day until every student has talked with every other student. If you would like to see a template, check out this one I created in Google Slides. Simply print it out and cut the emojis into puzzle pieces. Make a copy of the template here.
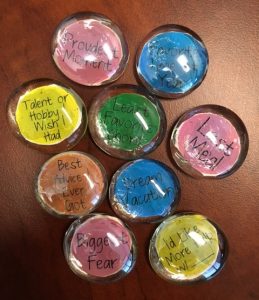
Conversation Starter Stones
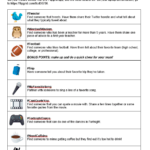
Conversation Starter Stones are a fantastic way to help your students get to know one another. In addition, they are cheap and easy to make. Drive to your local dollar store and buy some large glass stones. You can find a pack of about 30 stones for one dollar at the Dollar Tree. Next, get some clear glue and scissors. Cut out the starters individually and paste one on the bottom of each stone so that the writing is visible through the stone. Here is a template of conversation starters I use for the stones. This template was created in Google Drawing, so you can simply add it to your drive, edit it, and add your own topics.
Conversation Starter Stones
As your students enter the class, give them a stone. Next, pair them up with another student and have them discuss the topics on their stones. They could even trade stones to keep the conversation going. For an extension activity, have your students create a Google Slide or Office Sway from their starter that could be presented or shared with the entire class or on their blog. You can see examples of completed Sways using the stones here. Make a copy of the template here.
QR Code Icebreaker
QR codes are still everywhere and are so easy to create. As you know, once scanned, a QR code can take you directly to a website or reveal images or clues. For this activity, created by TCEA’s own Peggy Reimers, print the QR codes and cut them into four pieces. Give each student one of the four pieces of the code. Next, have your students find their group based on their category. Once in their group, have your students scan the QR code to reveal if their category word is correct. Lastly, ask each student in the group to follow up with their favorite item in the category, such as favorite color, favorite food, etc.
Two Truths and a Lie Padlet
With the Two Truths and a Lie Padlet icebreaker, you must first create a collaborative Padlet. If you have never used Padlet before, it is an online bulletin board and an easy way to get your students to collaborate with each other online. After you have created your blank Padlet, give your students the link and have them add three sentences about themselves (or their summer vacations). Two of the sentences should be true and one should be a lie. Next, each student (including you, teacher!) gets a chance to share their three sentences while the rest of the class takes turns guessing which one is the lie. Take a look at this sample padlet.
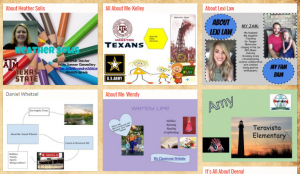
All About Me Google Drawing
All About Me Padlet
The All About Me Google Drawing combines two of my favorite tools, Google Drawing and Padlet. Have your students create a Google Drawing from scratch that will share information about themselves. They can add text, images, and links to the Google Drawing as they record facts such as where they are from, favorite sports, hobbies, etc. Once your students have completed their drawing, have them save it as an image and upload it to a collaborative Padlet. If you would like to see an example, take a look at my All About Me Padlet.
As your prepare for the first day of school, don’t forget to try one of these icebreakers. Giving your students the opportunity to get to know one another on day one will make it easier for them to work together the rest of the year.
As always, we love to hear your feedback. Leave a comment below with some of the icebreakers that have worked well for your students.


 Regardless of what you teach, your students will most likely respond well to an adventure of some kind as opposed to worksheets or traditional whole-group learning. So a fliphunt is perfect for your classroom. But, you might be asking yourself, “What is a fliphunt?” Designed by Kathi Kersznowski (
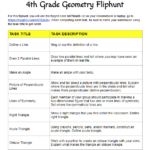


 What would you add to the list? Has your school or department created a parody of a song to showcase the work that you do? If so, share it in the comments below and let others enjoy your production. In the meantime, if you hear singing while you are waiting for the elevator, it might just be me.