Want your art creations to sparkle? You may find yourself reaching for an AI digital art tool to create content. But which should you reach for? AI art tools are at a premium. For educators on a tight budget, paying $10-$30 a month for access is too much. Even for those who want to “freshen up” their digital newsletters, the cost may be too high. Let’s take a quick look at a few solutions that are free to start out using. But first, let’s take a look at how to create a prompt.
Update: This blog entry now includes how to generate amazing art with Canva’s Magic Studio and AI Apps. Scroll down to see more. If you have Canva for Education or a Pro account, you may NOT need some of the other AI Creator tools listed, except for variety.
Crafting an AI Art Prompt
When generating art with AI, having a good prompt is a must. Working to perfect your prompt and including details will ensure that your generated AI art matches what you’re looking for. Some suggestions for prompt writing:
Describe the content of the image
Describe the subject
Add relevant details
Describe the form and style
Define the composition
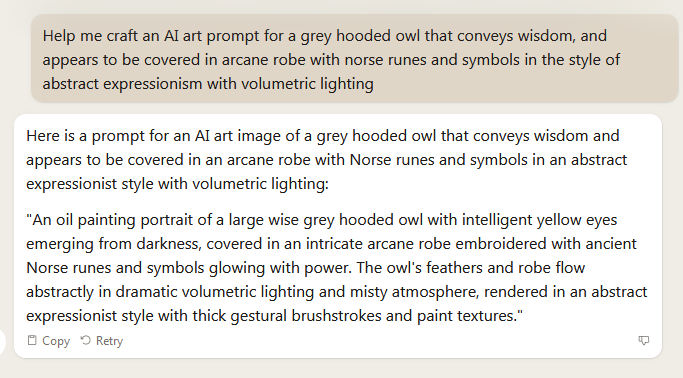
Additionally, using adjectives and involving other AI tools, like Claude.ai, can aid you in prompt-making. With that in mind, I decided to use a standard prompt to test out several AI art generators. I consulted Claude to help me. Since I like owls, here’s my prompt and the prompt generated by Claude in response:
Screenshot by author, Claude.ai
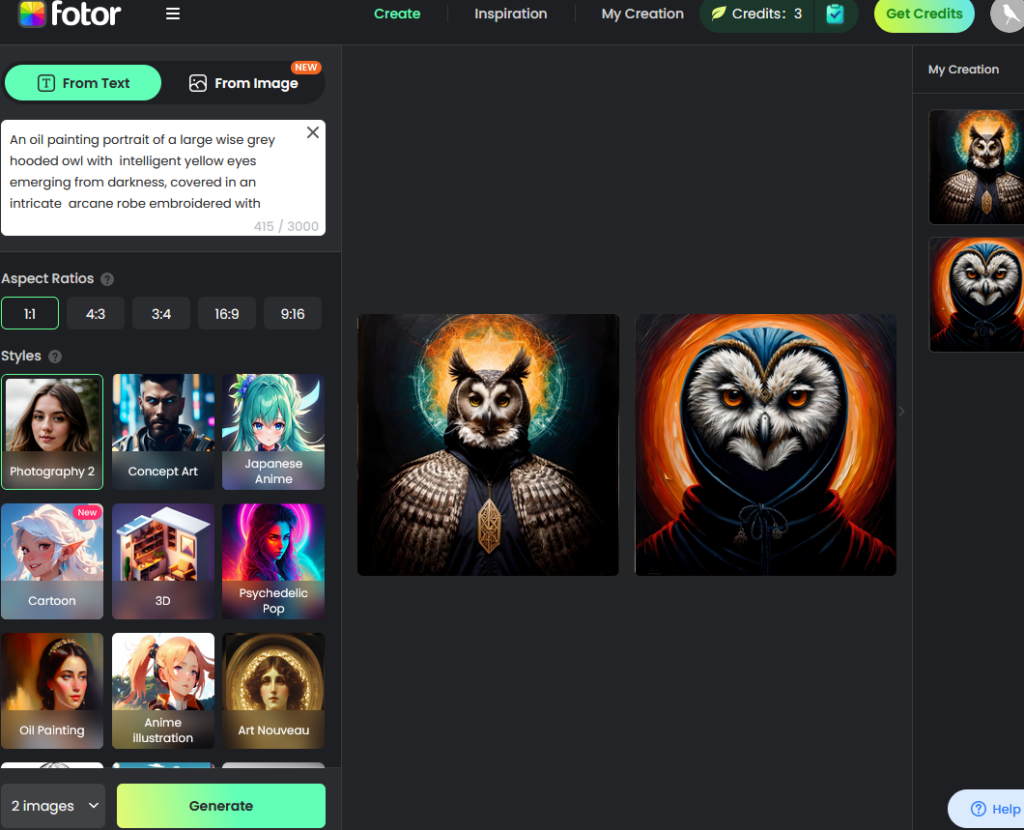
Test Prompt Text: “An oil painting portrait of a large wise grey hooded owl with intelligent yellow eyes emerging from darkness, covered in an intricate arcane robe embroidered with ancient Norse runes and symbols glowing with power. The owl’s feathers and robe flow abstractly in dramatic volumetric lighting and misty atmosphere, rendered in an abstract expressionist style with thick gestural brushstrokes and paint textures.”
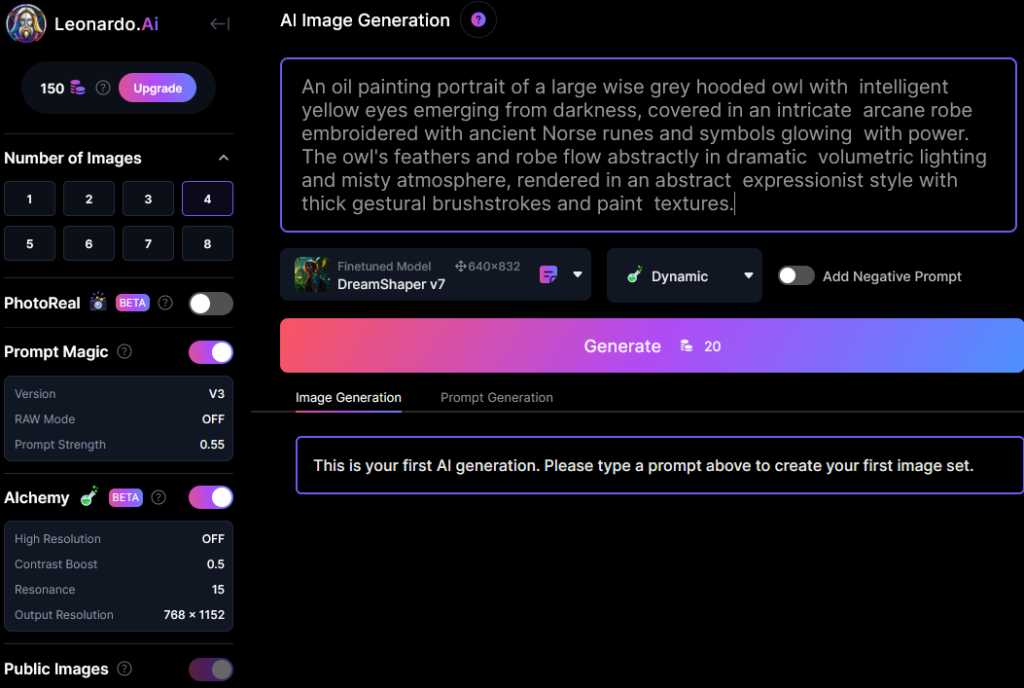
Although still under wraps, you can request Leonardo.ai access. My experience involved a short three-minute wait. Then, I logged in with my Google Workspace for Education account.
Screenshot by author, Leonardo.ai
This beautifully designed website features inspiring images. Some points shared during the welcome guide:
The featured models highlight various image generation styles. Select one and begin creating images with it yourself.
Use text, image prompts, or image-to-image to create new 2D images.
Explore features like Leonardo Alchemy and Prompt Magic v2.
Post-process your images with features that include upscaling, unzooming, and background removal.
Struggling to come up with prompt ideas? Toggle from Image Generation to Prompt Generation.
You can see that Leonardo.ai’s interface is quite rich:
Screenshot by author, Leonardo.ai
From start to finish, the text prompt appeared within two minutes. I turned the images generated into an animated GIF:
Animated GIF of images created by Leonardo AI with a prompt by the author
I loved Leonardo’s AI art creations. You might see these gracing the cover of a class anthology on fantasy writing.
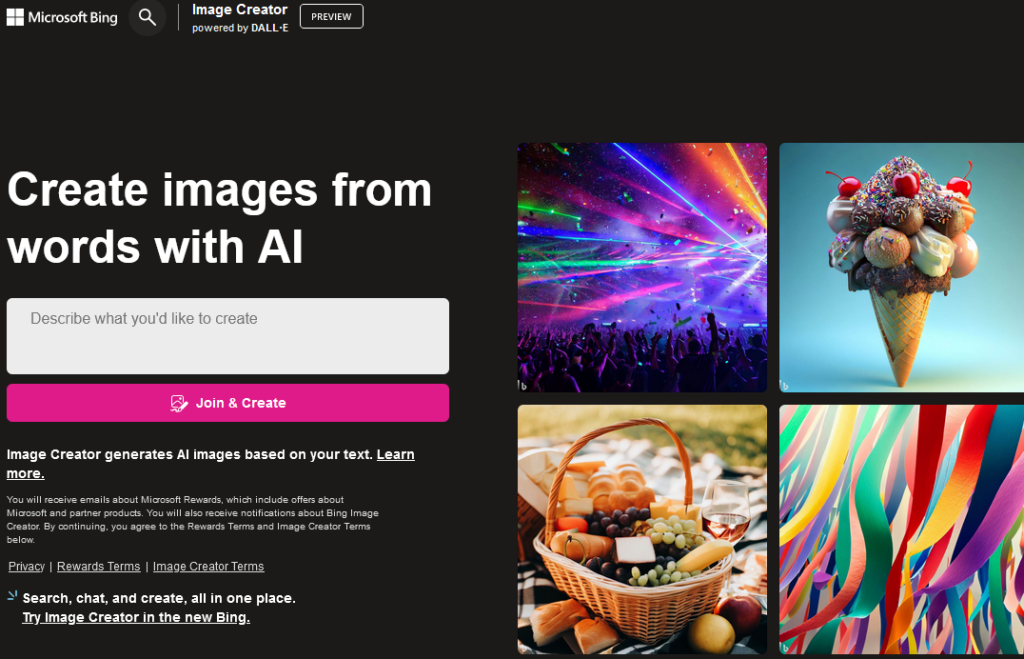
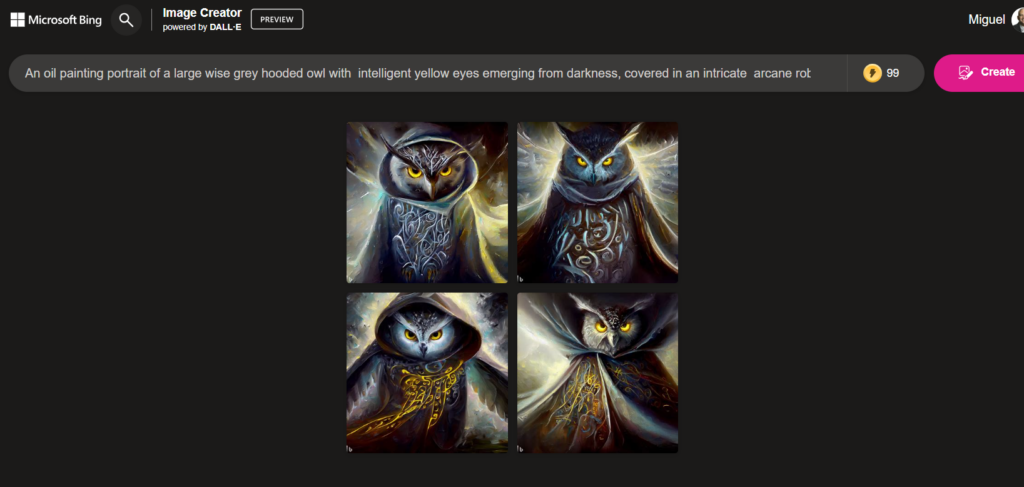
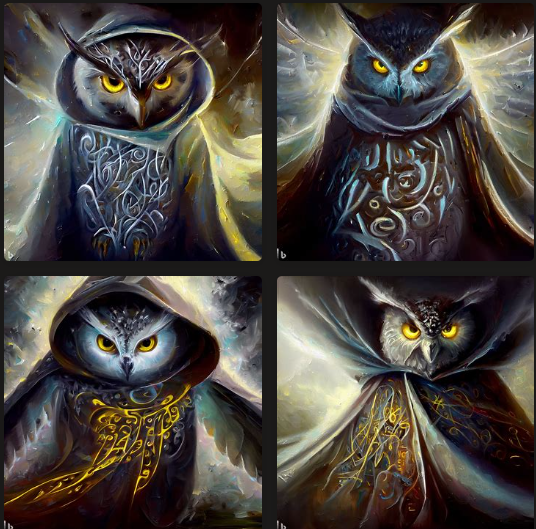
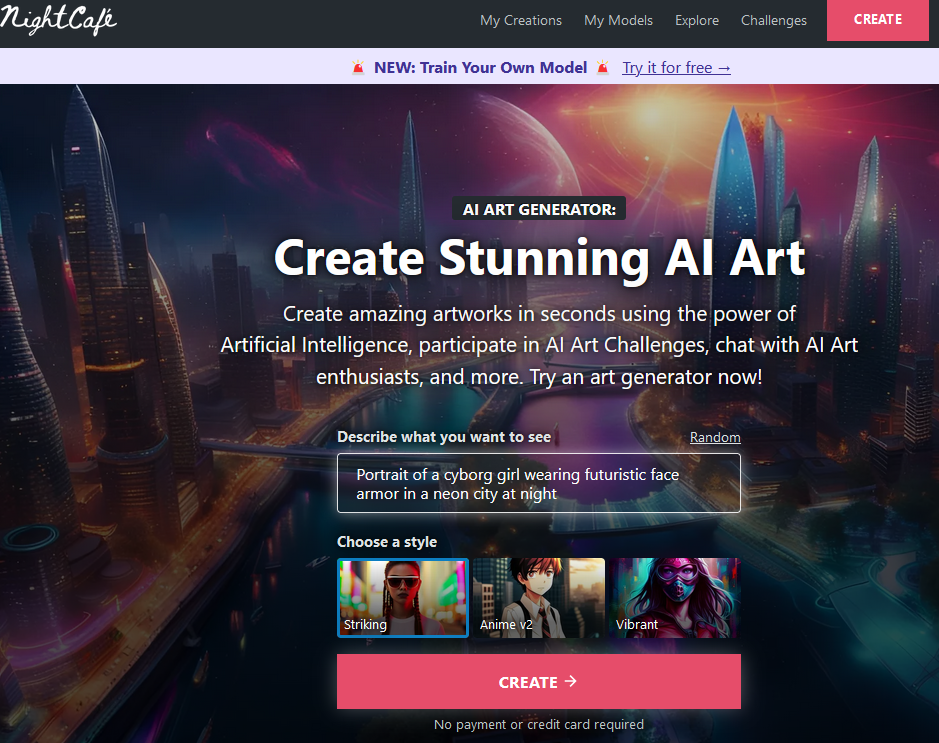
Microsoft Bing’s Image Creator has been my go-to for AI art based on text prompts. It relies on DALL-E to do the heavy lifting. It’s also easy to use, and it’s fast. While previous AI art creators took up to two to three minutes, Bing Image Creator generates in seconds.
This lightning-fast AI art generator offers one image in response to the prompt. You can see they have a simple interface that lets you get started quick:
Screenshot by the author: NightCafe Home Page
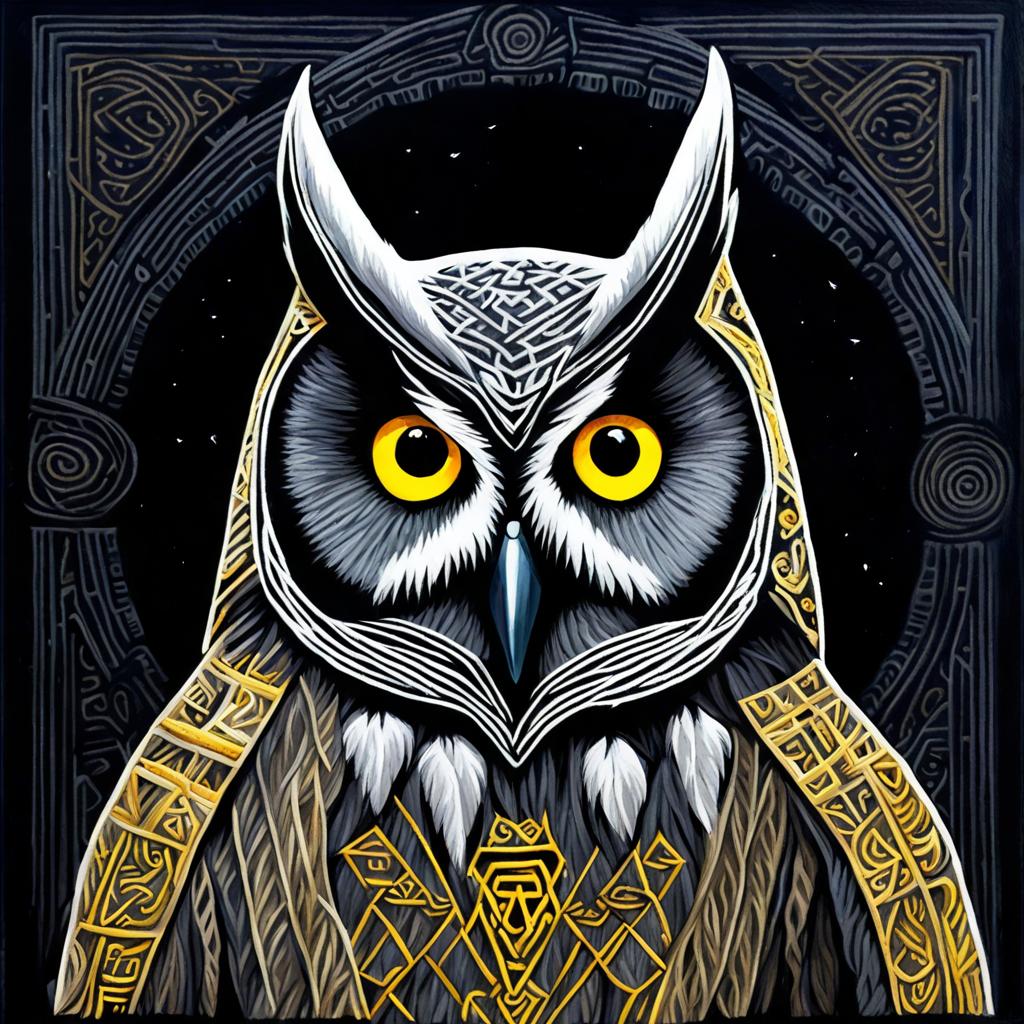
Here’s their stunning creation:
But Wait, There are TWO More!
#6 – Canva Magic Studio
If you’ve read about Canva Magic Studio, you know that it can’t be left out of the pack. It offers so much more capabilities for AI-powered art generation that rival all the tools shown above. Let’s take a quick tour of what’s possible.
Canva’s Magic Media, a tool in the Magic Studio and also known as “text to image,” offers the best image generation. You can choose from multiple styles. What’s more, Canva’s Magic Media generates FOUR images to the standard one or two that other apps render. Take a look:
You get over 400 credits that renew monthly, so you can generate a lot of images with Canva’s Magic Media. But it isn’t the only AI-art generator you get access to. Here are a few more creations from DALL*E, Google’s Imagen, and Mojo AI. Of these, Mojo AI provides 75 credits when you register for free, but expends 4 credits to generate two images. Of course, I found Mojo AI’s creations to be the best of the second bunch, but unable to match Canva’s Magic Media.
Here’s a video of the process I went through to generate these (about 8 minutes):
If you haven’t explored LEAP, you definitely need to give a hard look. While it only allows 10 free uses, the images appear realistic, like this one below:
Of course, you can also get an output like this one:
Assessing AI Art
Want to assess AI-generated art? Consider the points these authors make:
Assessing the artness of AI-generated images continues to be a challenge within the realm of image generation. Most existing metrics cannot be used to perform instance-level and reference-free artness evaluation.
Source: Chen, An, Lyu, Luo, Learning to Evaluate the Artness of AI-generated Images via ArXiv
Another important consideration? Copyright. Did you see the ruling from DC District Court Judge Beryl A. Howell? Judge Howell ruled:
United States District Court Judge Beryl A. Howell ruled on Friday that AI-generated artwork can’t be copyrighted, as noted by The Hollywood Reporter. She was presiding over a lawsuit against the US Copyright Office
Copyright law has “never stretched so far” to “protect works generated by new forms of technology operating absent any guiding human hand,” U.S. District Judge Beryl Howell found.
How do you propose to address the use of AI art in your classroom or workplace?
These AI art generators are terrific, and there are even more out there. As you might imagine, these are a boon to any student author looking for a quick cover for a book or publication. You can easily combine images like this with others to get incredible results. These tools are especially attractive to writers who can’t draw well. Which one do you plan to try first?
Featured Image: Owl generated from author’s prompt using Microsoft Bing Image creator
Are you a gifted artist? Or more a wannabe like me? Often when I stare at a blank canvas, it evokes a happy face or stick figures. In a flash, I imagine myself painting a Rembrandt or Picasso, then remember I don’t have a clue how. That’s where tools like Sketch.io come to the rescue.
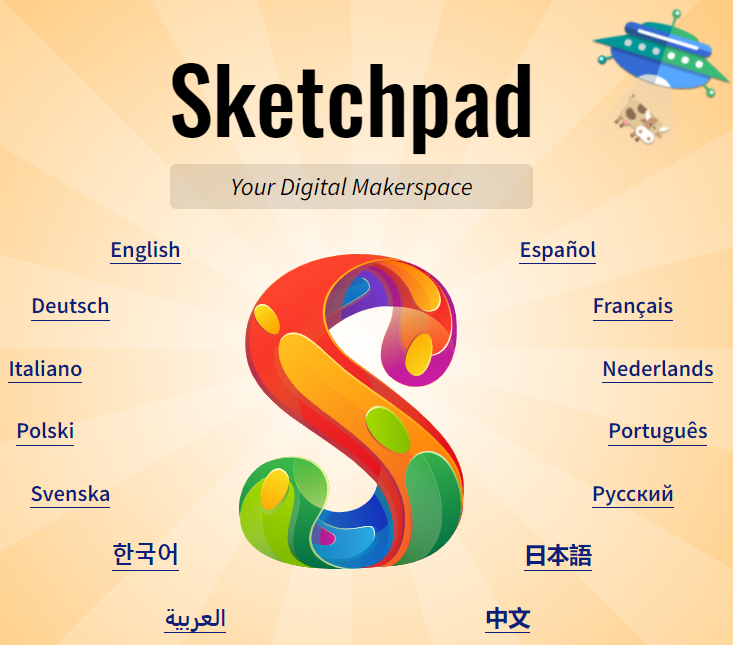
What Is Sketchpad?
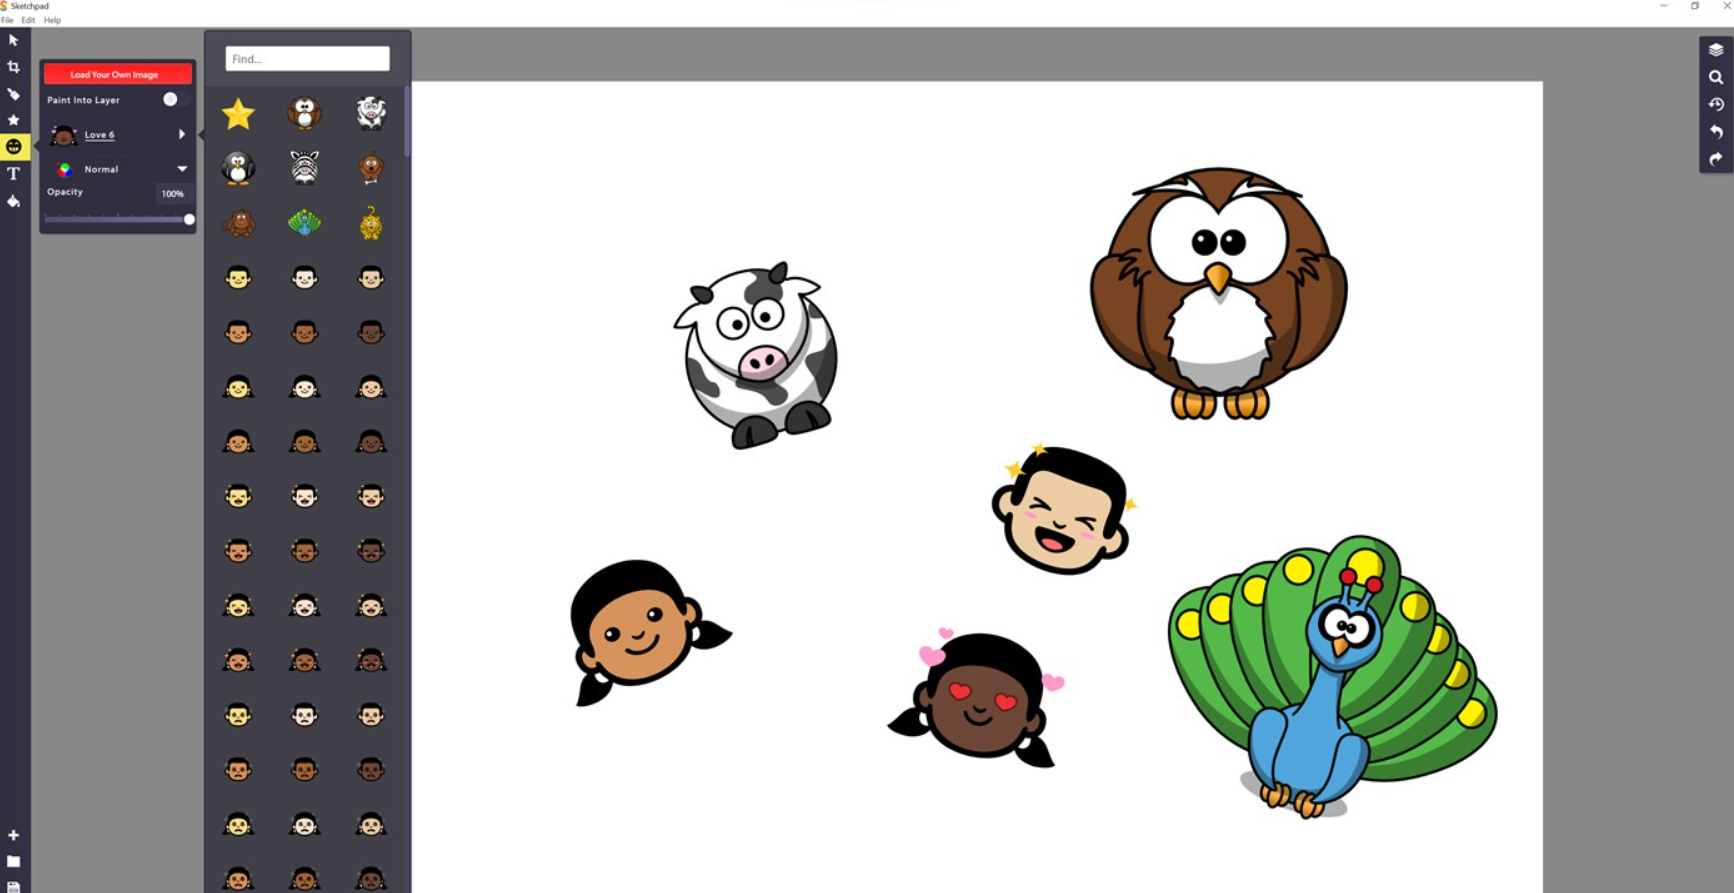
Sketchpad is a drawing, photo-editing tool that you can use to paint or enhance images. It has a wealth of built-in features you can explore and play with to create detailed line art. Visit the Sketch.io main site, and you get a multi-lingual option. That’s right, you can use this tool in your native language.
Screenshot by author
In addition to working in multiple languages, Sketchpad is a beautiful drawing and paint tool. It makes combining images and text easy and fun.
How Does Sketchpad Work?
Sketch.iooffers Sketchpad. As the name implies, there are an unlimited number of blank pages that you can fill with endless color. Billing itself as a digital makerspace, you can use it for free online. If you want to use it as an app on your Windows device, Sketchpad Premium will cost you $4.99. More on that in a moment.
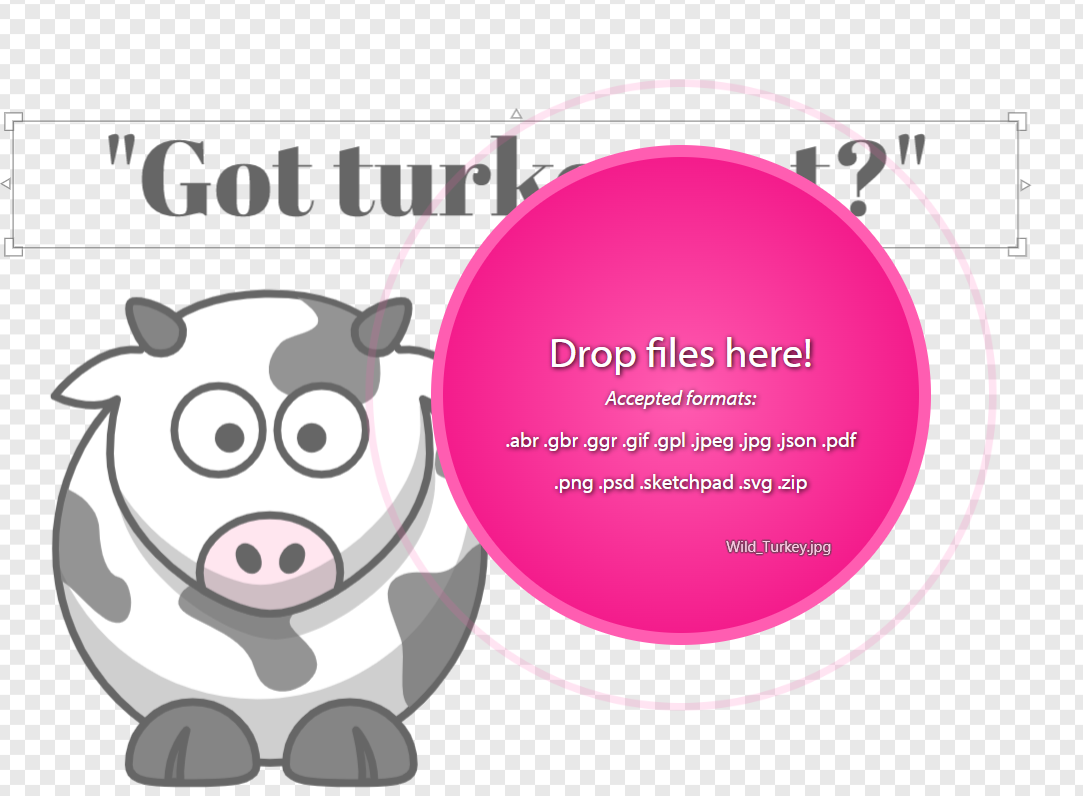
This tool includes layers, clipart, and more. Spend a few minutes exploring, and you’ll be creating masterpieces like this one:
Screenshot by author
What’s more, you can export your creations in a variety of formats, such as JPG, PNG, PDF, and SVG. You can also grab a region of the screen and print or share your creation with a link. Adding images is a cinch, and you can have a fun design put together fast. Since it’s browser-friendly, Chromebook users will love this web editor.
Screenshot by author
What Comes in Sketchpad Premium?
The Sketchpad Premium version offers the following to assist your creativity:
18 brushes, including high quality stamps, line, and path tools to trace images
5,000+ images, including open source and vector images that you can use for professional and commercial work
The ability to add your own vector or raster images by dragging and dropping
14 shapes that you can customize and add colors, gradients, and patterns to
Coloring inside of shapes
More than 800 fonts from Google’s font library. You can add fill and outline options to fonts with colors, gradients, and patterns.
If you are on a Windows computer, you may find getting the application worthwhile.
Screenshot by author
So What?
Sketchpad makes it easy to draw free hand or do amazing things with fonts and images. The fact that you can layer content and add stamps to the collection from your own images makes Sketchpad a winner. This is quite a powerful tool available for free to staff and students. What’s more, students don’t have to create an account to login; they can just start working right away.
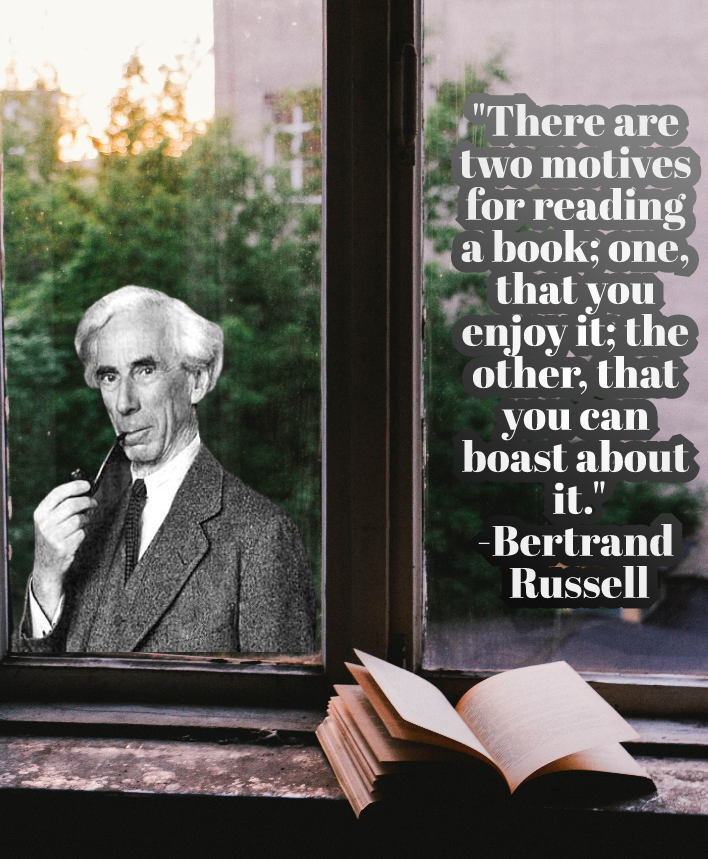
Give Sketchpad a swipe and let me know what you think. In the meantime, I’ll leave you with this Sketchpad creation featuring a quote from Bertrand Russell:
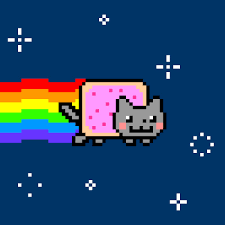
You may have heard the buzz about NFTs recently and been wondering what they are. If so, you aren’t alone. Recently, the Nyan Cat NFT image below sold for approximately $580,000. (Yes, you read that right!) So what’s the big deal about NFTs and do they have any connection to education?
What’s an NFT?
Wikipedia defines an NFT (Non-Fungible Token) as “a unit of data stored on a digital ledger, called a blockchain, that certifies a digital asset to be unique and therefore not interchangeable” (source). Unlike crypto-currencies, like Bitcoin, NFTs are, by definition, not “fungible,” meaning that each one is unique and not interchangeable with any other (one Bitcoin is the same as another one, making it fungible). The key takeaways about NFTs are that they are digital (electronic only; can’t physically hold them) and that they are licensable.
They are also very big business right now. The NFT market value tripled in 2020, reaching more than $250 million in sales. And during the first quarter of this year, NFT sales exceeded $2 billion. In May, people were buying and selling an estimated 85,787 NFTs—at a total value of $5.8 million—a day, according to application tracking firm DappRadar. That’s in spite of the fact that the owner of an NFT does not own the copyright to the item; that remains with the creator, who can go on to sell it again and again if he so desires.
What Kinds of Things Are Sold as NFTs?
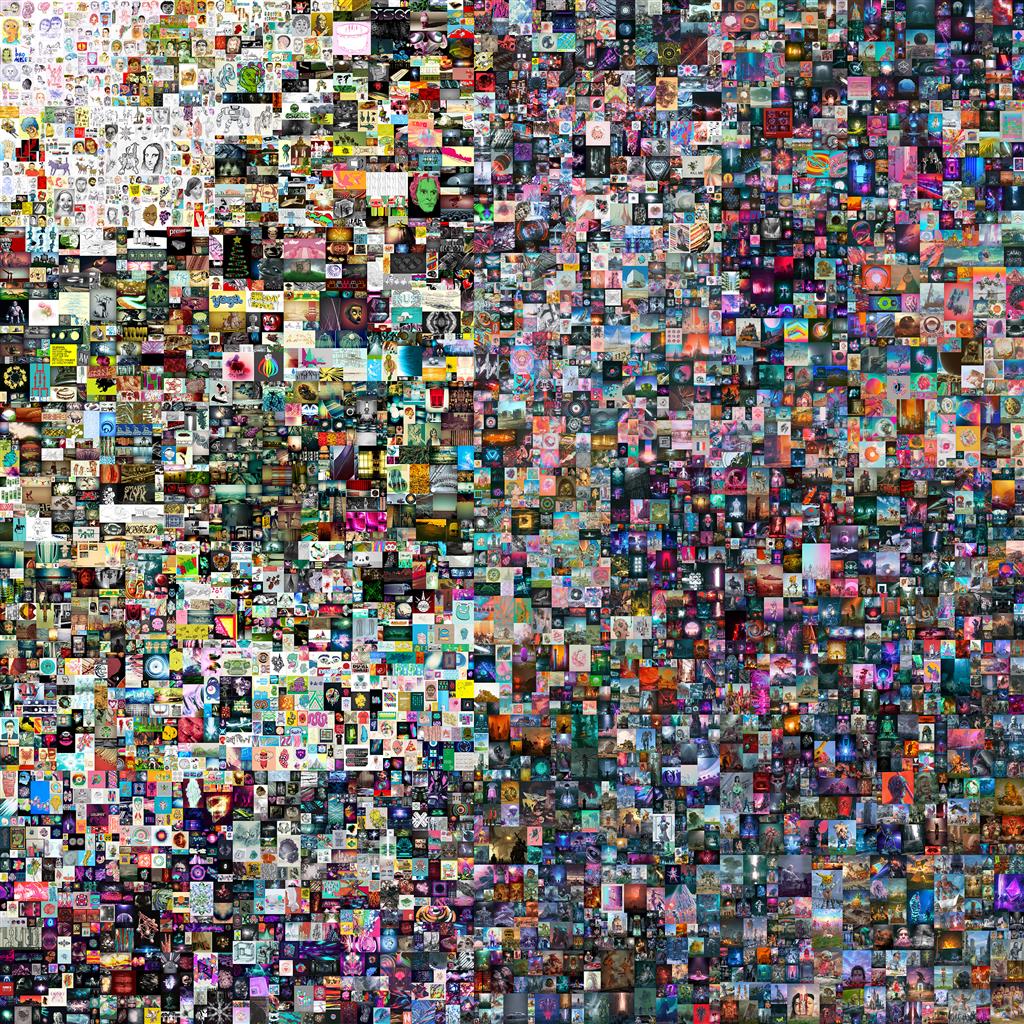
Technically, anything digital can be sold as an NFT. The market started with the sale of digital art. “For example, “the digital artwork entitled ‘Everydays – The First 5000 Days’ (above) by artist Mike Winkelmann, also known as Beeple, sold for $69.3 million in 2021″ (source). This made it the third-highest auction price achieved for a living artist. Then the market moved on to include collectibles, games, music, film, and fashion. Recently, a game called CryptoKitties was introduced that allowed users to trade and sell virtual kittens like the one below that sold for … wait for it … $172,000.
How NFTs Might Be Relevant to Our Students
It is clear that NFTs are currently a speculative market primarily for investors. But do they have a long-term future for others? Tech expert and art collector John Dodelande believes so. He says that ““NFT is not a ‘fad’ or a passing trend. It will continue to prosper, complimenting the art market rather than disrupting it.”
So what might that mean for our students? Well, if they have any artistic talent at all (and I do mean any), they may be able to sell their works digitally as NFTs and make a very nice profit. In addition, the ability to digitally store and track art work back to the original creator has some merit. NFTs also create opportunities for new business models that didn’t exist before such as new art platforms and enhanced media and special perks for music fans.
But there could be more. “The potential of NFTs goes much further because they completely change the rules of ownership. Transactions in which ownership of something changes hands have usually depended on layers of middlemen to establish trust in the transaction, exchange contracts, and ensure that money changes hands” (source). But that’s not necessary with transactions recorded on blockchain.
Whatever its future, NFTs provide a new way to think about art, ownership, copyright, and the safe sale of items.
Walk through a paper bookstore and you’ll find a huge section dedicated to graphic novels. Like many children of yesteryear, I grew up reading comic books. Everything from Avengers to Superman and Batman came alive as I sat on the floor of the Army Post Exchange (PX).
Today, that experience is less common. Comic books, as well as graphic novels, remain of interest to all. Whether at home or in the classroom, students themselves can create content-specific graphic novels. In this blog entry, we’ll explore a bit about the background and research, as well as how to make them.
John Hattie points out that imagery is a part of surface learning. Surface learning “includes subject matter vocabulary, the content of the lesson” (source). Imagery (d=0.51), as a surface learning strategy, involves the presence of visual content. That’s important due to the Modality Effect:
The modality effect refers to how learner performance depends on the presentation mode. Improve learning when you present textual information in enhanced mode. That is, when text includes auditory format, and/or visual materials. Visual materials could include a graph, diagram, or animation.Source:Visible Learning Meta X database
Comics and graphic novels take advantage of the dual processing of information. Both the text and visual imagery combine to speed processing of information. Also, consider how you can use comics and graphic novels for second language instruction; here are a few:
Learning opportunities abound with graphic novels, so why not give them a shot?
Why Graphic Novels?
Graphic novels, like comics, combine imagery with text. Some refer to graphic novels and comics as “visual narratives.” Reading and analyzing graphic novels adds depth and complexity.
With graphic novels, students use text and images to make inferences. They also synthesize information. In this form of literature, the images and the text are of equal importance. The text would not make sense without the images, and the reverse is true as well. (Source: Leslie Morrison, Adapted from The Research Behind Graphic Novels and Young Learners)
As Leslie points out, there is inferencing and synthesizing going on. Tracy Edmunds says:
Graphic texts are complex, effective teaching tools. Readers must receive information. They also must interact with both text and images to construct meaning.
Josh Elder captures this perspective in The Case for Comics in the Classroom. Engagement occurs in comics since comics show only the essential actions. Readers have to “read between the lines of each panel of even the simplest comic.” If not, the comic does not reveal its story well.
Creating Comics and Graphic Novels
There are definitely benefits to analyzing and reading comics and graphic novels. But what about making them?
Creating graphic novels and comics can be tough work. You can see how one comic gets created. Let’s explore some quick, inexpensive tools you can use:
Approach 1: Google Slides or PowerPoint
In chatting with Lisa Cupples, a TCEA Online Course Creator, she shared what tools she uses. As you might imagine, one that is a favorite is Google Slides. “We all have access to it, including the students.”
Here are a few video tutorials on making comics with Google Slides:
Amanda Werner’s Tutorial. Learn how to change slide size, find and crop pictures, and insert speech and thought bubbles. You also will learn to change the background of slides and then print six slides per page. At the end, you have a comic strip.
Richard Byrne’s Tutorial. Create a three-panel comic strip in Google Slides, pulling in images from other locations.
Erifili Davis’ Tutorial. Learn how to create a comic strip on a smartphone using the Google Slides app.
Familiar with Bitmoji? You can use Bitmoji characters to create a comic strip, then drop them into Google Slides. You can create panels for your comic or graphic novel in Google Slides. Then fill them with Bitmoji scenes.
Prefer PowerPoint to Google Slides? This video walks you through some amazing options:
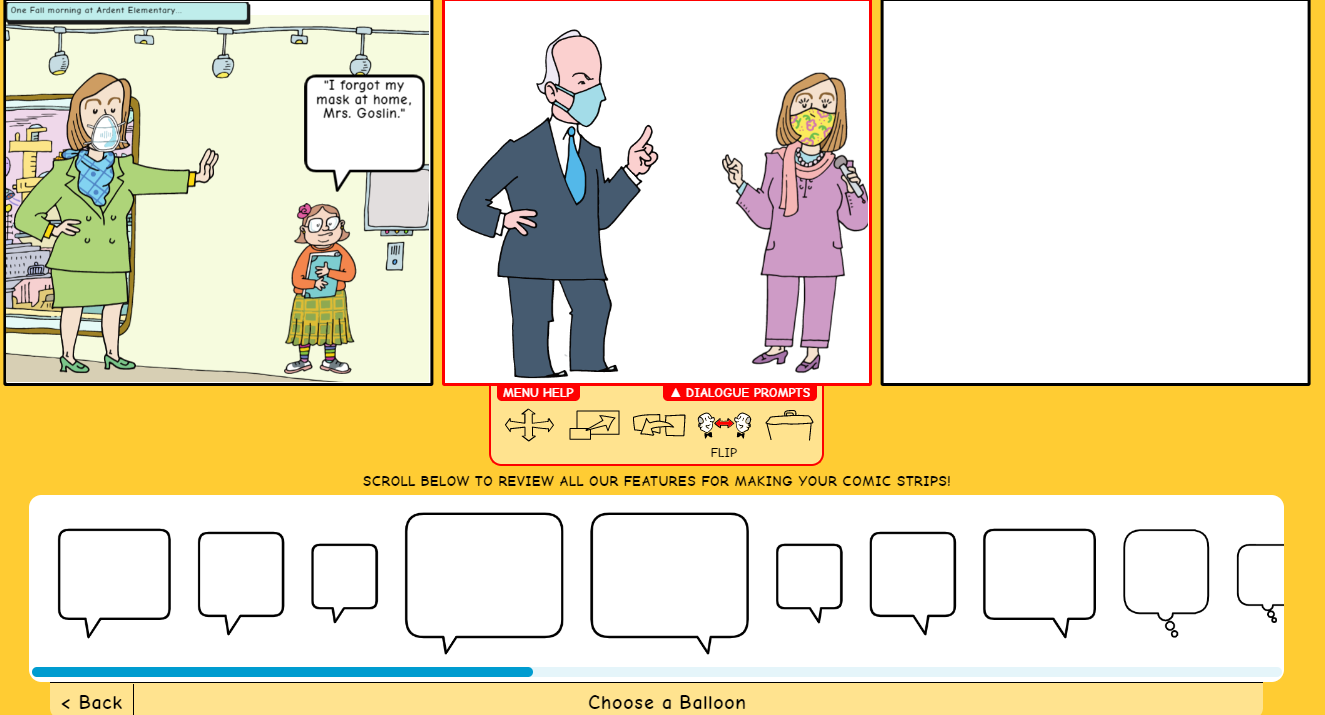
Approach 2: Make Beliefs Comix
The Make Beliefs Comix allows you to work via a web browser. You can create an account with your Google login. This easy-to-use comic strip maker offers limited features. That said, there’s a lot you can do with what it does offer. You can see the composition window below:
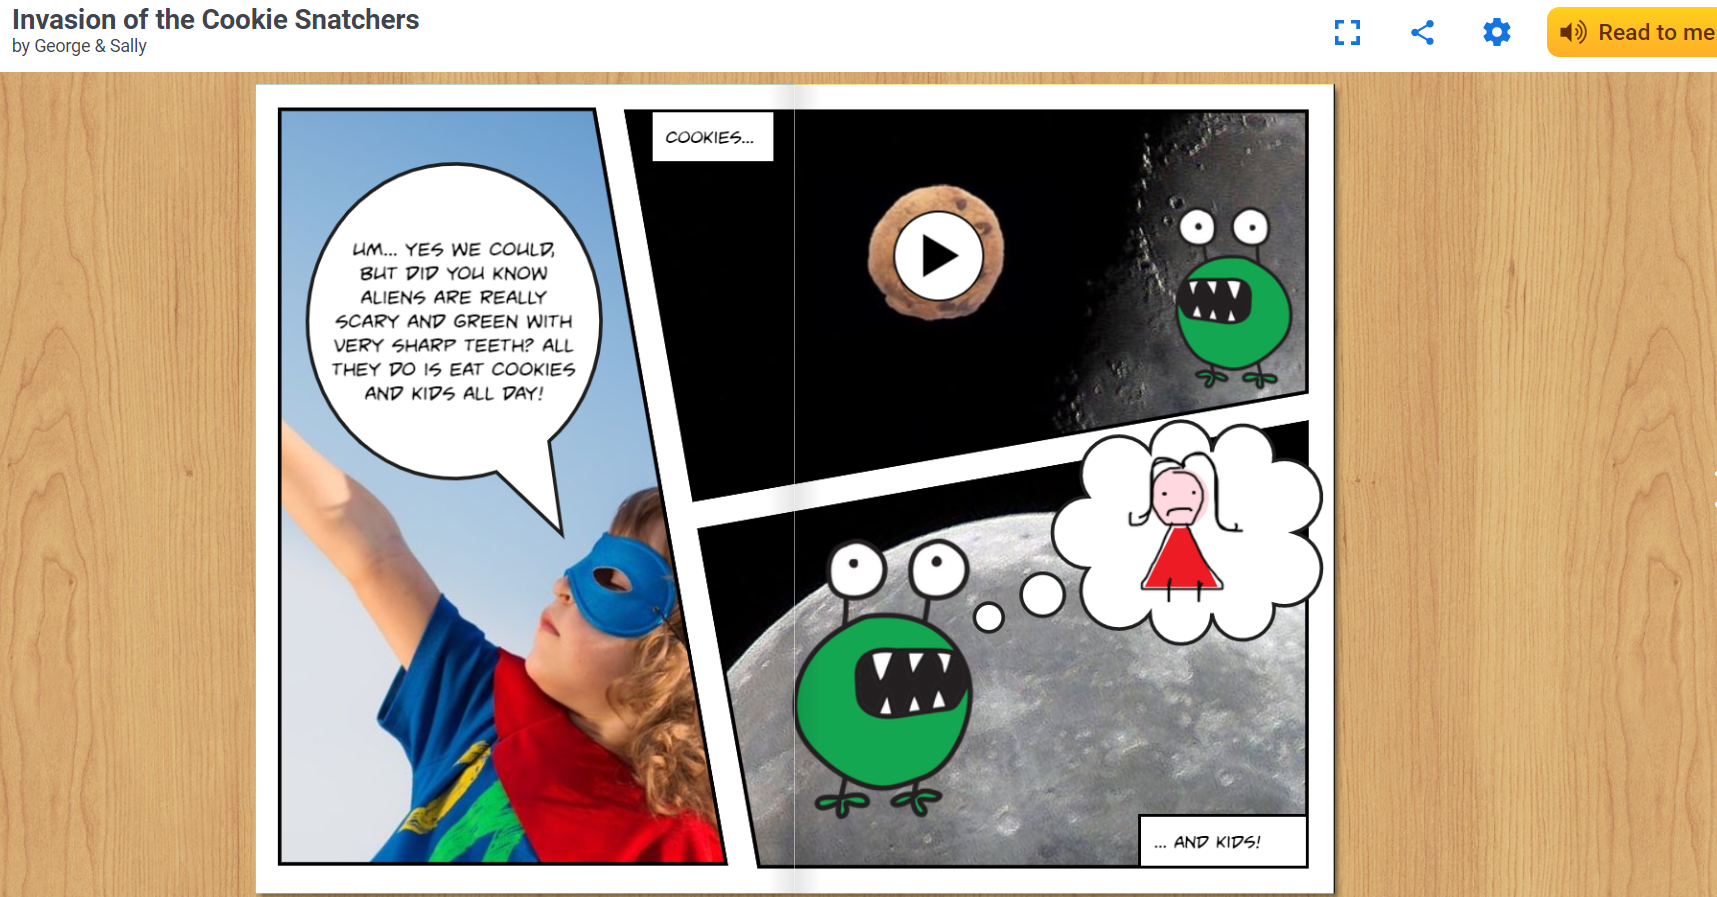
Approach 3: Book Creator
No list of comic book creator software would be complete without Book Creator. You can easily combine text, images, and audio to create comic books and graphic novellas. This program is a joy to use via a web browser or an iPad. And making comic books is easy for children of any age. Consider this page from the Invasion of the Cookie Snatchers. As you may not be able to see it, there is video embedded in the “Cookies…” panel.
If you thought creating comic books and graphic novel content was a waste of time, think again. These creative activities offer powerful learning possibilities for inferencing and synthesizing.
Looking to learn more? Check out these episodes of TCEA’s podcast, the Ed Tech Club:
Howdy, folks! Welcome to another in a series of periodic ed tech news roundups. We hope you enjoy this one, and if you have a story you’d like to see included, let us know.
Big Ideas Around Remote Learning
Remote education has shaken up much of the routine of schooling. As with any time of sudden change, there’s plenty to reflect on. Here are some of the big ideas floating around the education industry as much of the US shelters in place.
The Brookings Institution reports on “school closures, government responses, and learning inequality around the world during COVID-19.” [Brookings]
New York magazine’s The Cut profiles the changes and challenges in the life of New York City English teacher Samantha Elkaim. [The Cut]
EdSurge editor Jeffrey R. Young offers advice to newly-remote teachers. [EdSurge]
Also from EdSurge: The three biggest problems in remote teaching. [EdSurge]
Remote teaching can also highlight disparities, according to The Atlantic. [The Atlantic]
In higher education, some are looking into the long-term effects of teaching and learning at a distance. [Inside Higher Ed]
Hands-on, at a Distance
Many elective courses, like fine arts and physical education, are facing the challenges of instruction and teaching without face-to-face interactions, as are some academic areas like science labs.
Former university president Michael T. Nietzel discusses how students are looking to “the finer things in life”—art, music, and nature—during lockdown. [Forbes]
Even academic subjects, like many sciences, have to adapt to instruction without hands-on learning. [Nature]
For those courses and subjects that might feel constrained by remote learning, however, there is some hope in the form of novel and creative ways of remote teaching. [Inside Higher Ed]
Attendance Issues
The switch to remote teaching has left some school districts struggling to ensure students not only have time and access to remote learning, but also figuring out how to make sure students show up, even when school is on a screen.
San Antonio ISD has found that, in the first week of teaching remotely, “more than 19 percent of them had not completed online work, responded to inquiries either online or by phone, or picked up devices at schools.” [Express-News]
Meanwhile, two weeks into Austin’s remote teaching experience, AISD states that “more than half of the students who told the district that they needed a Chromebook gave a different address than the one they have in the district’s system.” [American-Statesman]
Student Voice
And how are students reacting to this new world of online learning? Some new outlets are digging in.
The New York Times dives into a discussion with students about their reflections on the current changes to their education. [The New York Times]
In California, a review of student and teacher responses shows an array of experiences. [EdSource]
Learning Hubs
Don’t forget, many apps, companies, and organizations (including TCEA) are putting together remote learning resources on easy-to-access hub pages. Here are a few worth checking out, if you haven’t already.
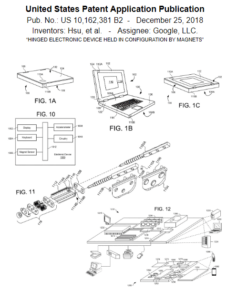
You may not think of patent illustrations as a way to connect students to content they are learning. But they might actually help some of your students who otherwise might not be interested in STEM. Accurate and detailed illustrations of inventions are critical in the application of a quality patent. As STEM educators, we already promote students thinking of themselves as inventors, creators, and designers, but you may have students who are reluctant to claim one of these three labels for a variety of reasons. These students may include those that consider themselves more artistic and drawn to doodling (pun intended) than those students who seem to excel in science or mathematics. Using patent illustrations is a great hook to include those students. It can also help you expand your STEM offerings to become STEAM (science, technology, engineering, ART, and mathematics) focused. Before we jump in to locating patent illustrations/art online and ways for students to create their own patent art, let’s have a quick history lesson.
History Lesson on Patents
The first patent in the United States was issued on July 31, 1790 to Samuel Hopkins for his improvement on the process of making potash as used in fertilizers. Since then, over ten million patents have been issued. The United States Patent and Trademark Office (USPTO) issues patents to inventors and businesses for their inventions and exists in order to maintain the objective outlined in the United States Constitution in Article 1, Section 8: “To promote the Progress of Science and useful Arts, by securing for limited Times to Authors and Inventors the exclusive Right to their respective Writings and Discoveries.” Inventors apply for a utility patent which protects the unauthorized use and sale of their invention for typically 20 years after the application date. Many utility patents include schematics or drawings to help illustrate the unique design of the invention.
Finding Patent Illustrations Online
Finding patent illustrations online can be easy and complicated at the same time. For example, if I want to find patent diagrams for an iPhone, the logical idea would be to search for iPhone in the patent title. If I use USPTO’s search engine, I only end up with five results (projector housing for IPhone, IPhone separate clip mobile power supply, IPhone slide rail with a mobile power supply, and Computer display with an iPhone window). When I look at the images associated with each, I find that they are rather boring. If I use Google’s patent search engine, then I end up with 43,600 hits – um, that’s a few more than I want to investigate to find a cool graphic for my classroom. So how do I get better search results that are more relevant and meaningful? Here are three strategies:
Strategy 1: USPTO’s Full-Text and Image Database
Begin by going to http://patft.uspto.gov and clicking on the Quick Search link. Here we can use two terms to search. A term can be a single word, a date, an inventor’s name, or a phrase. For each term, we can restrict the field to search. Instead of using “iPhone,” which was too limiting, let’s see what we find when we search for “smart phone” in the title field. Here we find 241 patents…some of which are clearly not what we are interested in (example: smart phone screen cleaning pad, security and surveillance system based on smart phone devices, etc.). Let’s take a look at number 226 – “Smart phone with lens.”
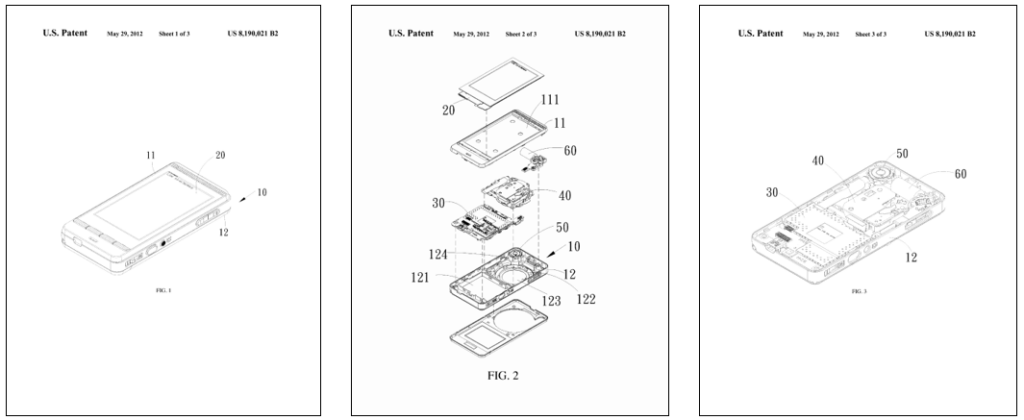
From here we can see that it is United States Patent number 8,190,021 which was issued on May 29, 2012. Scrolling down this page, we find out more information about the invention. We find that several figures are referenced in the summary section, so scroll to the top or bottom of the page and click on the “Images” link to view the illustrations (and other information) on this specific patent from the image database. Here you can download the document (right-click -> Save as…). To navigate to different sections, use the gold navigational arrows on the left-hand side or click on the “Drawings” section link to jump to the first drawing. We can now scroll through and see the three illustrations that are provided.
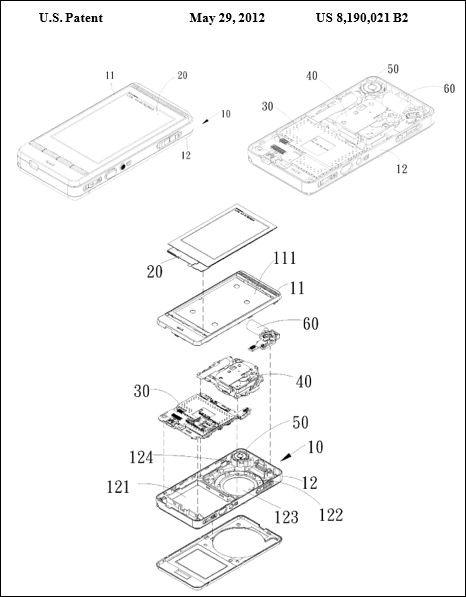
If we want to combine this into one page, we can create a Google Doc or Microsoft Word file and take several screenshots of the different pages and paste them on the destination page. With just a little tweaking, we can come up with a final product to display that looks like this.
Strategy 2: Using Google’s Patent Search Engine
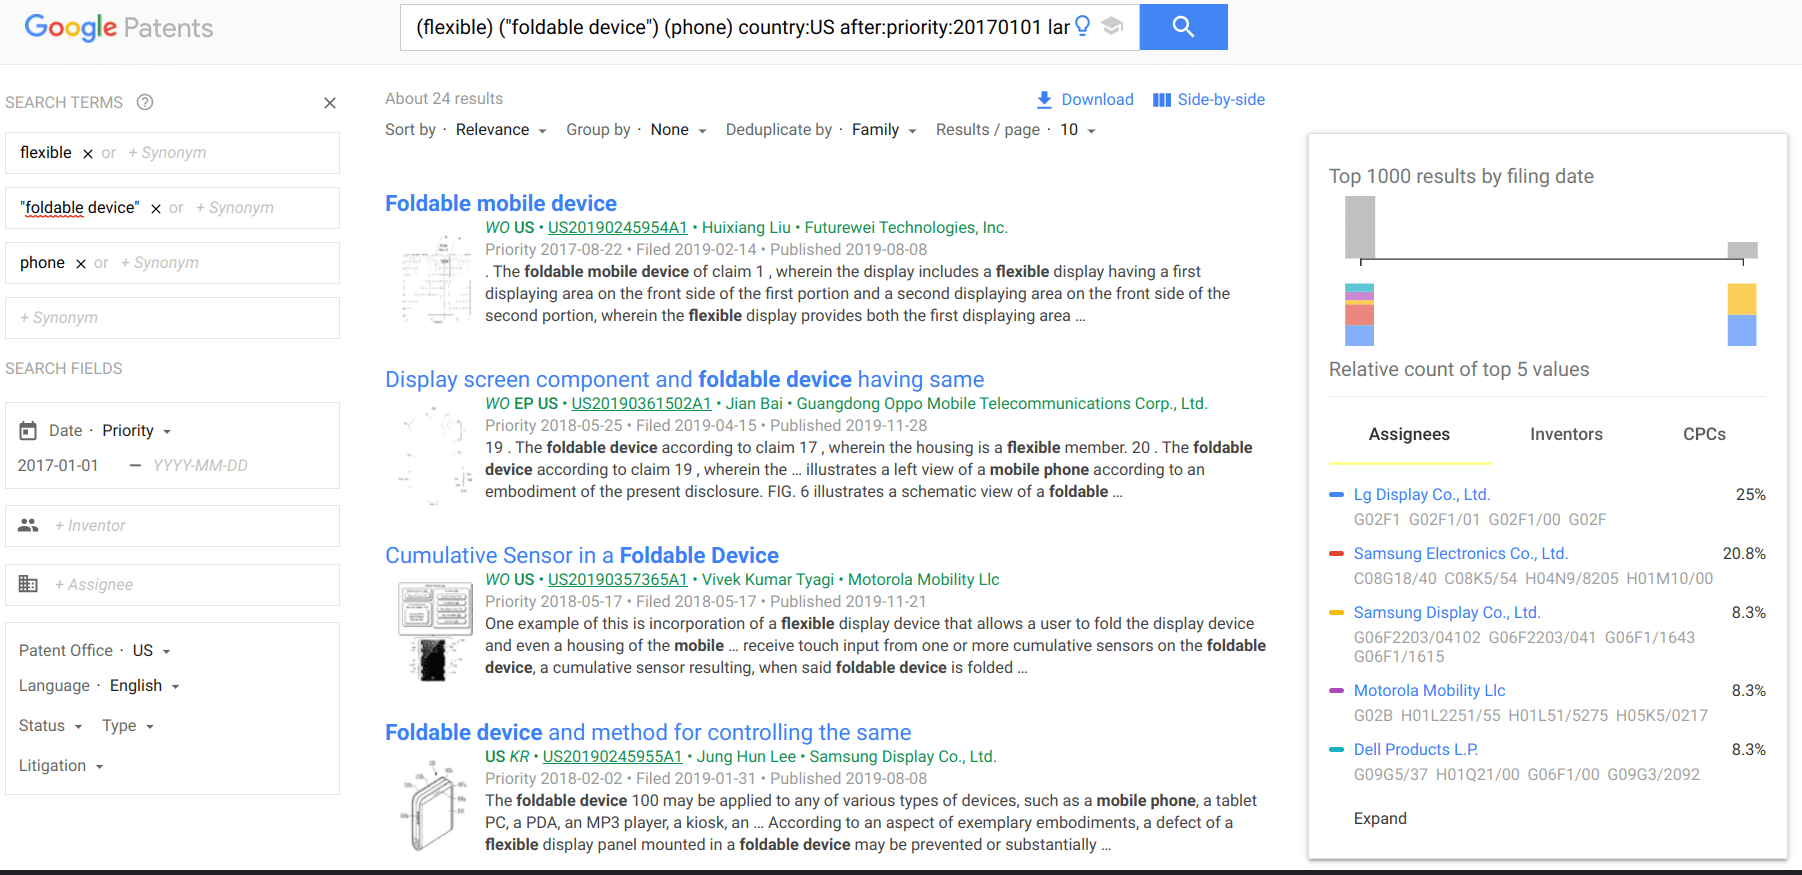
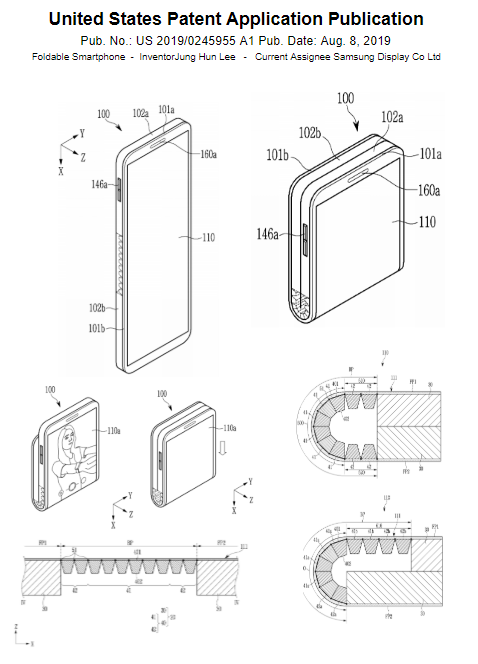
Begin by going to https://patents.google.com. Initially, we’ll use it as we would when we search Google. Because there has been a lot of talk this past year about foldable displays on smart phones, let’s see what we can find. Begin by searching for these three words – flexible, “foldable device”, phone. Be sure to put quotes around foldable and device since you want foldable device to be a single search term. When you have that typed in, hit the Enter key. Let’s narrow our results down by doing the following:
Enter 2017-01-01 as the beginning date (meaning we want any patents that have been filed AFTER January 1, 2017).
On the side of the search results page, a graph has been provided showing percentage of search results for Assignees, Inventors, and CPCs. You can use that list to also narrow your results. Click on Samsung Display Co., Ltd. and notice that our results have dropped to two. Click on Foldable device and method for controlling the same to review the information of that patent filed by Samsung. If you scroll left-right on the image thumbnails, you can see that this document has several good images that will work well for illustrations in our classroom. Yeah! To get the full size images though, you will need to click on the Download PDF link in the blue table. Tada! We now have the document with the images. You may (and probably will) find that these pages don’t look as interesting or as artful as you may want, so we’ll do as we did above and screenshot the images we want and piece them together to make the single page patent art that we want. When done, we should end up with something like this.
Strategy 3: Let Others Do the Work for You
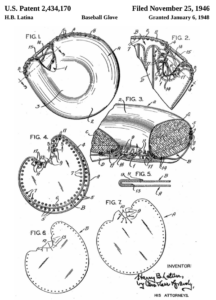
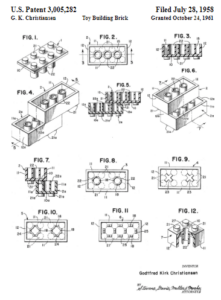
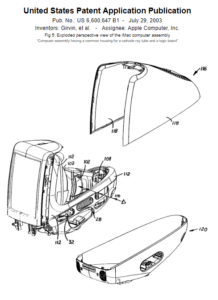
What?! You might be asking yourself if you read that correctly. Yep, you did. Let others do the work for you by finding the patent numbers of items that are interesting to you. The downside here is that you are limited to what others have found and shared. Plus, you can’t just take their work. You may find several folks who have done as I did above and took various images from different pages and then compiled them onto a single page…thus making patent art from patent illustrations. You can, however, make note of the information they have (patent number, inventor name, published date, etc.) so that you can more easily look up the patents for yourself. If you do an image search for patents, you will find many locations willing to sell you a fine print of patent illustrations. Some have been made to look more blueprint-ish by printing them in blue and white while others want to express a vintage look so they are offered on a tan or burnished paper. Regardless of the image, see if you can locate some identifying information that will help you search in one of the two (or both) of the databases previously covered.
How to Use Patent Illustrations/Art in Your STEAM Classroom
Your students may have not encountered patent illustrations or even realized that for something to be patented, it may need multiple, detailed drawings/illustrations. After looking at various patent illustrations, you quickly get the idea that there are lots of different f looks: simple, mechanical, or even almost-childish scribbles. Here are some suggestions for using patent illustrations or artwork in your class:
Identify things that your students enjoy and look for patent drawings that you can display as visual interest.
Consider adding a “Patent illustration” option to your choice boards or choice menus for students to demonstrate their understanding of a piece of equipment.
Make quasi-patent illustrations. These are real patent illustrations, but may be more like patent-like illustrations. They might be used, for example, when illustrating the parts of a cell, a cross-sectional view of a volcano, important objects of a story (and their value to the writing, mood, plot, etc.).
Have students sketch out patent drawings to go along with their inventions.
Work with the art teacher at your school to incorporate patent illustrations (or at least the concept) in their class and tie it to your content area.
What About Patent Copyright Issues?
Quoting from USPTO’s website, “Patents are published as part of the terms of granting the patent to the inventor. Subject to limited exceptions reflected in 37 CFR 1.71(d) & (e) and 1.84(s), the text and drawings of a patent are typically not subject to copyright restrictions. The inventors’ rights to exclude others from making, using, offering for sale, or selling the invention throughout the United States or importing the invention into the United States for a limited time is not compromised by the publication of the description of the invention. In other words, the fact that a patent’s description may have been published without copyright restrictions does not give you permission to manufacture or use the invention without permission from the inventor during the active life of the patent. ”
Freebie Patent Art for You
Here are a few patent art pieces that I put together to share with you. Feel free to print them out for your classroom or even possibly your home.
With the promotion of STEAM (Science, Technology, Engineering, Art, and Math), a lot of folks are looking to see how they can add relevant art components. It’s easy to think of how art and science or art and engineering fit together. It may take a little more effort to realize how art can be combined with math. Once you start looking, though, you’ll be amazed at how integral math is within art. If you are just getting started, consider researching Fibonacci’s sequence or the Greek’s golden rectangle. In this post, we’ll take a look at using low poly generators as an artistic means for math. Low poly has been around for decades in the computer industry. As early game designers needed a way to generate images (and later animation) that did not exceed the available memory, they found they could reduce the file size by reducing the amount of information contained in the picture itself. This was achieved by connecting a mesh of dots to form polygons that are filled with a single color. The most popular shape to use is a triangle. This method allowed designers to easily reduce an image to mathematical terms instead of every pixel having its own color. You may have noticed that even current gaming systems are making use of the retro look of low poly. News sites may apply a low poly filter when interviewing a witness that wants to remain anonymous so that their physical features are less likely to be identified.
Low Poly Generators
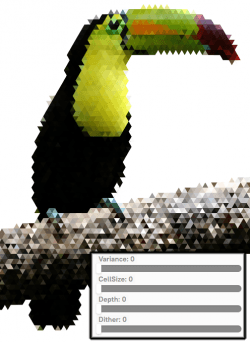
Low poly generators create create a mesh based on several factors, mainly how much variance do you want with the shape of the triangles (or other polygon shapes if you are not limited to just triangles) and how much variance you want with the size of the cells (triangles). A few will allow you to upload an image to use as a base, while others are strictly randomized and not based on a particular photo. A few terms to become aware of include the following:
Cellsize – Sometimes referred to as elements, this is a polygonal shape created (either based on a particular part of the photo or generated by the developers code). In the samples below, only the cellsize has been changed.
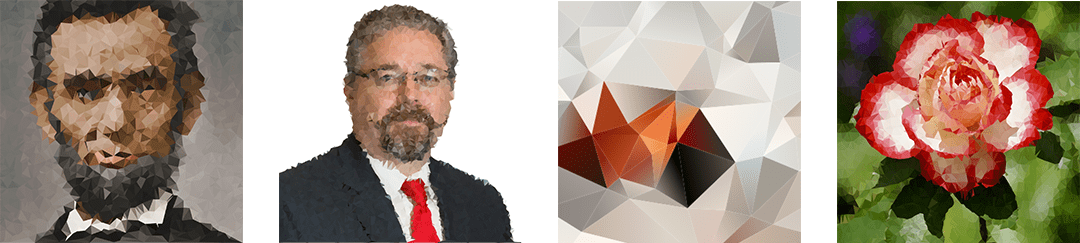
Variance – Sometimes referred to as randomness, this is how similar or different (in shape) each cell is to the other cells generated. If working with triangles, no variance will mean that they are all equilateral triangles. Increasing the variance will add some additional types of triangles (isosceles, right, etc.). The sample of the far left has no variance while the sample of the far right has the most variance.
Depth – how much shading is added to an adjacent cell to give the illusion of depth…as if it was an origami project that has three-dimensional properties. In the samples below, the square on the far left has no depth. The depth is increased in each of the other three samples with the far right sample having the most depth applied.
The online tool LowPoly Generator is rather intuitive. It does not require an account to use, allows you to use your own image if you prefer, and gives you the capability to download your work without a watermark applied over it. For the samples below, a photo of a toucan was used. The photo on the left is the original photo. The middle photo is a low poly version with variance set to 0 (no variance in the shapes) and cellsize set to 0 (all cells are the same size). An increase in variance and cellsize has been applied to the photo on the right.
Triangulation Experiment requires you to use a photo. It has a feature to take a photo with the tool (but didn’t work with my laptop), so I used the Open Image button to load an image. You can also import your own photos with a simple drag/drop of the photo onto the tool’s canvas area. When done altering the image with the various tools, you can download the image as a png or svg file. You can also easily share your creation via a link or out to social media.
HalftonePro Polygons allows you to choose what base cell shape you want to work with (triangles, right triangles, squares, or hexagons), though adding randomness (variance) to the image can distort the cells so they no longer resemble their original base. What I like most about this tool is that you can click on the color tab and choose for it to apply a stroke between cells. The downside of this tool is that it does require you to create an account if you want to upload your own photo; and, to save your work without a watermark, you will need to pay the $14.95 upgrade fee.
Trianglify.io is a simple low poly generator that only works with a selected color palette from their list or your own making; you are not able to import photos. Works well when you create your own color palette of just two colors.
Creating Your Own Low Poly Images
If you have a little more time, you can possibly use software you already have access to to create your low poly creations. You can find tutorials for such applications as Inkscape, Illustrator, and Photoshop. Using any of these tools allows you more freedom and creativity as well as control of your finished product. Even if you don’t have high-end illustration or paint applications, you can accomplish similar results using Google Drawings or Microsoft PowerPoint; after adding a photo to the layout, use the polyline tool to draw geometrical shapes over the object. Or, to be more creative, just create a low poly design with no background image as a guide!
Low Poly Art in Math
I really like the way that Halftone Pro will outline each shape. But without going pro, the watermark can be somewhat of a downer. If that doesn’t bother you, then consider using that tool. Or, if necessary, you can use a screen clipping tool to save your work as you incorporate low poly with math in the following ways.
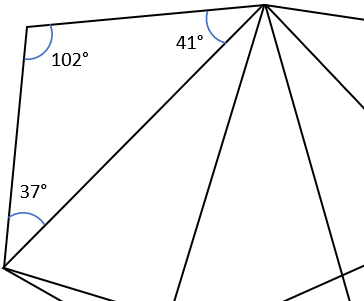
Identifying Angles – Because low poly can be made using only triangles, give students a page from the Low Poly Samples pdf file (link below) and have them identify whether each angle is a right, acute, or obtuse angle by writing r, a, or o in the angle respectively. For older students, have them use a protractor to identify the exact angle and have them write the measurement in each angle. Students can easily check their work by calculating the sum of the angles in the shape. The sum of the angles in a triangle will equal 180°, while the sum of the angles in a polygon with four or more sides is equal to 360°.
Identifying Types of Triangles – Given a low poly sheet made of all triangles, students identify each shape as equiangular, acute, right, obtuse, equilateral, isosceles, or scalene. If the page has triangles that go off the page, have students draw lines to create triangles using the edge of the page as one side. Have students assign a color to each of the answer options and color the shapes accordingly, which makes for quick self checking and grading.
Low Poly Animals – Provide animal shapes for students to use as patterns. Laying a sheet of blank paper over the pattern, students trace the image using only straight lines and fill the image in with line segments to create triangles, squares, pentagons, etc. but no curved lines. The image to the right is my work using this method.
Download the Low Poly Samples document to get started. You’ll find pre-made samples in black and white, as well as several choices with color. There are several options in regards to cell size and variance. Some samples are made of triangles only, while others incorporate a variety of polygon shapes. The last few pages of the document include several low poly animal shapes.
Taking It a Step Further
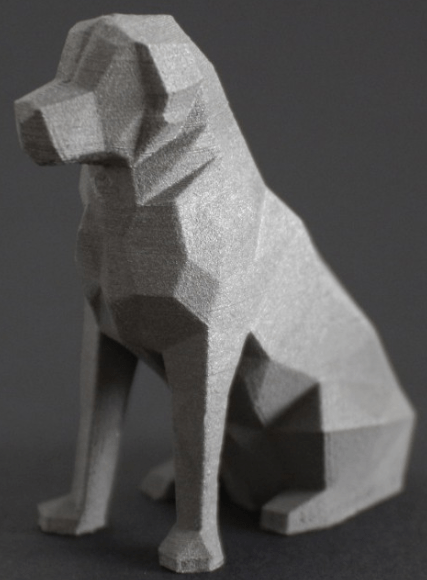
The sample ideas above will hopefully get you started in using low poly to connect art and math. Other skills to reinforce include perimeter and area. Take your learning further by transferring and extending your knowledge to 3D printing. Low poly shapes in 3D printing are those shapes that are more angular and not as refined. These shapes typically have smaller file sizes and can print faster. One may send a low poly stl file to be printed in order to check the printer’s calibration or to produce an initial prototype. Even if you don’t have a 3D printer, your students can still create in three dimensions using cardboard, paper, and tape.
How will you use low poly shapes in math, art, and technology? Will you explore artists in the cubism era or angular art? Will you have your students expand the learning to begin creating low poly objects to demonstrate various formulas or concepts? Share with us in the comments. We’d love to see how you are getting artsy with math and technology.
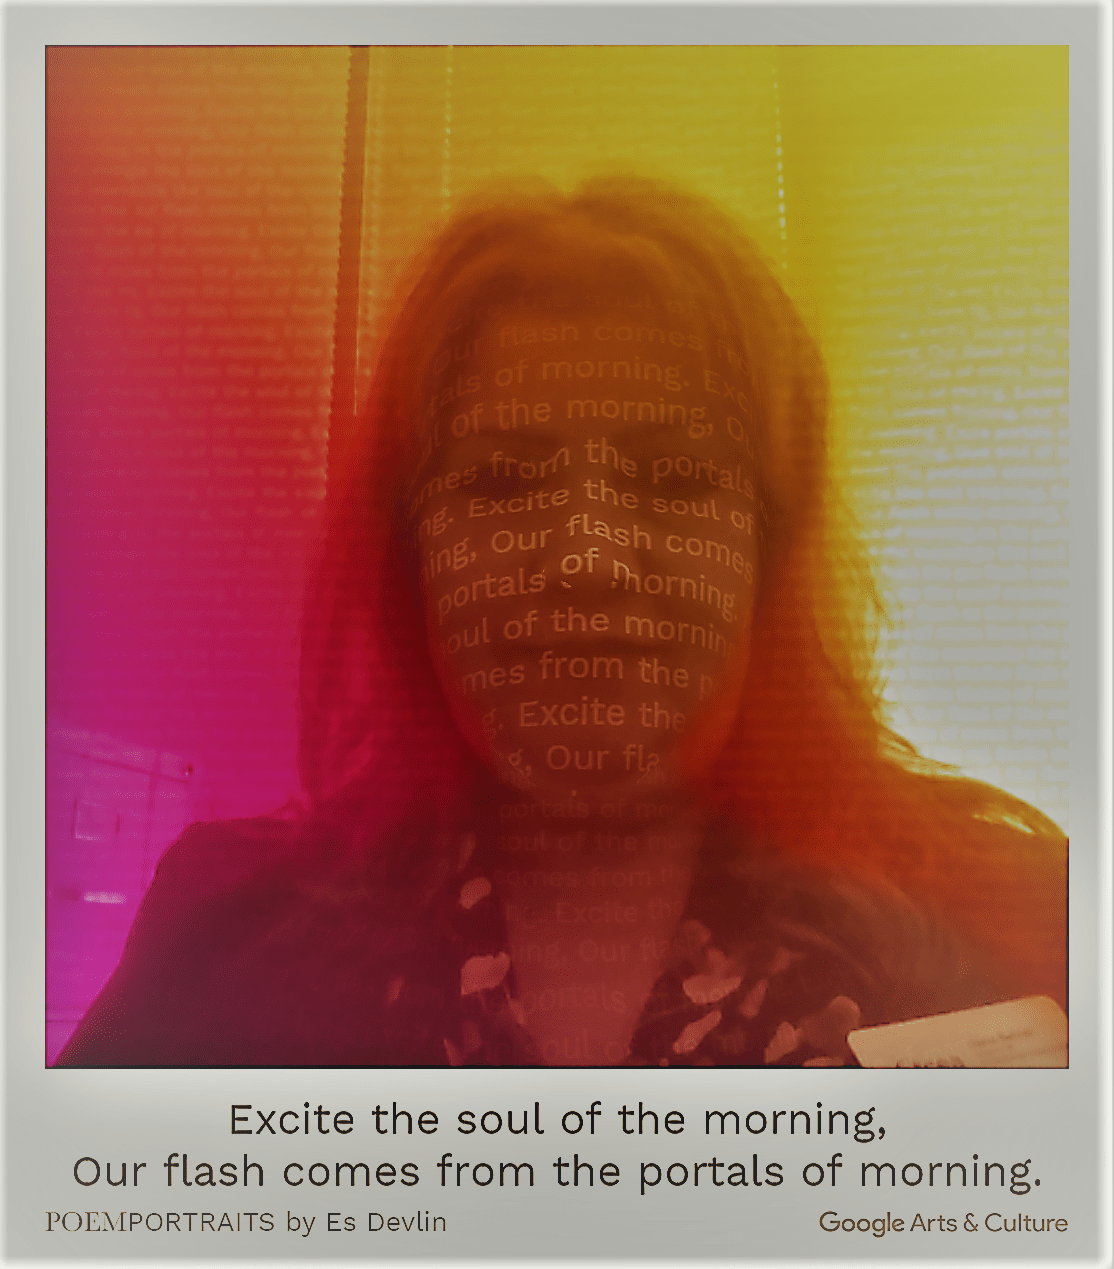
PoemPortraits is an online web application that takes a word of your suggestion and combines it with a selfie to create a poem portrait. It’s very much like an Instagram filter paired with a few lines of artificial intelligence-generated poetry. It’s fun, and it only takes a few minutes to create one.
PoemPortraits is a collaboration between Google’s Arts & Culture Lab, coder Ross Goodwin, and Es Devin, an artist. When you enter a word on the application, the algorithm looks for patterns by reading over 25 million words written by 19th century poets in order to generate a poem. It works like predictive text and doesn’t copy or rework existing phrases. As a result, the algorithm generates original phrases imitating the style of what it has been trained on.
Click Donate and watch the algorithm generate a poem for you.
Click Continue.
Authorize access to your camera and take a selfie.
You’ll then receive a unique PoemPortrait of your face which you can save.
Below is my PoemPortrait. The word I chose to donate was “excited.”
You can also find PoemPortrait on alion statue in London’s Trafalgar Square. The lion roars at the crowd while a screen inside its mouth displays a snippet of AI-generated poetry based on the words entered. At night, these words are projected onto the lion’s body.
As Devlin points out in her blog, the resulting poems can be “surprisingly poignant, and at other times nonsensical”, but do try it out for the fun of it.
As I’ve discussed in other blog posts, I was not gifted with an artist’s abilities (to say the least!), and I have always been very sad about that. I have no eye for color and couldn’t draw a recognizable figure if my life depended on it. And yet, I am very cognizant of what art and graphics can add to our lives and work. I am drawn by the beauty and magic of a simple drawing or a magnificent painting. But I can’t partake in that world, or at least, I couldn’t. Now, however, Google has once again come to my rescue with their new program Auto Draw.
How Does Auto Draw Work?
Auto Draw does exactly what its name says. Start any drawing free hand and the artificial intelligence (AI) in the program will figure out what it is supposed to be and complete the drawing for you, making sure it looks good. And because it’s a web app, Auto Draw works on any device with internet access.
Here’s my first drawing. Can you tell what it’s supposed to be? (My feelings won’t be hurt if you can’t. I really am that bad!)
After I was done drawing, Auto Draw tried to guess what I was attempting to depict. It struggled between a snowflake (good guess, but not quite) and the Sun (correct). Its choices for me to select from were presented across the top of the screen. I simply clicked on the sun icon and here is what I was given as Google corrected my poor work into something more recognizable.
So What?
The tool will let you completely free hand draw, if you wish. And it has the standard selection of fill colors, draw colors, shapes, and text boxes that you would find in any other drawing or paint program. It saves the drawing as a PNG file, and it includes a very simple tutorial (not that you really need one for this).
I guess what I like best about it is that I am no longer limited by my lack of artistic ability. Instead of always having to search for and use someone else’s graphic in my work, I can now draw my own (with a little help from the AI). And that is incredibly empowering, and not just for adults. What might your students be able to draw? How fast can they illustrate a story using Auto Draw and their writing? What will sketching teach them about including just the main points of a design? How proud will they feel that they wrote and illustrated their latest work?
Give Auto Draw a spin and tell me what you think about it. And be sure to let your students try it, too!
I don’t remember how it happened or what I was working on, but the “F” in Art on my kindergarten report card painted its own picture. And that “painting” hangs on my mental wall of shame, a constant reminder that I am terrible at art.
In that context, that is why the act of creating infographics can be stressful and frustrating; nothing you create will be good enough to meet the standards of your inner critic. That inner art critic may be saying any of the following to you:
You can’t draw.
Stick figures will be as good as you ever get.
You don’t know enough to make an infographic.
By taking action against the inner critic, you can silence that inner voice that stops you before you begin. But how DO you take action?
Three Strategies to Creating Infographics
While chatting with Peggy Reimers (Director of Professional Development) during a TCEA Lunch and Learn (free weekly webinars available only to TCEA members), she made the following recommendations. I have followed each strategy with some reflection and ideas from the Lunch and Learnchat:
Strategy 1: Voice and Choice
Voice and choice are powerful motivators. That sense of ownership can be quite beneficial when designing infographics, whether alone or as part of a team.
When creating an infographic, voice and choice may manifest as having a say about what information you are sharing, finding a way that uniquely expresses who you are and intersects with the content. As an infographic creator, do not forget to ask yourself, “What could I create that would make this more helpful to viewers?” To do that, I ask myself, “In each of my respective roles as a teacher, administrator, parent, how could I make an infographic that answers my questions and meets my needs?” Once you have overcome your fear, consider using a site like Daily Infographic as inspiration, not for examples that you may never be able to replicate (“Be silent, inner critic! Silent!”), but for examples of design elements you can incorporate into your own creations. And some might find this rubric for digital infographics helpful.
Starting with a specific topic, the more specific the better, you are able to shed the vague unease of creation. This limitation actually enables you to carefully select what would be most helpful and engaging and avoid information overload. One way to narrow a topic is to make a semantic web or concept map (spider map). This is a relatively simple approach that makes it easy to focus on key concepts, information, and data. And while I may not use all the data in one creation, I can still develop it in another.
Strategy 3: Use easy tools
In Peggy’s presentation at the TCEA Lunch and Learn, several TCEA members shared some of their “go to” infographic creation tools. For example, Casey Phelps recommended PiktoChart (which Laura Howard [Twitter @saisdtechtrain; San Angelo ISD; read her blog] said World Geography students in her district also employ) and Infog.ram for use with students and staff. Smore was another easy tool Casey recommended, saying, “We use Smore as our instructional technology newsletter for our staff. On Smore, multiple users can collaborate; they just have to be signed in using the same account.” Others suggested the CanvaiPad app and especially their infographics site.
And, finally, for overcoming your inner critic when it comes to infographics, Alison Berquette suggested beginning with Thinglink. Combining PiktoChart (used to create the infographic) and Thinglink (add interactivity for web posts) can extend the reach and usability of your new creation. Another supportive infographic tool is Easel.ly, which I have used to create some of my first infographics. It features, as most of these tools do, templates and clip art that make it easy for the art-challenged to spruce up words and numbers.


 The first patent in the United States was issued on
  Finding patent illustrations online can be easy and complicated at the same time. For example, if I want to find patent diagrams for an iPhone, the logical idea would be to search for iPhone in the patent title. If I use

 Low poly has been around for decades in the computer industry. As early game designers needed a way to generate images (and later animation) that did not exceed the available memory, they found they could reduce the file size by reducing the amount of information contained in the picture itself. This was achieved by connecting a mesh of dots to form polygons that are filled with a single color. The most popular shape to use is a triangle. This method allowed designers to easily reduce an image to mathematical terms instead of every pixel having its own color. You may have noticed that even current gaming systems are making use of the retro look of low poly. News sites may apply a low poly filter when interviewing a witness that wants to remain anonymous so that their physical features are less likely to be identified.


 Identifying Angles – Because low poly can be made using only triangles, give students a page from the Low Poly Samples pdf file (link below) and have them identify whether each angle is a right, acute, or obtuse angle by writing r, a, or o in the angle respectively. For older students, have them use a protractor to identify the exact angle and have them write the measurement in each angle. Students can easily check their work by calculating the sum of the angles in the shape. The sum of the angles in a triangle will equal 180°, while the sum of the angles in a polygon with four or more sides is equal to 360°.
 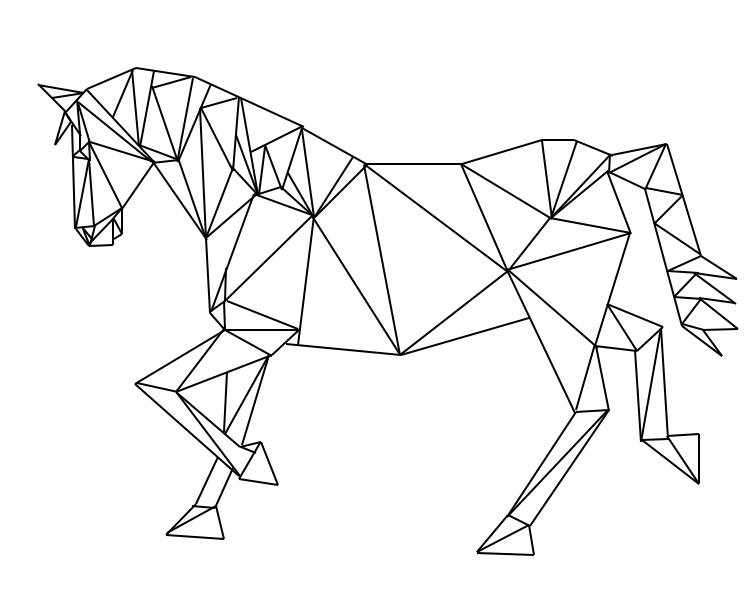 Low Poly Animals – Provide animal shapes for students to use as patterns. Laying a sheet of blank paper over the pattern, students trace the image using only straight lines and fill the image in with line segments to create triangles, squares, pentagons, etc. but no curved lines. The image to the right is my work using this method.
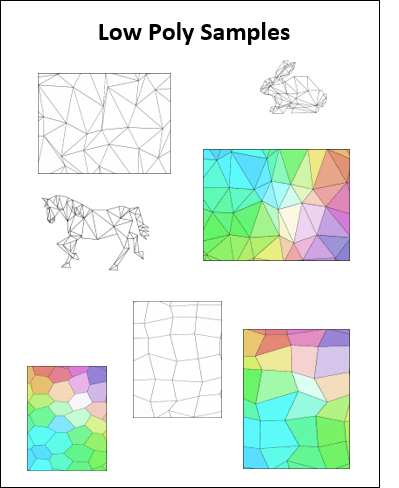
 (correct). Its choices for me to select from were presented across the top of the screen. I simply clicked on the sun icon and here is what I was given as Google corrected my poor work into something more recognizable.