Working with video can be difficult. While screen recording tools have become popular with remote learning, we face daunting obstacles. One of those is screen recording instructions for student learners. How do you record only what they need and not one more thing? In this blog entry, we’ll explore some tips and G Suite EDU tools for video recording.
Tips for Screen Recording Student Directions
Managing expectations for video quality is important. When I start out, my goal isn’t to create a fantastic, awesome professional video. My goal is to keep the message concise and say no more than what students need. That’s a difficult proposition. When you start making videos, you may think as I once did that a video must be many parts. I like this perspective:
There is no need or expectation for you to create a professional-quality production. You can use titles, opening and closing credits, music and/or special effects. It is best to leave those to Hollywood directors.
Further suggestions worth taking into account:
- Get directions straight in your head first.
- Limit them to no more than three (perfect) to five steps (long).
- Divide directions up and match them to a task.
- Keep your videos bite-sized, ranging from three to six minutes.
- Insert yourself into the video at the start and then only after for meaningful points.
There are other tips you can consider. Explore TCEA’s Screencasting for Educators self-paced, online course for more. Now let’s look at G Suite EDU friendly video tools.
G Suite EDU Video Tools
For many G Suite EDU users, Screencastify is at the top of the heap for video recording. The Screencastify Unlimited version includes Chromebook-friendly recording. For educators, the price is $29. Non-educators must pay $49.
What’s more, Screencastify Unlimited offers a super video editing environment. Not only can you trim your video anywhere, you can crop video like a photo. That is, you can capture a part of your video’s area and cut the rest out. That’s an amazing editing feature I have not seen elsewhere. Screencastify Submit is a nice addition that supports student video creation and editing.
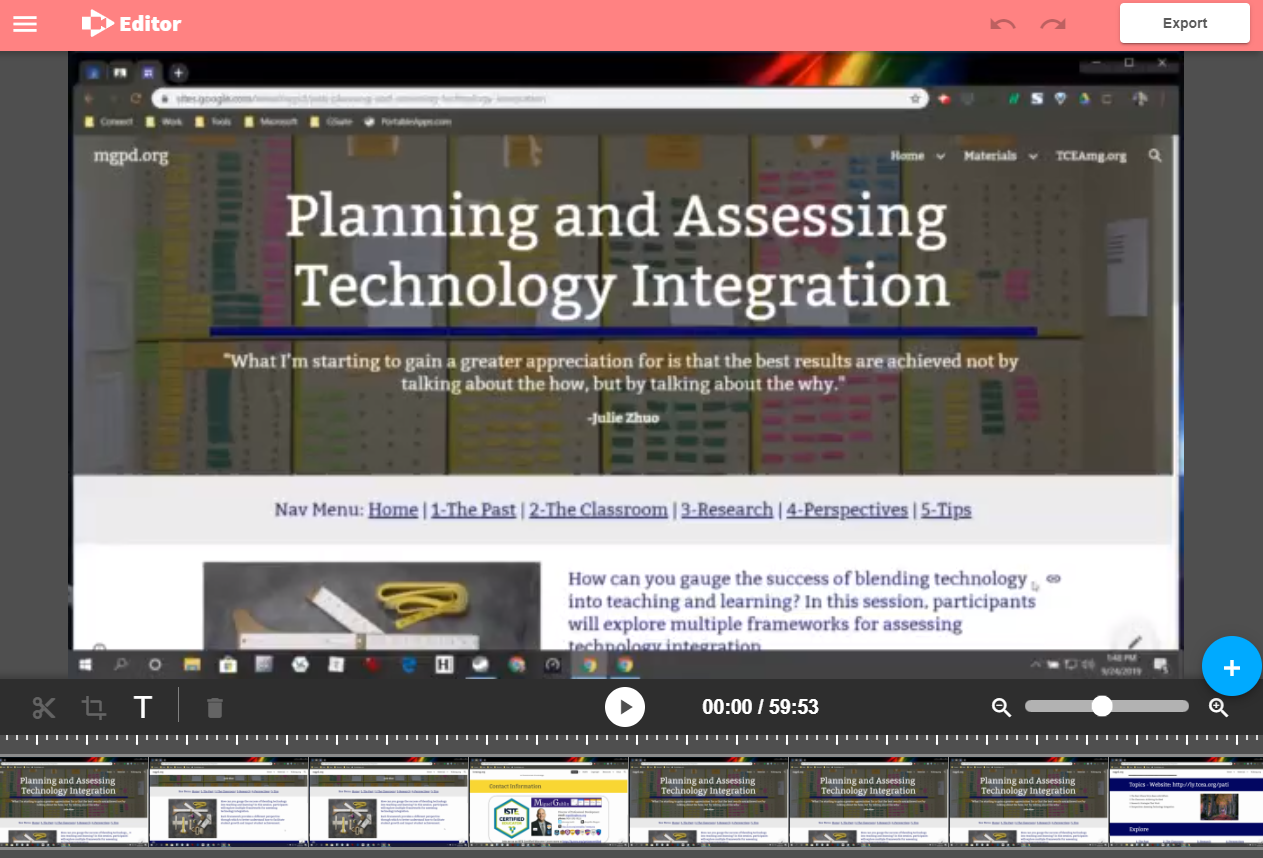
Screencastify Unlimited’s Editor is amazing, offering trim and crop features.
Need a free alternative without the super editing tools? Flipgrid’s screen recorder offers options for Chromebook-only educators. Nimbus Screenshot offers another free option, but most avoid Nimbus due to its less than obvious interface.
Are there any other tools that can ease video recording on Chromebooks? Let’s take a look at a newcomer.
Record to Slides
Clay Smith‘s Record to Slides may be the tool that makes it happen. Instead of a screen recorder, you may need a moment to share your thoughts. You, the camera, and your students.
Record a quick set of instructions with Record to Slides. Videos will appear right on the slide you are speaking about. What a great way to personalize the slide. What’s more, all videos are auto-stored in the “RecordToSlides” folder at the top level of your Google Drive, as shown below:
Here’s a quick video overview:
Parting Thoughts
Record to Slides was easy for me, and I suspect will be easy for students, although you saw me run into challenges with my video recording. While you could use Screencastify or Flipgrid, the simplest tool for the job is often the one to go with. And it doesn’t cost anything.





 Sign up for one of our Google Certified Educator certifications. You’ll learn about more than Google Meet, as well as earn 12 CPE hours per course. Use these courses to get Google Educator certified.
 Highlight Tool: Open Broadcaster Software (OBS)