TCEA Area 15 Director, Sherry Hall, has an excellent idea for creating a digital badge leaderboard to enhance student engagement. You can create your own spreadsheet and badges or edit this template that Sherry has already created! This template is ready to go with badges, tabs, and formulas– it just needs your customized class list, skills, and badges. If you want to get creative and make your own, let’s walk through how Sherry does it. Watch the video and/or check out the steps outlined below!
Create Your Tabs
Type sheets.new in your Chrome search bar to open up a new Google Worksheet, and follow the steps below to get started.
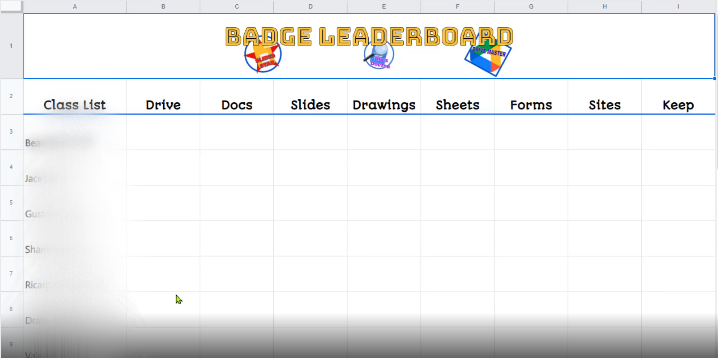
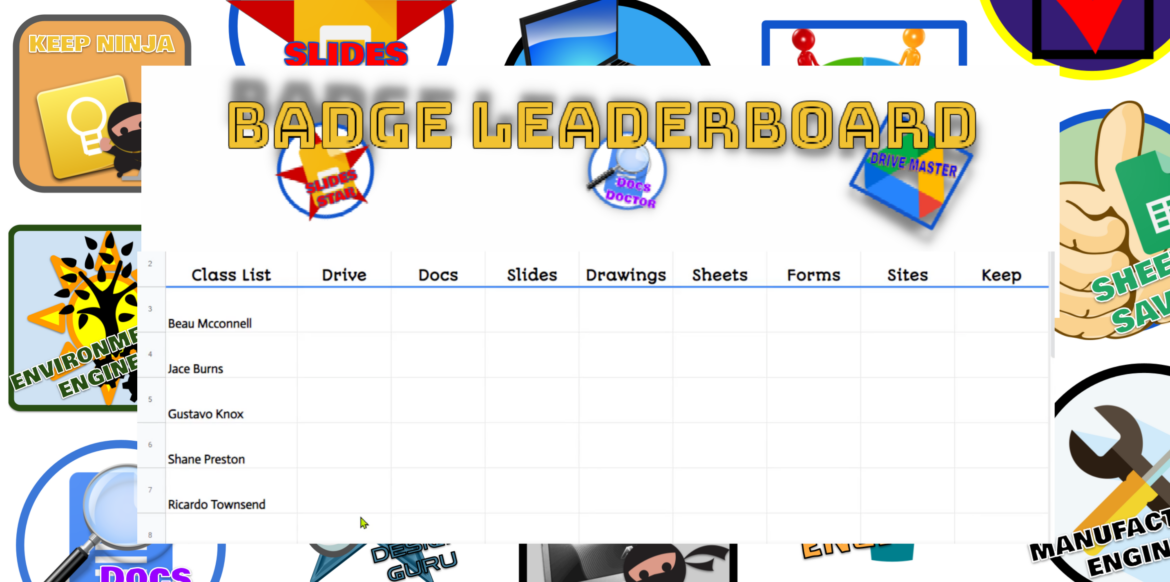
Tab 1: Open Google Sheets and create a “Badge Leaderboard” tab. In Sherry’s example, she has her class list in the first column, a title and image in the first row, and the tools students are working on mastering as titles in row two (Drive, Docs, Slides, etc.). Here, we can see she is working on skills in Google Workspace.
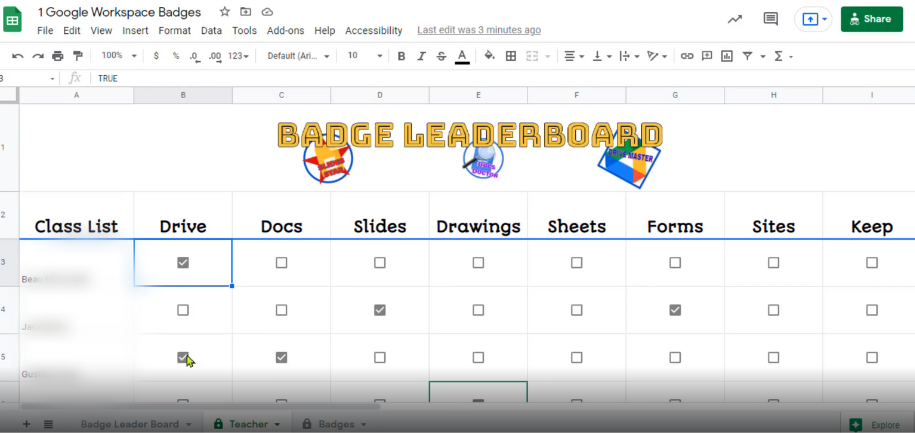
Tab 2: Make a copy of the leaderboard tab by right-clicking on the tab and selecting “Duplicate.” Name this tab “Teacher,” because it’s just for you. Place checkboxes in each cell under the skills for each student name by highlighting the cells, clicking “Insert” in the menu bar, and then clicking “Checkbox” in the drop-down menu. Checkboxes will appear in all the cells you’ve selected.
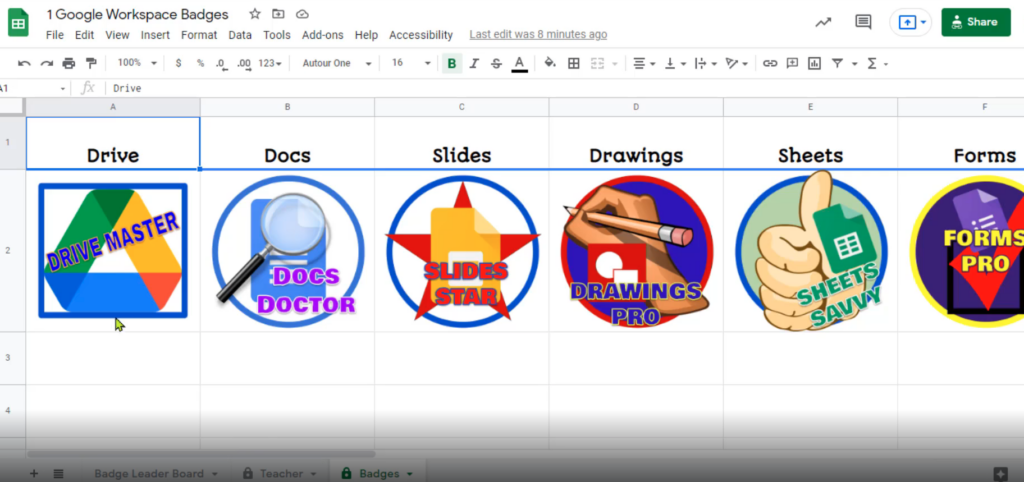
Tab 3: Make a copy of the “Teacher” tab and name this tab “Badges.” Remove the class list column and the row one image, so only the tools appear. Insert the badges you’d like each student to receive for mastering each tool. To do this, select the cell, click “Insert” in the menu bar, click “Image,” and select the “Image in cell” option. We can see here that Sherry has inserted coordinating badges for each tool.
Set Up Data Validation
- Go back to your “Teacher” tab, and click on “Data” in the menu bar.
- Then select “Data validation” in the drop-down menu.
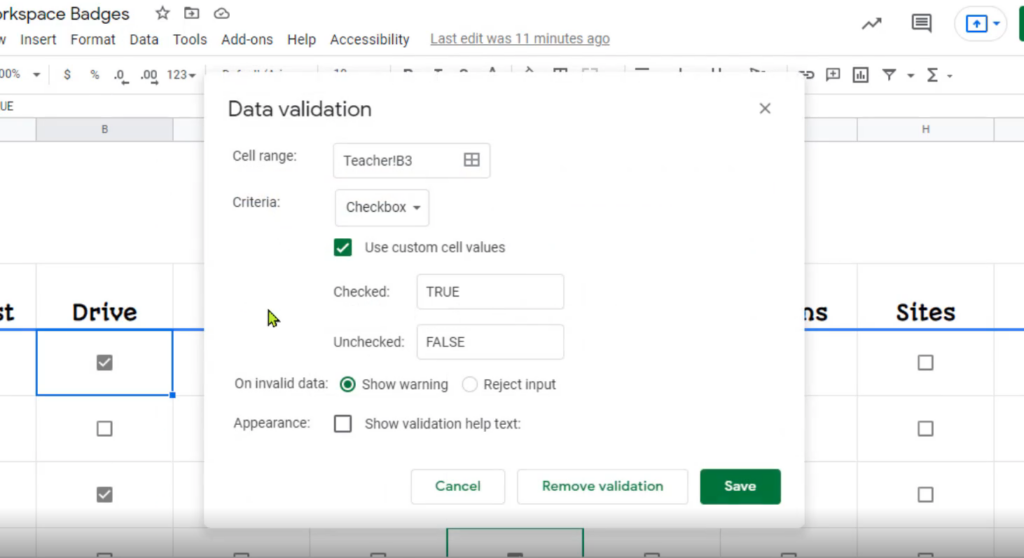
- A pop-up box will appear, and you will need to make sure the criteria says “Checkbox,” the “Use custom cell values” box is checked, and set checked boxes to be “TRUE” and unchecked boxes to be “FALSE.”
- Once these are set, click “Save.”
Protect Teacher and Badges Tabs from Student Editing
- Under “Data” in the menu bar, click “Protected sheets and ranges,” and a menu will appear on the right side of the screen.
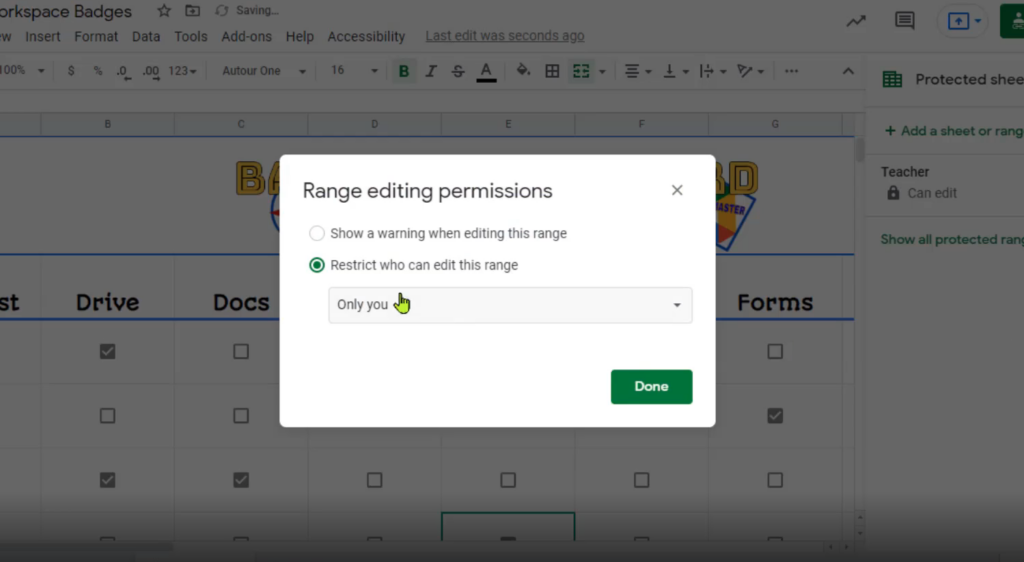
- Select the “Sheet” tab, and click “Set permissions.”
- Click “Restrict who can edit this range, and select “Only you” from the drop-down menu.
- Click “Done.”
- Click on your “Badges” tab and do the same!
Insert the IF Formula
I promise this isn’t as hard as it seems! You will only need to do one row of formulas, then drag the row of formulas down to fill the page, and Google Sheets will magically take care of the rest.
- On the “Badges Leaderboard” tab, you will need to insert an IF formula in the first student’s row for each skill. Note: You can copy and paste the one I provided below and edit it as needed.
2. To do this, you will structure your formula like this:
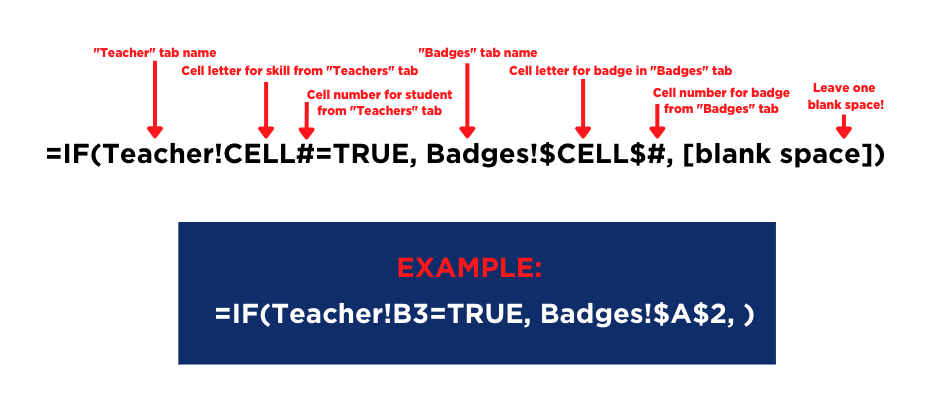
3. Once you’ve inserted the formulas in each row one cell for the first student, select all the cells in row one for that student, click the blue box in the bottom right corner of the last cell, and drag down over all the cells, like this:
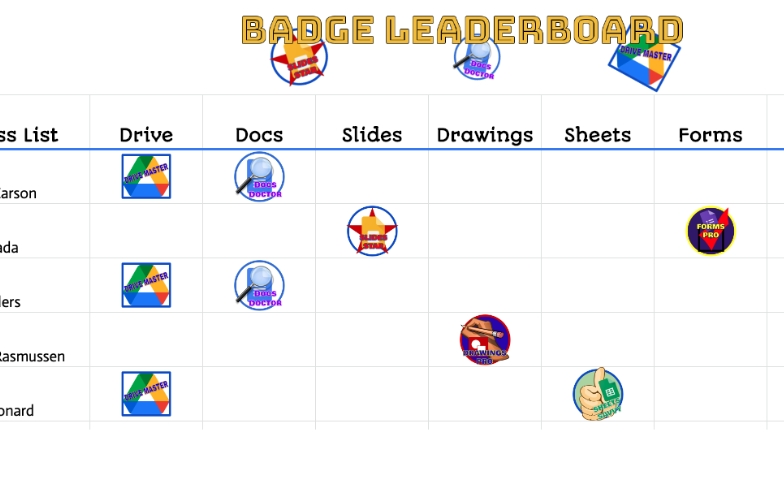
4. As students master each skill, check the boxes in the “Teacher” tab, and the “Badge Leaderboard” will auto-populate with badges! Pretty neat.
Sherry offers several free resources:
- STEM Badge Samples
- STEM Badges Slide Deck
- Sample STEM Badge Leaderboard Worksheet
- Google Badges Slide Deck
- Sample Google Badge Leaderboard Worksheet
You can also download the entire folder of resources here. Thanks to Sherry for this fantastic idea! I can see this being used in a variety of ways at any grade level. How will you use a digital badge leaderboard? Leave us a comment to let us know.





 Did you know? Join the December 27-29, 2016 EdCamp Voxer event, 100% audio and mobile, available for free!