Dear TCEA Responds:
We have some tech I got ready to send back to a buyback company. I sent them the info, the photos, the serial numbers, everything they asked for. Then I waited. No pickup, no quote, no email. Does anyone have a company they would actually recommend? I need this gear out of my storage room.
Thanks,
-Ghosted Technologist
Dear Ghosted:
Thanks for writing in. Getting the silent treatment from anyone, but especially a vendor partner you had hoped to have help you, is hard. It’s easy to do what you needed to do, then they faded away. I won’t speculate as to why or how this happened. It could be as simple as a change in personnel to a decision that what you had to offer would not be that profitable. What is positive is that they aren’t the only game around, and Texas has several solid options. You will also find a handful of national specialists worth knowing. Here are some ideas to start with.
Compare the Vendors at a Glance
Rather than a static table, use the interactive flash cards below. Filter by vendor type, then tap any card to see certifications, payout model, pickup logistics, and what makes that vendor different.
Did You Know?
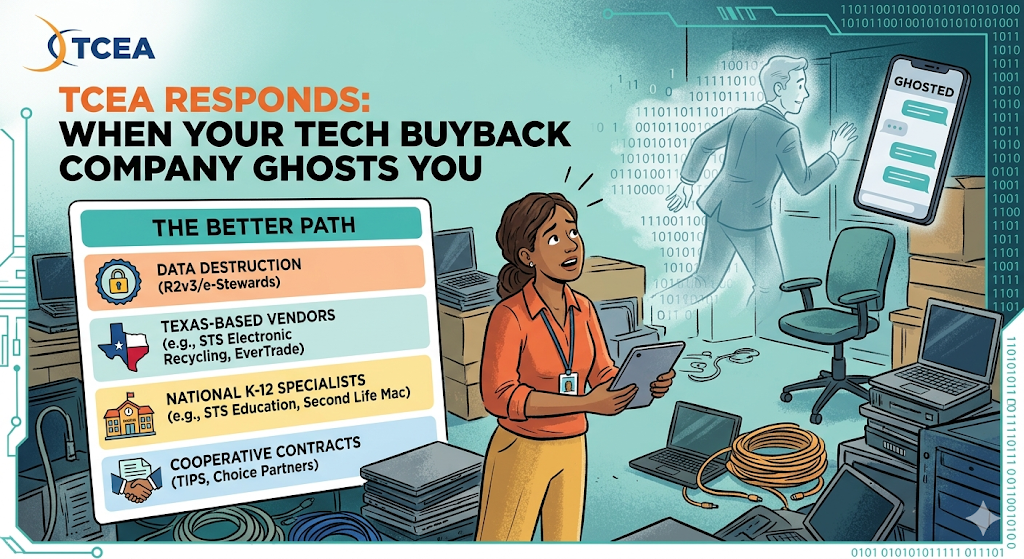
When you hand off retired devices, two things matter more than the buyback check: verifiable data destruction and a certified recycling chain. Look for vendors with R2v3 (Responsible Recycling) or e-Stewards certification. Both standards require documented data sanitization and responsible downstream handling, which protects your district from surprise compliance issues later. NAID certification is another good signal for data destruction specifically.
Learn more about TCEA’s IT/Tech Director Certification
Start With Texas-Based Vendors
Texas districts have a home-field advantage here. Regional vendors know local purchasing calendars, cooperative contracts, and the realities of multi-campus pickups. A colleague shared this about working with one of them:
“We have used STS Recycling several times. They don’t pay for stuff, but they do all the loading. Some companies make you put it on a pallet, wrap it, notate it, etc. STS takes care of all of that. They also erase the hard drives and send a certificate of destruction if you want. They’ve been great to work with. If it’s basically end-of-life and pretty much headed to the landfill, it goes to STS instead.”
That colleague is talking about STS Electronic Recycling, Inc., headquartered in Jacksonville, Texas, with R2v3 certified locations in Austin, San Antonio, Irving, Carrollton, Corpus Christi, Tyler, and Grand Prairie. That is a different company from STS Education (stsed.com), which does K-12 device reconditioning out of California. Both are legitimate and work to serve schools. That said, they solve different problems as far as I can tell from their websites. Avoid mixing them up when you request a quote.
Two other Texas regional picks you may want to add to your list:
- EverTrade Electronics Recycling: Sugar Land-based, NIST 800-88 compliant, free pickup across Greater Houston for qualifying loads
- Bass Computer Recycling: Houston-based, R2v3 plus the full ISO 9001, 14001, and 45001 certification stack. The strongest compliance profile on this list
Another reader wrote in with a different experience:
“We use Global Asset. Same as STS, except they will pay you a little something for the devices. They will load it all and palletize it. I’ve been using them for years.”
That’s not a bad thing to keep in mind. If what you have to send to the vendor has resale value, a buyback vendor might send you a check. If it is end-of-life, your goal is probably a clean, documented pickup. A no-pay recycler can be a handy to have in your call list.
National K-12 Specialists Worth Knowing
Of course, TCEA’s reach is global, so Texas is not the only place with good vendors. If you are outside Texas, there are several national companies that specialize in K-12. You can work with them via a mail-in or onsite pickup:
- K-12 Tech Repairs: Indiana-based, offers cash or credit with a 10 percent bonus if you take credit toward repairs, parts, or cases. Mail-in service available for Texas
- STS Education: California-based K-12 specialist focused on reconditioning “Second-Life Hardware” for resale to other districts. A good fit when your retired gear still has useful life left in it
- Tech to School: Covers Apple, Chrome, and Windows on one contract. Their Community Sales option lets parents and staff buy retired devices at a discount
- Second Life Mac: Apple-only. Their ex-Apple team and “Blue Glove” onsite service usually beats generalist quotes on iPad carts and MacBook fleets
If you have a homogeneous fleet, call a specialist first. A generalist quotes you an average. A specialist knows the resale market and prices accordingly.
Use Your Cooperative Contracts
If your district buys through a purchasing cooperative, check the cooperative first. Pre-vetted contracts save you from running a new bid. What’s more, they may give you legal cover on the procurement side. Both of the big Texas co-ops are free to join:
- TIPS, The Interlocal Purchasing System: Managed by Region 8 ESC in Pittsburg, Texas. Search the awarded vendor list for “Technology Solutions” to find recycling and ITAD partners already under contract
- Choice Partners: HCDE-governed cooperative out of Houston with a 50-plus-year track record. Contracts meet EDGAR and 2 CFR 200 requirements, so your business office gets federal compliance coverage automatically
While cooperatives are not glamorous, they close the loop on compliance, ensuring your business office be happy. I’ve found that keeping the business office happy in your school district is pretty important.
Questions to Ask Before You Ship Anything
Before you send a single serial number, ask the vendor these five questions:
- Do you provide a certificate of destruction for each drive?
- What is your certification (R2v3, e-Stewards, NAID, or none)?
- Do you handle palletizing and loading, or is that on us?
- If the gear has resale value, how do you calculate the payout?
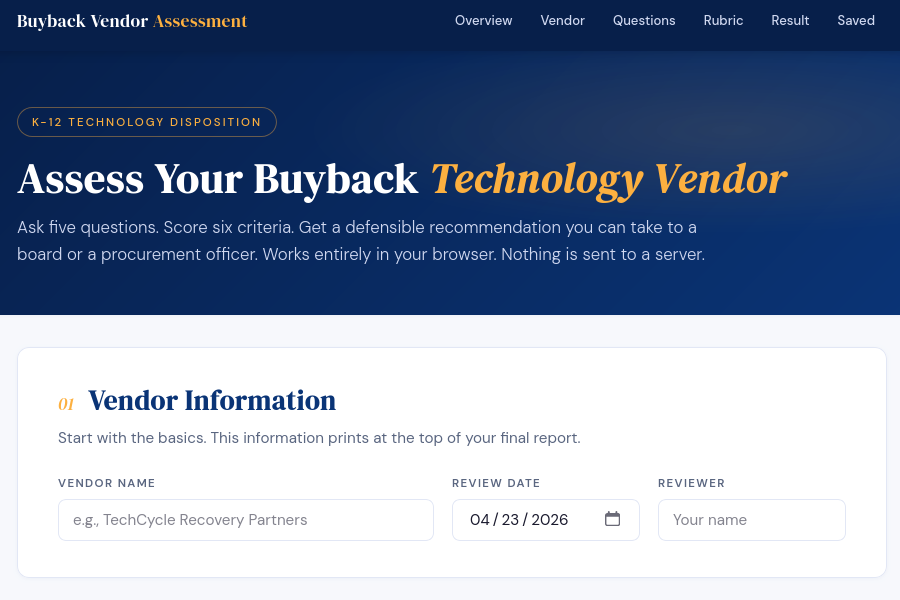
Get the answers in writing. A vendor who hedges on any of the first three is not ready for a K-12 contract. Feed the responses into this online tool I vibe-coded for you to use or, with the rubric and prompt at the end of this blog post, make sure own bot, custom GPT, or project:
Access the Buyback Vendor Assessment tool
A Short RFP Selection Rubric
When you have the answers, score them. Below is a simple hundred-point rubric you can lift into a district RFP. Adjust the weights to match your priorities. I weight data destruction highest because it is the one thing that cannot be fixed after the fact.
| Criterion | Weight | What to Score |
|---|---|---|
| Data destruction method | 25 | R2v3, e-Stewards, or NAID certification; NIST 800-88 wipe or physical shred; certificate of destruction per drive |
| Pickup logistics | 20 | Who packs, palletizes, loads, and transports; multi-site capability; handling of chain of custody |
| Compliance documentation | 15 | FERPA alignment; serial-number tracking; board-ready audit reports |
| Turnaround time | 15 | Days from pickup to final report and payment |
| Payout model | 15 | Cash, credit, or free; transparent calculation; guaranteed minimum in writing |
| References | 10 | Three Texas K-12 references at comparable district size |
Scoring: Rate each criterion from one to five, multiply by the weight, and total the score. A vendor clearing 400 out of 500 is a safe pick. Anything below 300 goes to the no pile.
Wrapping It Up
The vendor who ghosted you is not worth a second email. Move on. Between Texas regional recyclers, national K-12 specialists, and your cooperative contracts, you have options that will actually return your call. Pick two, send them the rubric as an RFP, and take the one that puts the certificate of destruction in writing first. Use the Buyback Vendor Assessment tool if you need a little help or make your own tool.
Make a Gen AI Connection
Turn your shortlist into a quick evaluation with this prompt:
Compare these IT asset disposition vendors for a Texas K-12 district retiring [number] devices: [list vendors]. Score each against these criteria: data destruction method (25), pickup logistics (20), compliance documentation (15), turnaround time (15), payout model (15), and references (10). Flag any vendors missing verified R2v3 or e-Stewards certification and recommend a top two for a formal quote request.Paste in the vendors from this post, adjust the device count, and let your Gen AI tool of choice handle the first-pass comparison. Then you call the top two.