

As imperfect as it may be, the Scientific Method remains humanity’s greatest tool. Some may even see it as the lever to move the world. But a tool for doing what? As Greg Epstein points out, it is the “most reliable tool for determining the nature of the world around us.” In this blog entry, we’ll take a look at some ideas for introducing the scientific method to students. What’s more, I’ll offer some suggestions for engaging young scientists.
The scientific method is an empirical method of acquiring knowledge. It has characterized the development of science since at least the 17th century. It involves careful observation, observing then applying rigorous skepticism to those observations. That’s important since one’s cognitive assumptions can distort how one interprets the observation. (source)
The process varies in its details from one discipline to another. But generally, the scientific method is often represented in a simple diagram:
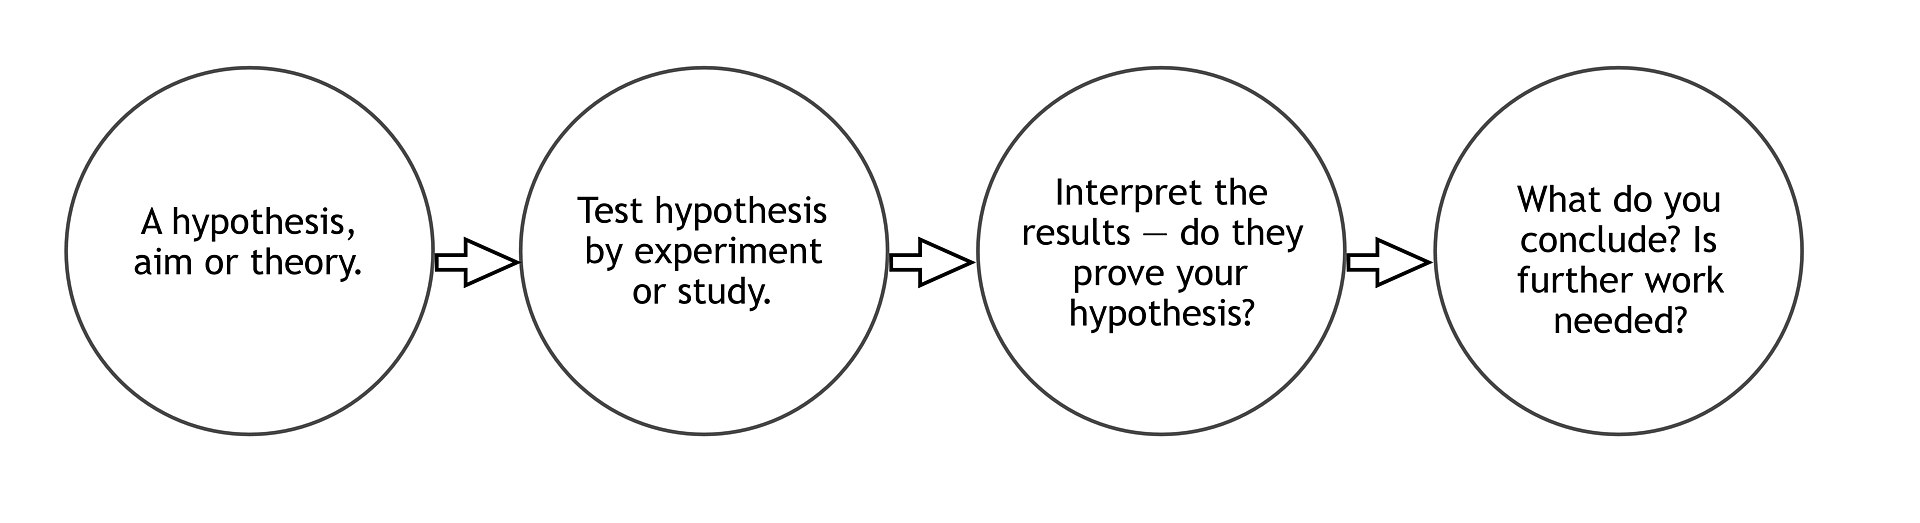
Source: Brightyellowjeans – Own work, CC BY-SA 4.0 | See Others
Although the steps appear simple, more work must take place than just completing a science lab. Students must engage in discussion and reflection. As I reviewed some of the fun labs in this blog entry, I realized that I had had little exposure to the problem-solving aspect in my school days. To make sure that’s not happening with your students, be sure to follow the steps included in the diagram below.
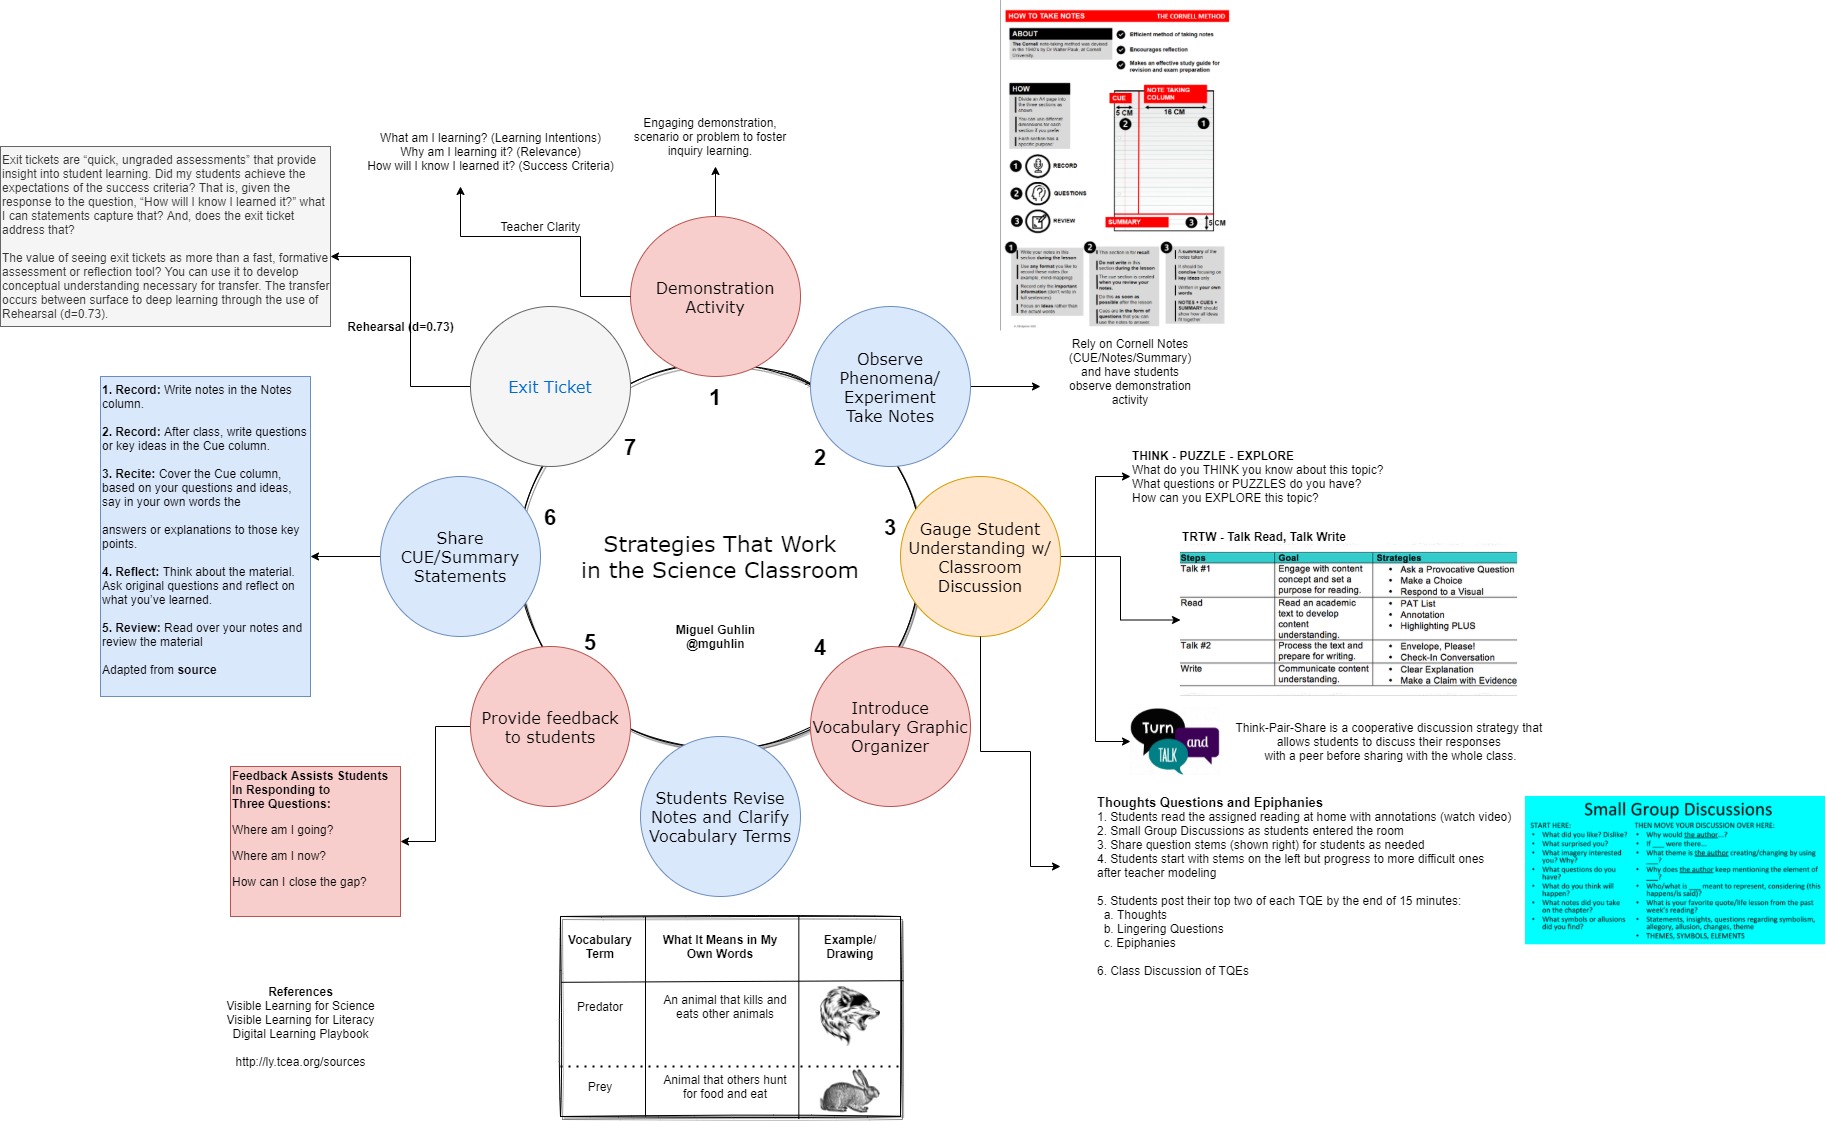
View online and make a copy – Created by author, adapted from John Almarode’s description in his book
Introducing the Scientific Method
Engaging in scientific reasoning and critical thinking is hard work. How do you introduce it to students in a way that engages them? In the blog entry, How to Design Research-Based Science Lessons, I describe the first step which includes three goals:
- Get students engaged in learning science
- Give students ownership of their learning
- Assess and scaffold student progress from where they are to where they need to be
This means that students must internalize the scientific method and engage in metacognition. They must ask themselves, “What does the evidence say? What do I think about that evidence? What does it imply for next steps?”
Clarifying Vocabulary
Before I share some examples, let’s take a look at some key vocabulary terms to know:
- Observation. What you see occur or happen
- Hypothesis. A suggested explanation for the observation
- Control group. A set of controlled variables that are unchanged. You only adjust the one variable for experimentation. The variable that is adjusted is known as the Independent Variable (IV).
- Independent Variable (IV). This is the variable that is changed to see how it affects something else.
- Dependent Variable (DV). The variable that is being measured/observed. It is assumed that the DV is affected by the IV. The DV’s value depends on the IV (source).
Below are some tried and true demonstrations that students can observe, write about, and discuss:
 Demo #1: Water Temperature and Effect
Does water temperature affect how fast an Efferdent tablet dissolves? Give this activity a try for middle school students.
Tips for Implementation
Here are some suggestions from Carlos Gomez. I’ve also included some website links I thought might be helpful:
- Get the tablets at a Dollar store.
- Get a bag of ice in a cooler for the cold water. You can warm up water in an electric kettle. I pour it for the kids into their beakers so they don’t have to use tongs. Use room temperature water from the sink as your control.
- Students time from the start (drop tablet) until fully dissolved. Temperature doesn’t need to be recorded because we simply care that one is hot water and the other is cold.
- You can do a simple graph (bar or line) with independent variable (IV) being water temperature (hot, room, cold). Time can serve as the dependent variable (DV).
- You can also try this with Alka-Seltzer, but Efferdent tablets are less expensive. View lesson plan.
- Also use tablets to measure how much carbon dioxide gas is in an Efferdent tablet.
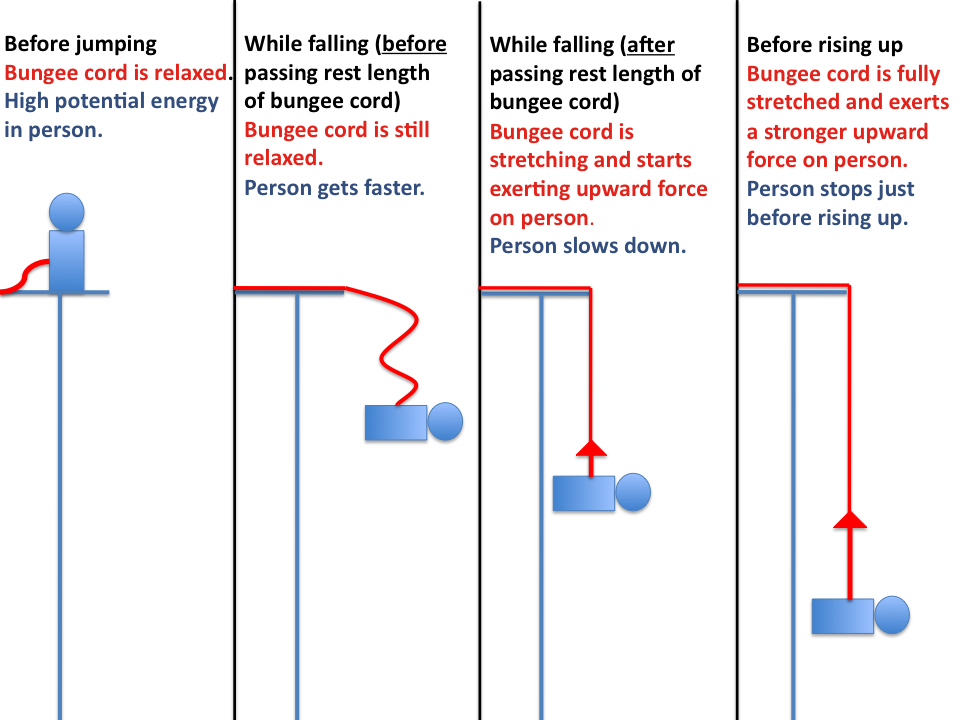
Image Source: Newton’s Third Law
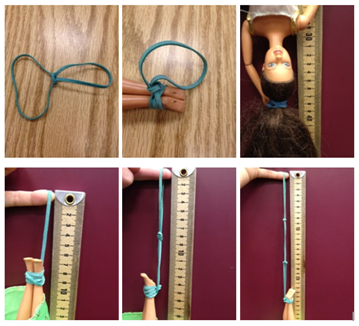
Demo #2: Barbie Bungee
Use scientific method as students differentiate between speed, velocity, and acceleration. They will also compare and contrast Newton’s three laws. Try this activity with high school chemistry students.
Tips for Implementation
- Follow the steps in this eighth grade science teacher guide.
- Explore Fawn Nguyen’s guide (also source for image shown right).
Demo #3: Slug Lab
Students write their own research questions about slug feeding behavior, then gather evidence. The goal is to learn how to design experiments that successfully gather the evidence needed. This activity works well for middle and high school students.
Tips for Implementation
Demo #4: Paper Tower Challenge

In this experiment, students work to discover the best way to assemble a paper tower. The independent variable is the tower design. The dependent variable is the height of the tower. Provide same materials (type and amount of paper, scissors). The materials will serve as the control.
Tips for Implementation
- View lesson plan for standard challenge.) or explore an alternative.
- Give each group two pieces of 8 1/2 x 11 copy paper, scissors, and cellophane tape. Challenge them to make the tallest free-standing paper tower. Some ground rules that Kerry BresMontgomery suggests:
- Use as much or little tape as you want.
- Rip/cut/fold paper.
- Cannot tape tower to floor or desk.
- Only 20 minutes to design and build.
- Cannot get extra paper, so make a plan before cutting or ripping the paper.
- Height is from base to top only counting paper (cannot make a tape spire).
There are many other cool lab ideas that can engage students. Use these to develop their scientific reasoning.
Be sure to explore Save Fred, Pringle Ring Challenge, Baking Soda Rockets, and Gummy Bear Osmosis. You may find the Bubble Gum Lab and Elephant Toothpaste of interest as well.
More Labs
You can find many more labs for a variety of age ranges and grade levels online. Here are a few places where you can find those:
- Five Scientific Method Experiments along with Scientific Method activities
- Three Simple Scientific Method Experiments
- Water Drops on a Penny Lab Activity
- Teachers Pay Teachers has a collection focused on Scientific Method, one of several available.
In part two of this blog, Interactive Science: Virtual Labs, we will explore virtual labs that can help with the Scientific Method. Stay tuned!
References
- Feature image attribution. Whatiguana, CC BY-SA 4.0 <https://creativecommons.org/licenses/by-sa/4.0>, via Wikimedia Commons
- Archimedes’ Lever. ZDF/Terra X/Gruppe 5/ Susanne Utzt, Cristina Trebbi/ Jens Boeck, Dieter Stürmer / Fabian Wienke / Sebastian Martinez/ xkopp, polloq, CC BY 4.0 <https://creativecommons.org/licenses/by/4.0>, via Wikimedia Commons
- Carlos Gomez’ suggestions for science lab. Available online on 09/09/2021.
- Kerry BresMontgomery’s suggestions for science lab. Available online on 09/09/2021.

 What Is Flip?
 Students begin learning observational skills in science starting in kindergarten. Though the skill is not as robust or refined as what a high school student may demonstrate, there is still great value in having them engage in observing the world around them to start taking notice of how things work. Observation is a foundational science skill that leads to communication, classification, measurement, inferencing, and predictions.
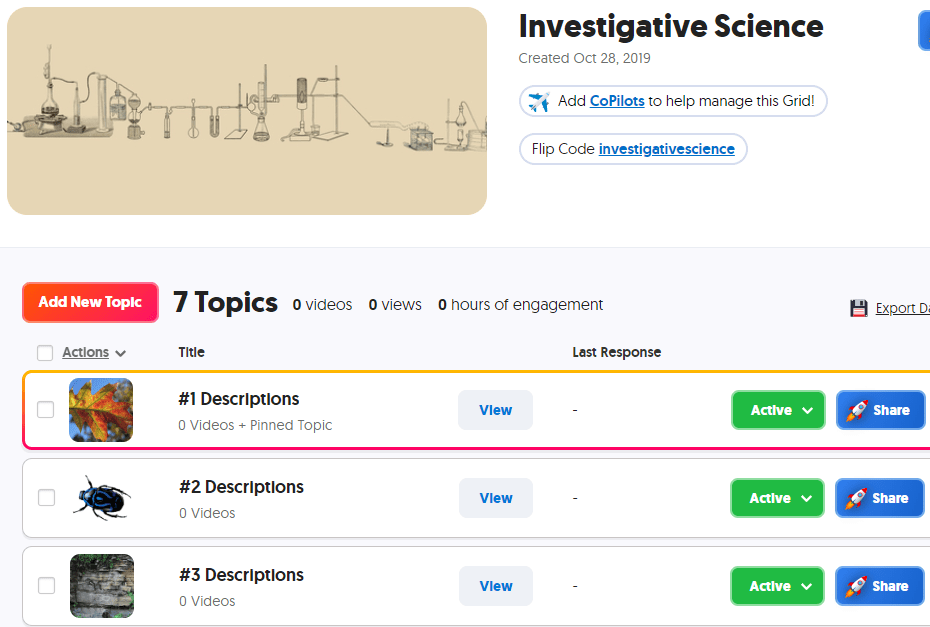 In Flip, create a grid for observations. Each topic in this grid will show a photo or video that the student is to observe and describe. Depending on the level of skill, you can require students to use previously learned vocabulary in their responses. If you want students to use words from a given word bank that you have developed for them, create the document and add it as a topic attachment to the topic. You can reference this word bank in multiple topics by adding the link to each topic. If you have a rubric to guide the students in their work, add the rubric as another topic attachment; for younger students, you may need to record a video showing the rubric while you are reading it aloud.
 Go to
Go to 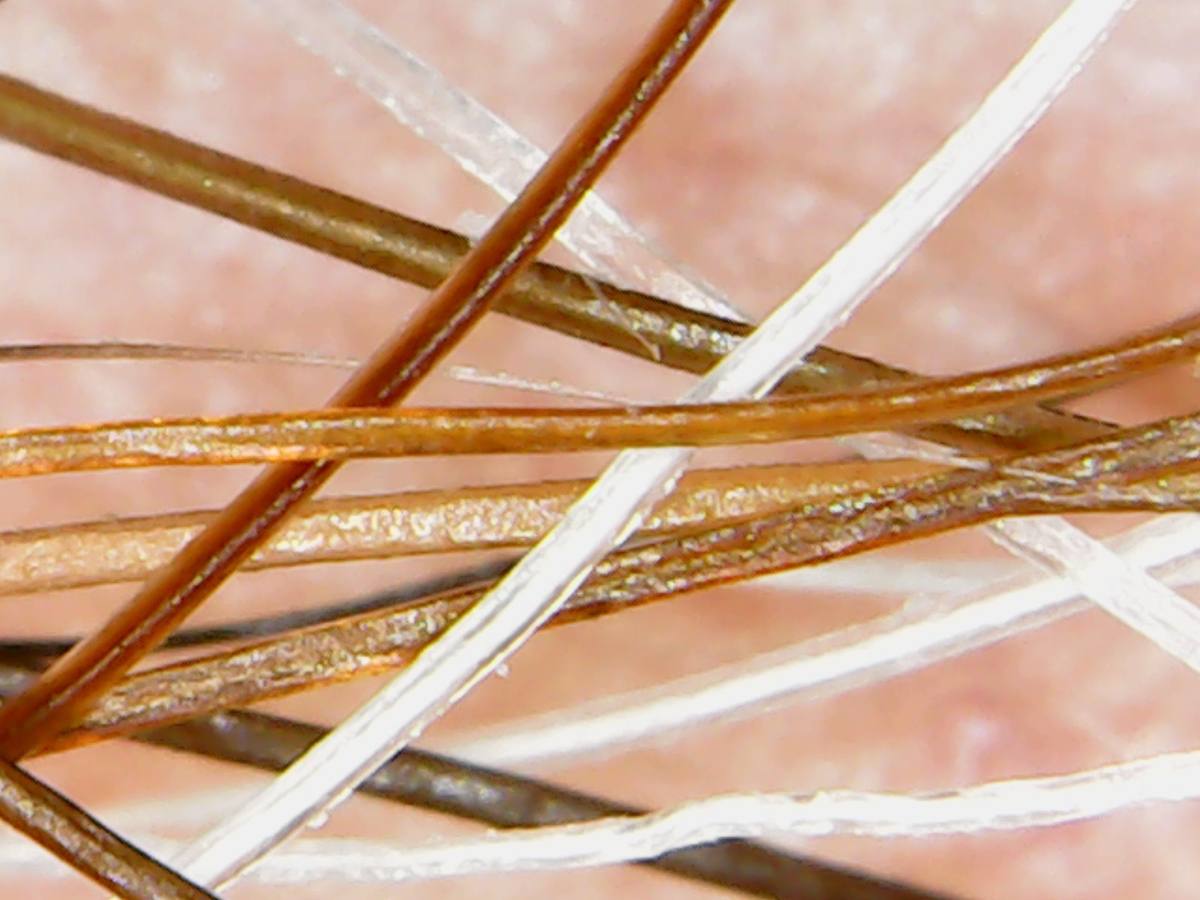 Begin by creating a grid to hold your inferencing topics. As done above, create a standard set of instructions for your students. You can go to ,
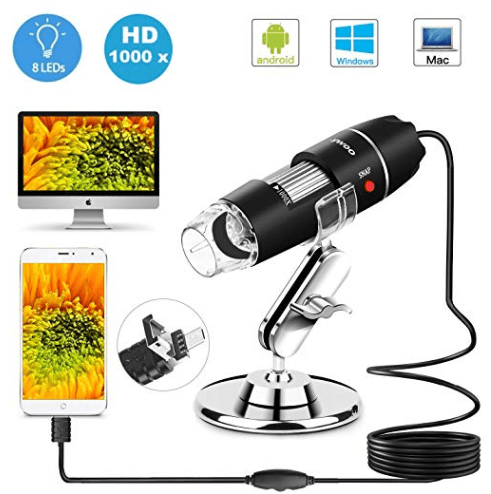 USB Microscope – Consider purchasing a USB microscope that you can connect to your device in order to take photos and videos of actual materials in your classroom…or on fieldtrips! Read the details carefully as some microscopes will work with some devices but not all…such as Android phones/tables, PC computers, and Mac computers but not iPhones or iPads. If you need a microscope that connects with your iPhone or iPad, be sure that it explicitly states that it connects. Likewise if you are wanting to connect the microscope to a Chromebook. If it is not clearly stated, look for a link in which you can ask the seller or locate that microscope on another seller’s website to see what information they provide.