

If I were a new robotics teacher handing out sets of SPIKE Prime kits, my first thought would be, “What do I do first?” “Where do I start?”
Before jumping into bots that spin out of control or crash off the table, I like to begin with a no-wheels, no-stress activity: The Fully Primed Light Show Challenge.
This project focuses on using the 5×5 light matrix on the SPIKE Prime hub—no motors, no movement—just creativity, teamwork, and flashing lights. It’s the perfect way to introduce block programming, collaboration, and the Engineering Design Process (EDP) in a low-pressure, high-impact way.
Activity 1: Kickoff with “Initial Sound”
The first program I always introduce is a quick activity called Initial Sound. Each student programs their SPIKE Prime hub to:
- Display their initials on the 5×5 light matrix
- Add a sound effect at the end
Why this works so well:
- No moving parts
- No teamwork required (yet)
- Just focused programming practice
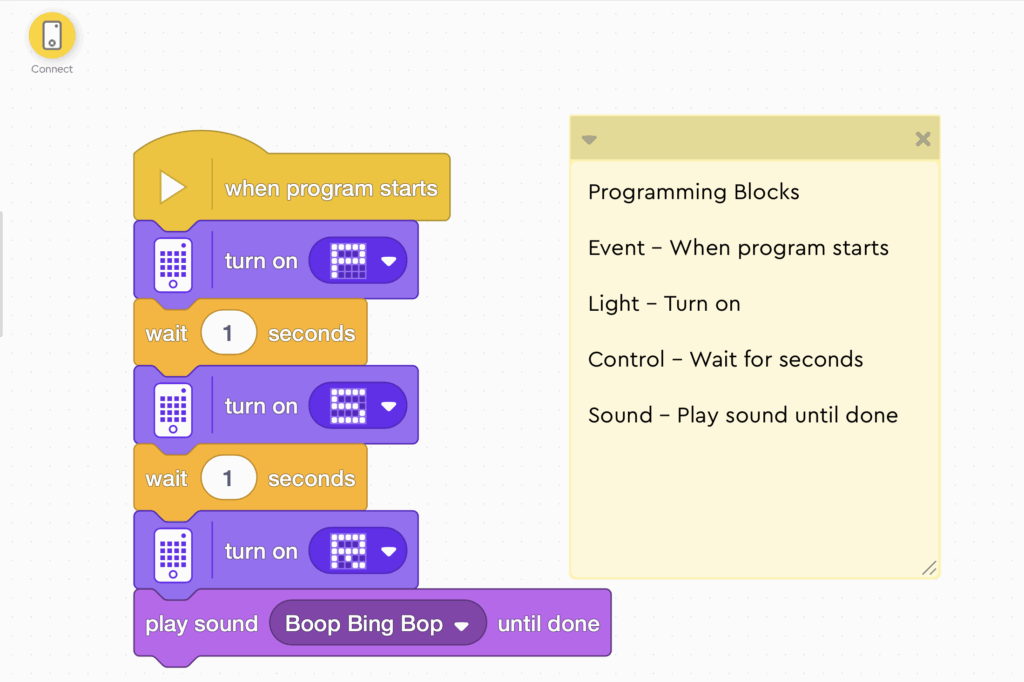
Programming Blocks Introduced:
- When program starts (event block)
- Show image (to display initials using the light matrix)
- Wait [x] seconds (control block)
- Play sound until done (sound block)
Activity 2: The Fully Primed Light Show Challenge
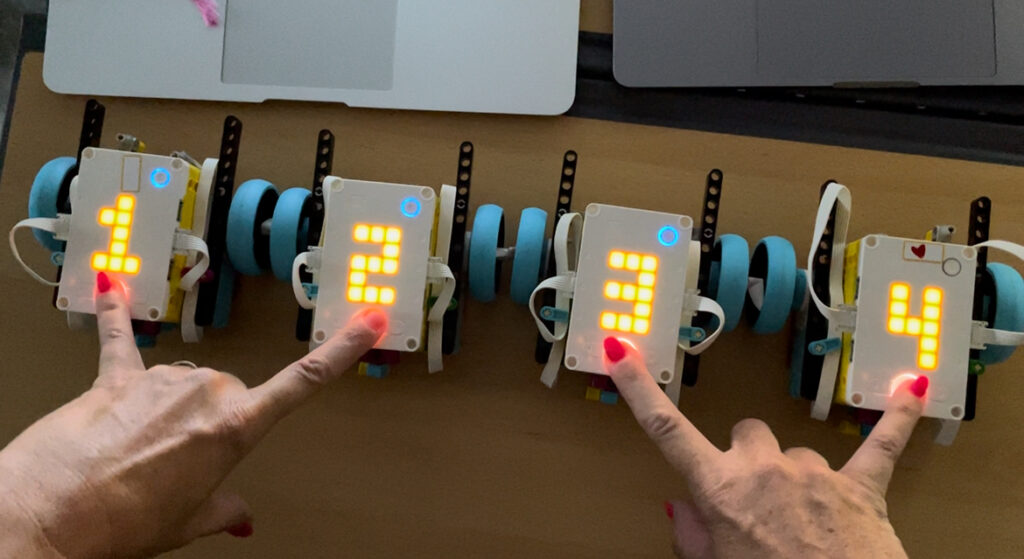
The next step is to work together in small groups (3 to 5) to create a light show using the 5×5 light matrix. No motors, just pure pixel power.
Why I love this as a starting challenge:
- It introduces block coding with zero movement-induced stress
- It builds teamwork and planning from the start
- It’s the perfect opportunity to roll out the Engineering Design Process
Step 1: The EDP (Engineering Design Process)
Cue the pencils—it’s time to sketch, plan, and dream. Students complete the EDP template before they ever touch the code.
Since this is their first experience with EDP, I recommend completing it together as a class.
Example EDP Prompts:
- What is the challenge I’m trying to solve?
“My group is programming a light show with our SPIKE Prime hubs.” - The List (Real-World Connections):
Where do you see light shows in everyday life?- Fireworks
- Concert stage displays
- Public art installations
- Football halftime shows
- Digital advertising signs
- Arena or stadium LED ribbon boards
- The Aurora Borealis
- Amusement parks and rides
- Brainstorming: Draw symbols or ideas for animations
- Drawing Zone: Sketch out your pattern
- Light Patterns: Color in the 5×5 Matrixes to plan your light blocks
After the Challenge: Revisit the EDP to reflect, rate, and rank the experience.
Step 2: Plan It Out
Give groups dedicated time to sketch and plan before touching the computer. This ensures intentionality and teamwork.
Step 3: Program, Test, Modify
Time to bring those designs to life. Encourage groups to iterate and refine as they test their light shows.
Step 3.5: Back Pocket Trick (Time to Wow Me!)
Let’s be real: The most important thing I can tell you as a robotics teacher is this—what are you going to do with your early finishers? Because if you don’t have a plan, they will find something else to do… and it usually involves off-task creativity.
That’s why I always keep a back pocket trick—a simple way to extend the challenge and keep students engaged.
Once students have completed their light sequence, challenge them to add some “Wow Me” features—shoutout to Joy Schwartz for the alternate name!
Back Pocket Bonus Ideas:
- Add scrolling letters or words
- Sync sound effects with the light sequence
- Program the center button light for color changes
- Build a stand or frame for their hub display
“I’ll be watching for the wow factor” is all it takes to keep motivation high.
Step 4: Showcase and Reflect
Wrap up the challenge with a classroom Light Show Showcase. Let groups present their light sequences and explain their design process.
Afterward, revisit the EDP sheets to complete:
- Emoji reflection (How did it go?)
- Star rating (1–5 stars)
- Final tweaks to the Drawing Zone or program notes
This reinforces the importance of reflection, feedback, and iteration.
Resources
- Download the EDP Template
- Yo: The Robo-Waving Machine – Another beginner activity by Peggy
Final Thoughts: Let There Be Light (and Learning!)
The SPIKE Prime Light Show Challenge is a beginner-friendly project that sets the tone for creativity, collaboration, and coding from day one. It’s open-ended, fun, and just the right amount of challenge.
So go ahead—spark curiosity and light up your students’ imaginations.
And if your class creates a spectacular light show, I’d love to see it! Share a clip or photo with me at preimers@tcea.org or tag me on X @preimers.