
With the right sized paper clip, anything is possible. That’s not only because of National Paper Clip Day, which happens on May 29 every year. It’s because many paper clips have certain attributes and properties that are science-friendly. Let’s explore some science-friendly paperclip activities!
Did You Know?
Invented in 1867, manufactured in its current form (a.k.a. “Gem clip”), the paper clip has come a long way. In 1940, during World War II, Oslo University (Norway) students relied on it as a non-violent symbol. “A symbol of resistance, unity, and national pride.” The students chose it because it “binds things together.”
Attractive Paper Grippers
My favorite attribute of paper clips? They bind stuff together without damaging it. A staple is a permanent decision, but a paper clip gets the job done. I carry a paper clip with me everywhere I go, but there’s a lot more that I could use it for. Aside from holding papers together, it’s qualities make it versatile:
- Paper clips are made from galvanized steel wire.
- Their diameter is 0.9-1.3 mm.
- Most paper clips weigh about 1 gram.
- Due to high surface tension of water, paper clips can float on water surfaces.
- They’re usually a silver/gray metallic color from the steel.
- They’re made of hard metal but malleable and bendable into different shapes
What’s more, paper clips can be attracted to magnets. Even more cool, paper clips can exhibit magnetic hysteresis behavior. That’s a fancy way of saying, apply a magnet to a paper clip, and it becomes magnetized. And, let’s not forget, a box of paper clips is inexpensive, making it perfect for class projects.
Given these attributes, what science projects are possible?
Project #1: Paper Clip Floating Experiment
Introducing the Scientific Principle of Surface Tension. Water molecules create a strong cohesive force at the surface. This allows support of light objects like paper clips.
Did you see Sir Anthony Hopkins float a paper clip to make a compass in the movie “The Edge” (language warning)? Since I saw that scene, I have wanted to try this. The list of materials needed is low and easy to scrounge up:
- Paper clips
- Bowl of water
- Tissue paper
- Magnet
You can run a magnet about twenty times or so along the length of a straightened paper clip to magnetize it. Then, place it atop something that floats in water (like a piece of foam). After a few moments, it will align itself to magnetic North (source).
Project #2: Paper Clip Chain
Introducing the Scientific Principle of Magnetism. Paper clips can be magnetized by aligning their magnetic domains, and magnetic fields extend beyond magnets to attract/move paper clips.
You may remember that fancy term, magnetic hysteresis behavior, from earlier. As a young person, I found it cool and fun to do. Did you know that the record for longest paper clip chain was set in 2004 by sixty students at a Utah high school? The chain was 22.17 miles long, using over 15 million paper clips. Set a challenge for your students!
All you need are a few paper clips and magnets. The goal is to magnetize paper clips so that they connect.
You can get the activity going by following these steps. You can also refer to this free Teachers Pay Teachers (TPT) resource.
- Magnetize the paper clips.
- Touch the magnet to a paper clip, then touch a second paper clip with the first one.
- Repeat the process with each subsequent clip.
- See how many paper clips you can link together (and perhaps, graph the total number).
You can also test the strength of different magnets by counting how many paper clips they can pick up. Create a graph for each and see if results vary from student group to group.
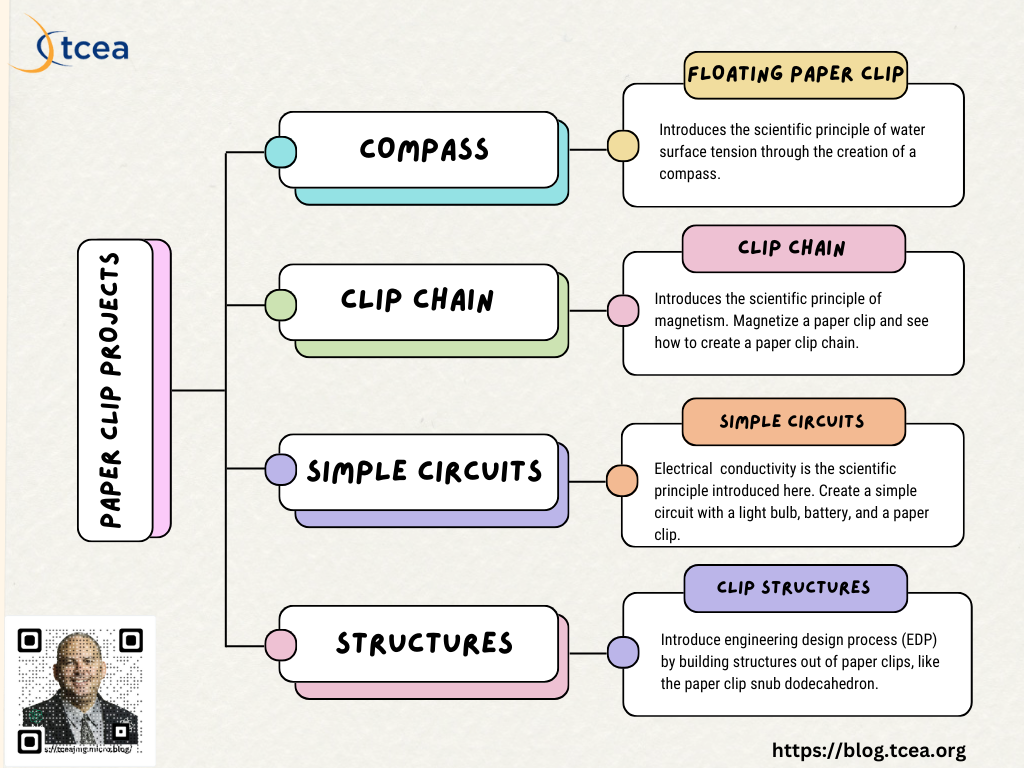
Project #3: Paper Clip Circuits
Introducing the Scientific Principle of Electrical Conductivity. Metal paper clips act as conductors. These allow electron flow and complete a circuit with a battery and light bulb.
With metal paper clips, you can get your students learning about conductivity. To start making simple circuits, you’ll just need:
- A battery
- Paper clips
- Small light bulb
You will also need some electricity conducting (or not) materials like plastic, rubber, aluminum foil, etc. Anything that you can use to test electrical conductivity. Here is a project on this from Science Buddies.
Project #4: Paper Clips and Water Displacement
Introducing the Scientific Principle of Water Displacement. When an object is immersed in water, it pushes water out of the way, causing the water level to rise. The volume of water displaced is equal to the volume of the submerged portion of the object. If the weight of the displaced water is greater than the weight of the object, the object will float. If the weight of the displaced water is less than the weight of the object, it will sink. This principle is known as Archimedes’ Principle.
You already know that you can float a paper clip on the surface of water with tension. Of course, water is holding the paper clip up, the same way water striders take advantage of it.
But you can also test to see how much paper clips might displace water in a glass or cup. See this science experiment for how to measure paper clips in a glass of water. The floating paper clip experiment website offers more resources.
Project #5: Paper Clip Structures
Introducing the Scientific Principle of Engineering Design. Concepts like structural integrity, stability, creative problem-solving are addressed.
While you can build something out of almost anything, paper clips are more fun. That’s because their metallic composition enables them to be bent and wrapped around each other. Check out this amazing creation:
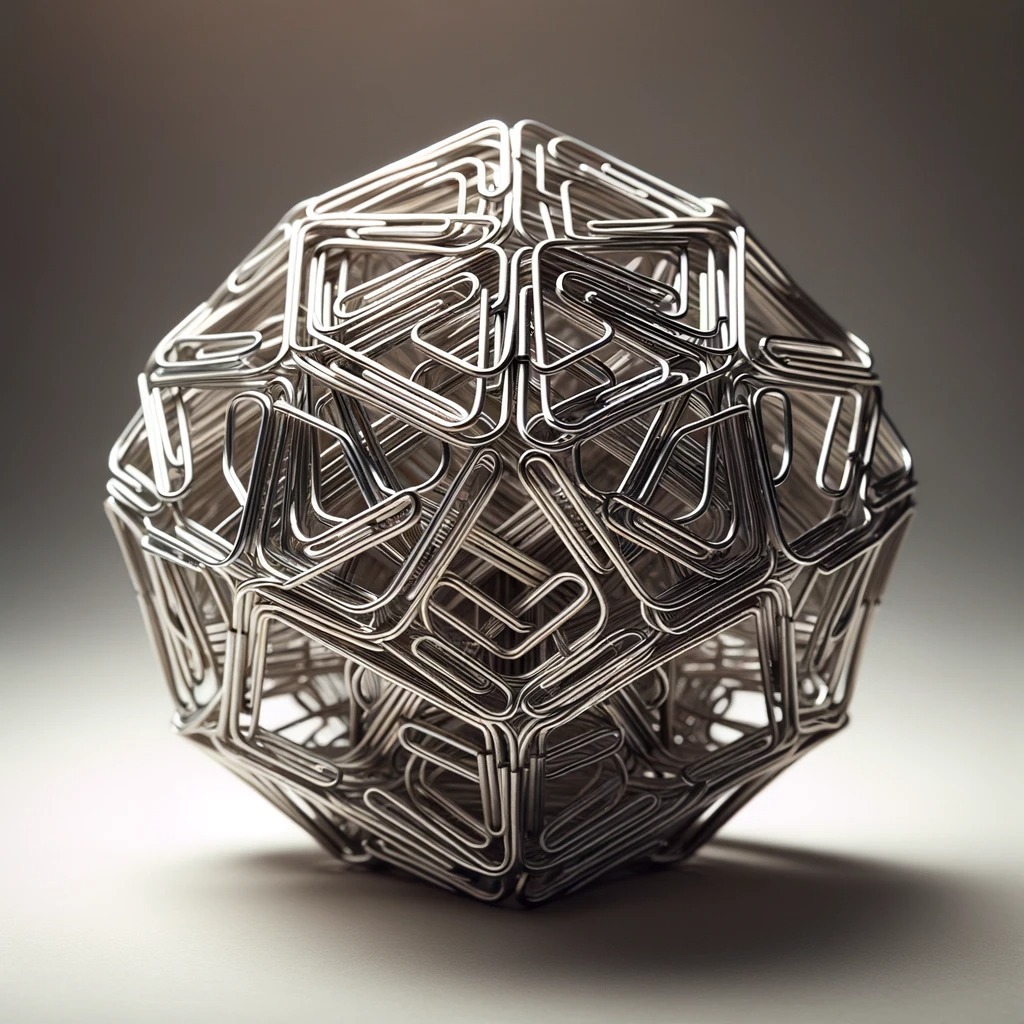
Creating a paper clip snub dodecahedron a unique and intricate project! To achieve this, you’ll need to follow a few steps to construct this complex polyhedron using paper clips. Here’s how you can go about it:
Materials Needed:
- 120 paper clips (preferably new or straightened for uniformity).
- Pliers for bending and adjusting the paper clips.
- Optional: Rubber bands or small wire ties to temporarily hold junctions.
Steps to Construct a Paperclip Snub Dodecahedron:
Step 1: Understand the Structure
- A snub dodecahedron is an Archimedean solid with 80 vertices, 150 edges, and 92 faces (12 regular pentagons and 80 equilateral triangles).
- You’ll be creating this structure by linking paper clips to form each edge.
Step 2: Prepare the Paper Clips
- Straighten all the paper clips. You can use pliers to help straighten and bend them as needed.
- Each edge of the snub dodecahedron will be represented by one straightened paperclip.
Step 3: Construct the Basic Units
- Pentagons: Connect 5 paper clips end-to-end to form a pentagon. Make 12 of these.
- Triangles: Connect 3 paper clips end-to-end to form a triangle. You will need to make 80 triangles.
Step 4: Assemble the Faces
- Begin by creating a small assembly of a few pentagons and triangles. Attach triangles around each pentagon. The triangles will share edges with each other and the pentagons.
- Remember, each vertex connects three shapes: two triangles and one pentagon.
Step 5: Continue the Assembly
- Gradually add more pentagons and triangles, ensuring that each connection is correct according to the snub dodecahedron’s geometry. It’s helpful to refer to a model or image of a snub dodecahedron for accuracy.
- Use rubber bands or wire ties to hold the structure together if necessary.
Step 6: Final Adjustments
- Once all the elements are connected, go through each junction and make sure every paperclip is securely fastened and properly shaped. Adjust with pliers as needed.
- Remove any temporary rubber bands or ties if you used them.
Tips:
- Be patient and meticulous. Constructing a geometric model with paper clips can be challenging due to their flexibility and tendency to slip.
- Work on a flat surface and possibly have a diagram of a snub dodecahedron to reference the structure as you build.
In the world of education, where innovation meets inspiration, the humble paper clip emerges as a versatile tool for scientific exploration. From magnetism to electrical conductivity, paper clips offer endless opportunities for engaging experiments and creative projects. National Paper Clip Day may come once a year, but the wonders of paper clip science know no bounds. So, grab your paper clips and join us as we delve into a realm where curiosity knows no limits, and learning knows no bounds. Let’s clip together a brighter future, one experiment at a time.