

Chromebooks are so powerful that they come with built-in accessibility features right out of the box. In order to unlock learning experiences for students with diverse needs, abilities, and learning preferences, try some of the accessibility features listed below.
Increase the Size of the Browser Content
Press Ctrl + Plus (+) to increase the size of the browser content. Ctrl + Minus (-) will decrease the size and Ctrl + 0 will reset it. The rest of the desktop will be unaffected. (This is great when you want to highlight a particular section of a website or even for those of us with “older eyes.”)
Increase the Size of All Items
Press Ctrl+Shift+Plus (+) to increase the size of the browser content. Note that the status tray and tab strip enlarge, too. Ctrl+Shift+Minus (-) will decrease the size.
Turn on the Built-In Full-Screen Magnifier

To turn on the magnifier, click the snowman (three dots in the upper right-hand corner of the Chrome browser) > Settings > Advanced > Manage Accessibility Features (under Accessibility category) > Enable Screen Magnifier. Pressing Ctrl + Search + M will also get the magnifier to appear. To adjust the magnifier, hold Ctrl+Alt and scroll two fingers on the touch pad.
Use High Contrast Mode
To make the screen a little bit easier to see, use High Contrast Mode which inverts all colors. To enable this, click the snowman (three dots) > Settings > Advanced > Manage Accessibility Features > Use High Contrast Mode. Pressing Ctrl + Search + H will also toggle the contrast on and off.
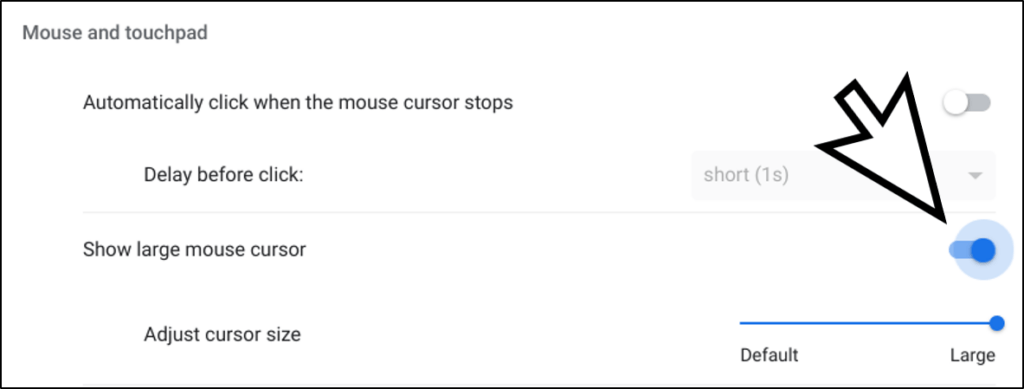
Adjust Mouse Cursor
Some students may prefer a larger mouse cursor. To enable this, click the snowman (three dots) > Settings > Advanced > Manage Accessibility Features > Show Large Mouse Cursor.
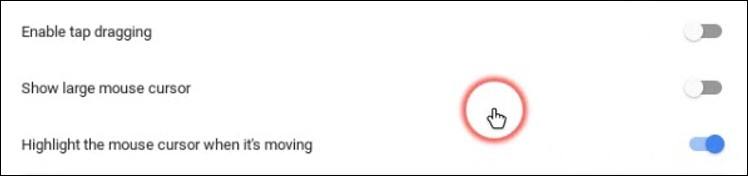
Highlight the Mouse Cursor When Moving
Colored circles can highlight the mouse cursor when it’s moving on the screen. To enable this, click the snowman (three dots) > Settings > Advanced > Manage Accessibility Features > Highlight the Mouse Cursor When It’s Moving.
Hear Text Read Aloud
When your students want to hear certain words or passages, all they have to do is highlight what they want to hear and then press Search+S once Hear Text Read Aloud is enabled. To enable this, click the snowman (three dots) > Settings > Advanced > Manage Accessibility Features > Enable Select-to-Speak. Once enabled, you will also notice a small speaker icon appear in the status tray. Students can click the speaker icon to select text that they want to hear.
Use the ChromeVox Screen Reader
The built-in ChromeVox screen reader makes everything accessible using synthesized speech. Press Ctrl+Alt+Z to enable or disable it at any time.

Enable Dictation
It might be easier for students to speak into any text field instead of typing. To enable dictation, click the snowman (three dots) > Settings > Advanced > Manage Accessibility Features > Enable Dictation. Once enabled, you will notice a microphone icon appear in the status tray. Students can then place their cursor in a text field, click the microphone icon, and begin speaking. Pressing Search + D will also enable the microphone.
Chromebooks help extend and expand student learning experiences, including those with disabilities and diverse approaches to learning. To learn more about accessibility in Google for Education products, click here. In addition, check out some of these TCEA TechNotes blog posts on accessibility.