

Whether you use Schoology, Google Classroom, Canvas, or another Learning Management System (LMS), your digital classroom is an extension of your physical space. An LMS provides a digital location to house your files, collect assignments, and conduct assessments. However, the power of the LMS lies in creating ways for students to connect, collaborate, and produce in ways that are inconceivable in the physical classroom.
Students should spend time in both and learn to access, read, and complete assignments in each modality, working simultaneously with and without technology. Just like in your classroom, assignments don’t have to be solely for turning in work, but many teachers do not know how to extend beyond this functionality. Let’s dive into some of my favorite ways to use your LMS!
You’ll also find a bonus guide for adding instructions to your assignments – that students will actually read!
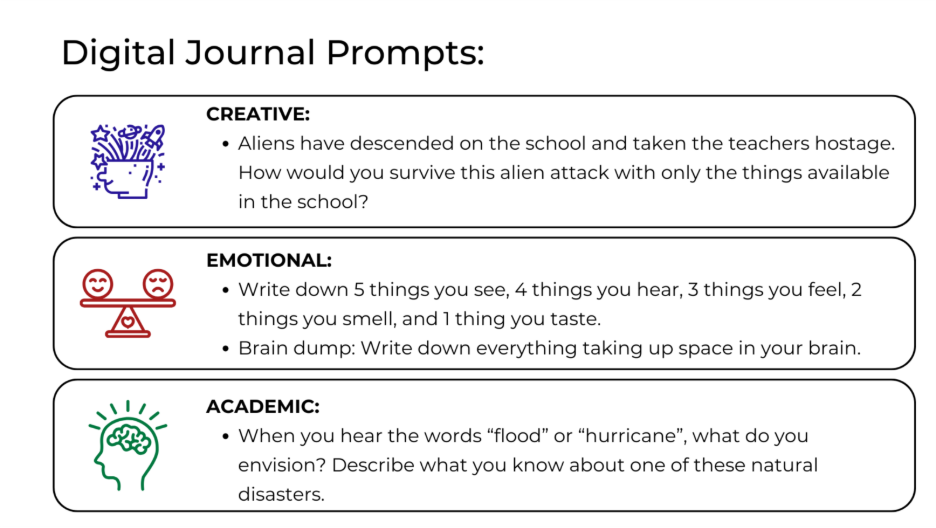
1. Create a Digital Journal.
Digital journals allow students to express themselves creatively, emotionally, or academically. These informal journals teach students to write about the world around them, and they make exceptional bell ringers. A digital journal is a living document that students can add to as often as they want (or you assign), and it is shared only with you. While discussion boards can also be used for journaling, a journal provides one-on-one interaction between you and the student.
Why?
Students lose valuable minutes searching for documents on their computers. By placing this link in the LMS, students easily find it by opening the assignment! You also have an easy way to view them, just as you grade assignments. This type of activity also provides typing exercise, writing practice, and gives you five minutes to collect yourself before class begins.
Create it!
The key here is to create a shared document that lives within your LMS. Create an assignment that has a due date at the end of the year and place it in an easy-to-find folder. Then, help students create a document, copy the link, and paste the link into the assignment. Students can then type in their document without resharing or uploading assignments!
2. Interactive PowerPoints/Google Slides
Collaborative documents are, in my opinion, an underutilized instructional tool! These documents shared among students provide a space for collaboration. As the instructor, you customize the document with an activity and guidelines for student creation.
Why?
This mirrors how students would collaborate on a paper project. Rather than drawing a map or analyzing an article, students complete the same activity online. This also provides the perfect opportunity to practice digital literacy, offering a controlled environment for practice and exploration.
Create it!
Create a presentation that will allow students to collaborate. I like to create a template and assign each student or group a specific slide to work on. Create a link for the document and ensure that anyone with the link can edit the document. Place this link in an assignment for students to open and complete. Because it is a shared document, you can watch them collaborate on screen, and you have access to the document’s history.
Some of my favorite interactive presentations are shared by Ditch That Textbook.
3. Video and Audio Responses
A hidden feature of LMS assignment and assessment submissions is the submission option for video or audio recording. Rather than students typing an assignment, they have the option to turn on their camera and respond via video! Generally, students choose this as a submission option when they turn in their assignments.
Why?
Providing your students with options for submission keeps classwork exciting and different. By sharing through audio or video, students practice collecting their thoughts, speaking aloud, and recording themselves.
Create It!
Most LMS’s will provide this as a submission type for students inside an assignment, so create an assignment and provide specific instructions for students. Include which tab to click, how to allow access to the camera and microphone, and expectations for speaking. Provide screenshots and video instructions if needed. When you’re ready to view, click on the assignment and cycle through each video!
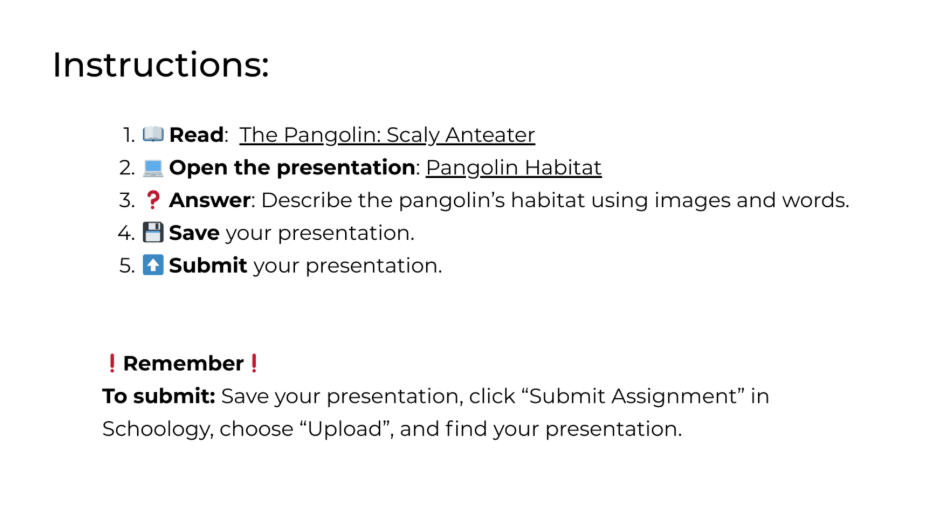
Bonus: Instructions Your Students Will Actually Read
Giving instructions digitally requires students to read the instructions, which also means you will be responsible for dozens of questions about those instructions. Continuing to say, “read the instructions,” doesn’t always solve the problem. Instead, change the way you share the instructions. Large blocks of text are overwhelming to students, and the requirements of the assignment get lost.
Tips for Instructions:
- Text Size. The average text size in an LMS is 12-point font, which is difficult to read on a laptop or Chromebook. Enlarge all text to a size 14–16-point font so instructions aren’t missed.
- Keep it Concise. Like this sentence!
- Images or Emojis. Break up the text and show students what is important. (Remember to add Alt Text to all images for screen reading accessibility.)
- Numbered Lists. Provide students with individual steps broken into chunks.
- Submission Instructions. Describe the steps to submit the assignment. Provide screenshots or videos if necessary. Tip: Copy this and edit for each assignment.
Your Learning Management System is a powerful tool for extending your classroom into a digital space! As you experiment, know that technology takes time to learn, for both you and your students. Remember that technology enhances your magic as a teacher!