

As teachers, we all have Post-It notes in our desk drawers. If we are lucky, we have different sizes and colors. Typically we use them to jot down our to-do list to take care of during our planning period or write a quick note to leave on another teacher’s desk. But what if we make use of that small stack of paper to enhance our teaching? Here are some ideas and templates that you can use to do just that!
Printing Your Post-It Note Templates
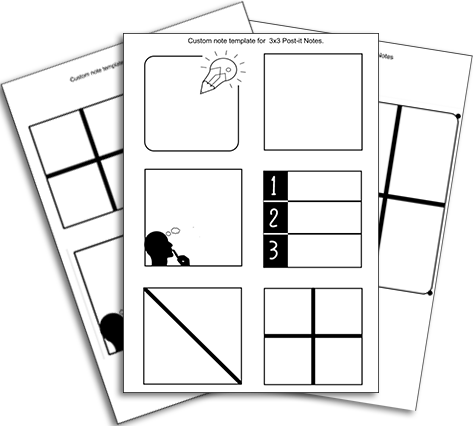
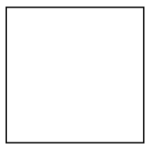
Here is a great collection of templates that are perfect for teaching and learning and can be copied onto your Post-It notes. There is a full set of templates and some tips so that you don’t ruin your copier! (Don’t ask how I came to know some of these tips!) Be aware that your printer may make some adjustments when printing, so you’ll probably have to tweak the template some so that things line up. Once you get through that trial-and-error phase, you’ll be able to fly through. In the template slide deck, you have a base template page for 1⅞”x1⅞”, 2″x2″, 3″x3″, 4″x4″, and 4″x6″ Post-It notes. Keep in mind that your “paper” doesn’t have to be real Post-It Note brand. You should be able to easily tweak it to what you need.
Begin by printing the base template page for the size of note you want to use; I suggest actually printing several copies of that specific page. Then carefully place the sticky notes so that the sticky part is attached to the top of a note box on the page; this should keep it from getting jammed as it goes through the copier. This actually may be one time in which having a simpler, less complex copier/printer may be a benefit. Now that your sticky notes are stuck to the page, place them in one of the trays (I typically place mine in the pass-through tray). You’ll want to make sure that you have the printed pages with the sticky notes on it in the tray so that the top with the sticky end goes in head first. Locate the slide in the provided slide deck that has the note you want to use. You’ll probably want to duplicate the slide, delete all the images you don’t want to print, duplicate the image you do want print, and place a copy of the image on each square on the page. Now print just one copy of that slide. Be sure you are not printing in duplex mode and that you have selected the loaded tray.
Anticipate that the first few prints won’t be exact due to differences in copiers/printers, etc. You may need to move the notes over a bit to one side or another. If you need to edit the template, click on VIEW→Theme Builder. If you have downloaded the slide deck as a PowerPoint file, then you will go to VIEW→Slide Master. Edit the specific slide and then close the Theme Builder/Slide Master. Below is a brief tutorial on editing a slide in Theme Builder.
Teaching Ideas
Let’s take a look at some of the different images you can print on your Post-It notes and consider how we can use them. Feel free to make your own.
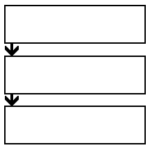
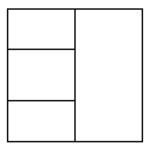
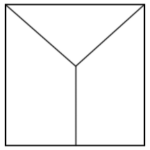
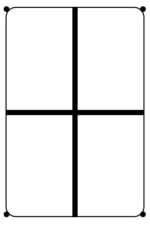
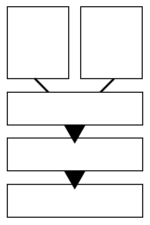
This mini-graphic organizer is great if your students are working with a progression of ideas or actions.
SCIENCE: Three cycles of an ecosystem, three stages of matter, life cycle of a grasshopper, taxonomy of an animal (phylum, class, order)
ELA: progression of a story (beginning, middle, end), components of an effective essay, three-act structure in narrative fiction
SOCIAL STUDIES: three steps of civil discourse, three consecutive leaders/presidents/rulers, three-step process of becoming a state
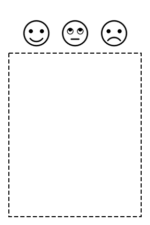
EXIT TICKET: one thing I learned → why it’s important → how it can apply to MY life
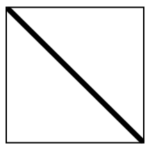
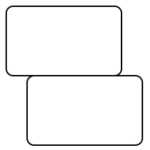
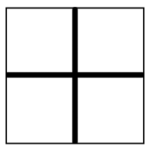
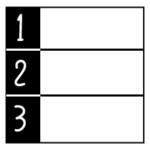
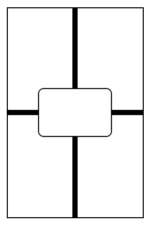
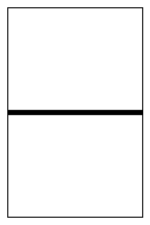
This graphic organizer is great if you have before/after, two parts, cause and effect, etc.
SCIENCE: write the molecular formula on one side and the structural formula on the other, trait and alleles
MATH: problem/solution, sketched geometric image and vocabulary or definition, multiplication fact and drawn representation
ELA: tone and mood of a particular chapter or book, setting and events of a particular chapter, synonym/antonym
SOCIAL STUDIES: push/pull factors, opposing viewpoints of a given topic, checks and balances of two branches of government
EXIT TICKET: main idea I learned today and question I still have, two important things I learned in today’s lesson, something I learned and how it applies to my life
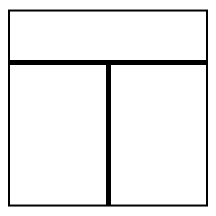
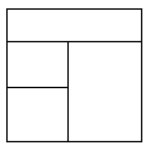
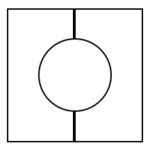
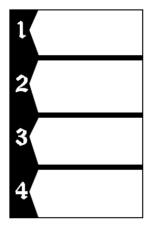
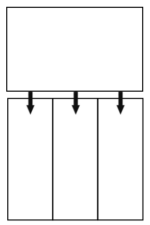
The T-chart is a great way to organize your thoughts and content. A few ideas for using this graphic include:
ELA: name of a book with characters on one side and their traits on the other, listing facts and opinions in an article
SCIENCE: chemical change (items on one side before change and the corresponding results on the other), sink/float experiment results
SOCIAL STUDIES: evaluating the pros/cons of a topic, comparing two political leaders, then/now comparisons
EXIT TICKET: learning intention for the day with what I learned on one side and drawing or small sketchnote on the other side
There’s an App for That
If you have an iOS or Android device, you can capture student work on sticky notes by using the Post-It app. This free app even allows you to create digital sticky notes to add to the information already captured. Once you take a picture of the student responses on the sticky notes, you (and they) can rearrange them as needed. When done, you can share to PowerPoint, Excel, PDF, Dropbox, Trellow, Miro, and more. Just follow these three simple steps to get the most from the Post-It app:
- Capture your notes – Have students write on the sticky notes as instructed. When done, have students add their sticky notes to a flat surface like a wall or desk; be sure that none are overlapping. Use your device to capture the information. If students have devices, they, too, can capture the information to work with.
- Organize your thoughts – The app will automatically digitize each note. At this time, additional digital sticky notes can be added. Rearrange the digital notes by dragging them in clusters, rows/columns, groups, etc.
- Share with everyone – Share your organized board with your team, the class, the world! For students with an IEP or a 504 plan, you can easily send an electronic copy to them.
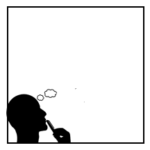
Additional Post-It Note Graphics
Below are other graphics that you will find in the template slide deck. Let me know how you would use one with your students. Even if you don’t print out the graphic, students can easily fold and/or draw on the sticky note to create the image. Screenshots by the author.
7 comments
That was super easy and fun and I didn’t even break our copier! Loved this idea, Bruce!
What a cool idea! I am going to try it out this year. Thanks!!
I love teaching with Post-it Notes! These templates are great!
Thanks so much for the awesome templates! Love these!
If I need pages for 25 students do I stick sticky notes to all 25 pages and then run through copier?
Just make the single page full of the image you’d like and then make as many copies as you need on pages with notes stuck to them as directed.
Extremely creative way, I will definitely use it in my work.