

Recently I saw a short video created by Tom Mullaney on how to transform emojis from their original color to a monochrome tone. He suggested there might be times you want to change the skin tone of an emoji or that changing the color can help emojis pop. I immediately wanted to experiment with his suggestions and found the process to be very simple. Note that this trick will work in Google Docs, Drawings, Sheets, and Slides!
What Does a Monochrome Emoji or Icon Look Like?
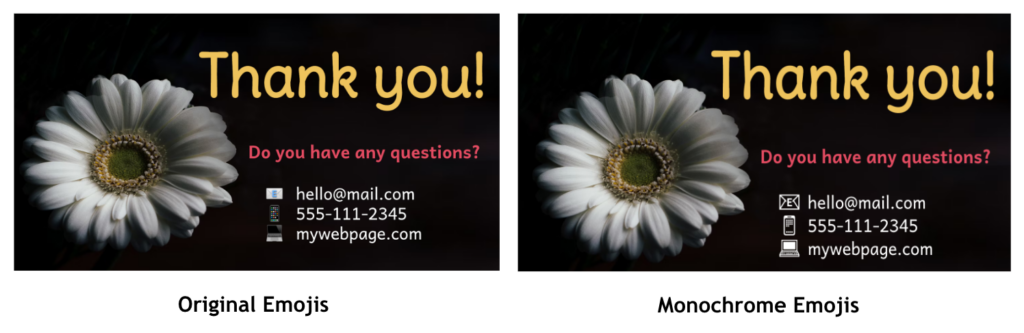
Let’s start with the end in mind. Below is a slide that I created for a presentation with presenter contact information. I created one with original emojis to the left of my contact information and a slide with monochrome emojis. The original emojis aren’t easy to see, and I really like the monochrome emojis better.
Install the Noto Emoji Font
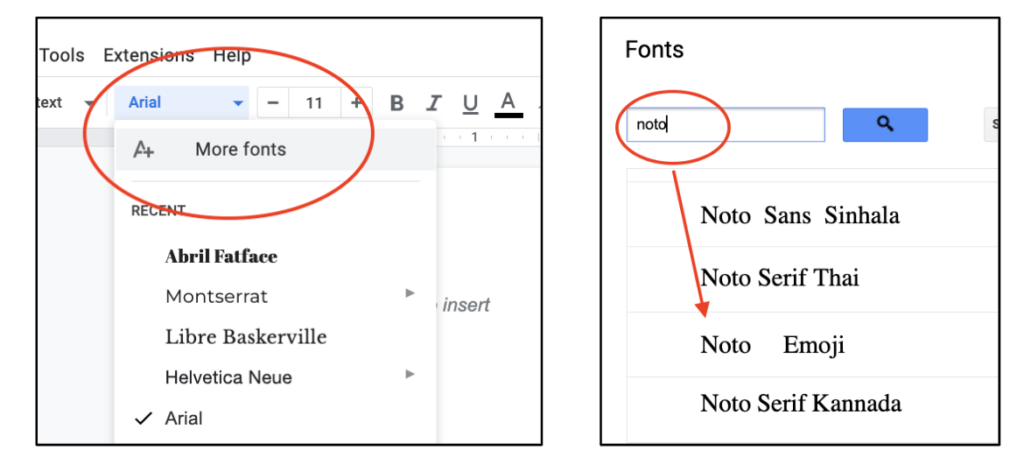
The first thing you will need to do is install a font called Noto Emoji. Once you install it in one Google App, it will be available in the other Apps. I installed the font first in Google Docs. You can install it in three steps:
- Click on the font menu, and then select “More Fonts.”
- In the search field start typing “noto”.
- Select Noto Emoji from the dropdown list, then click OK.
Finding Emojis and Icons
There are two ways to find emojis. You can find them in the Special Characters menu within Google Workspace or you can get them at Getemoji.com. To insert an emoji into a Google document or slideshow, follow these three steps.
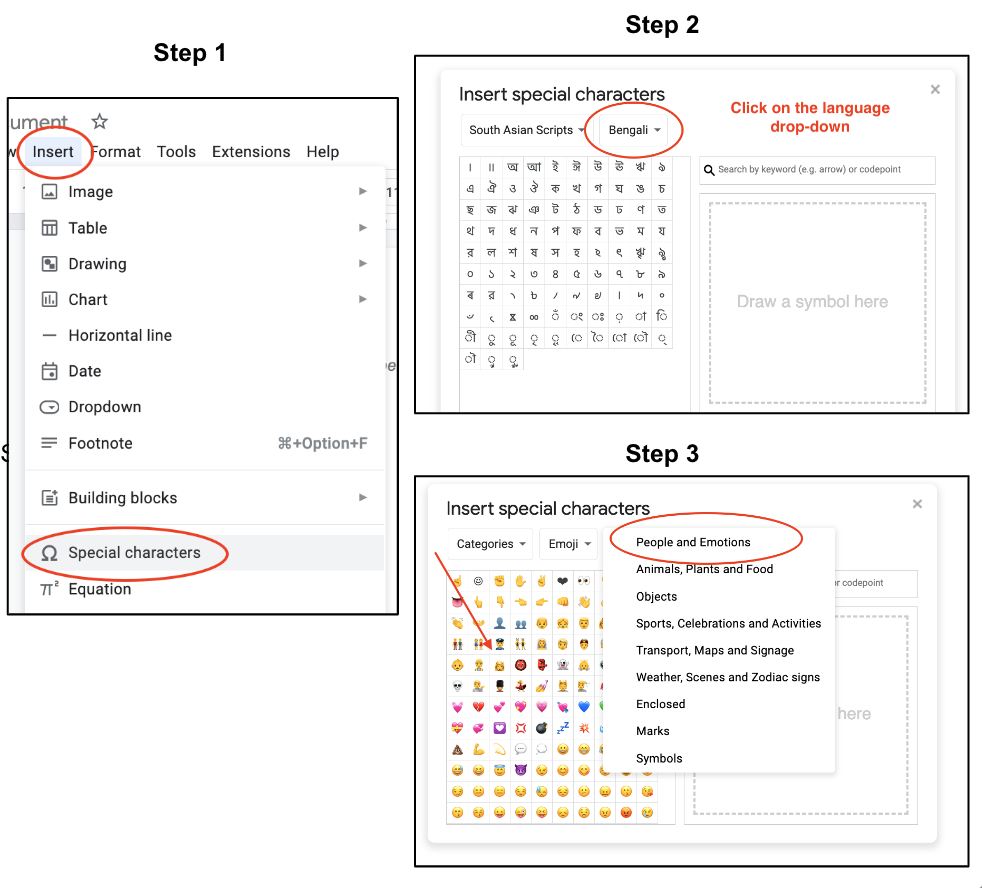
Step 1: You can find the Special Characters menu under the Insert menu.
Step 2: Click on the language drop-down menu and then select Emoji. You can then navigate through the different types of emojis (people, animals, objects, etc.).
Step 3: To insert the emoji into the document, you will highlight and click the emoji you want to use. It will automatically insert into your document wherever you have placed your cursor.
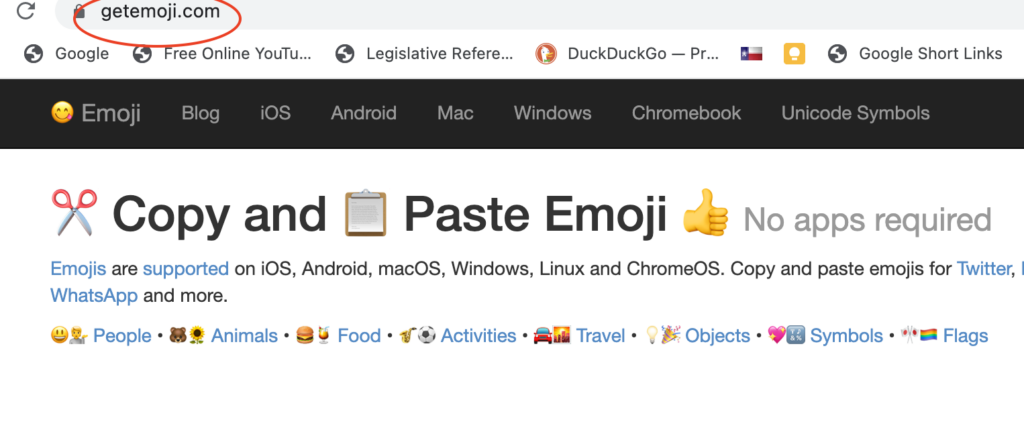
As mentioned above, you can also access some emojis at Getemoji.com. Once you find one you like, all you have to do is copy and paste it into the document.
Editing the Emojis
Now the fun begins! Once you have inserted the original emojis into your document, you will highlight the ones you want to change. You will then need to change the font to Noto Emoji. This will turn them into a black monochrome. You can then change the colors of each one depending on your need.
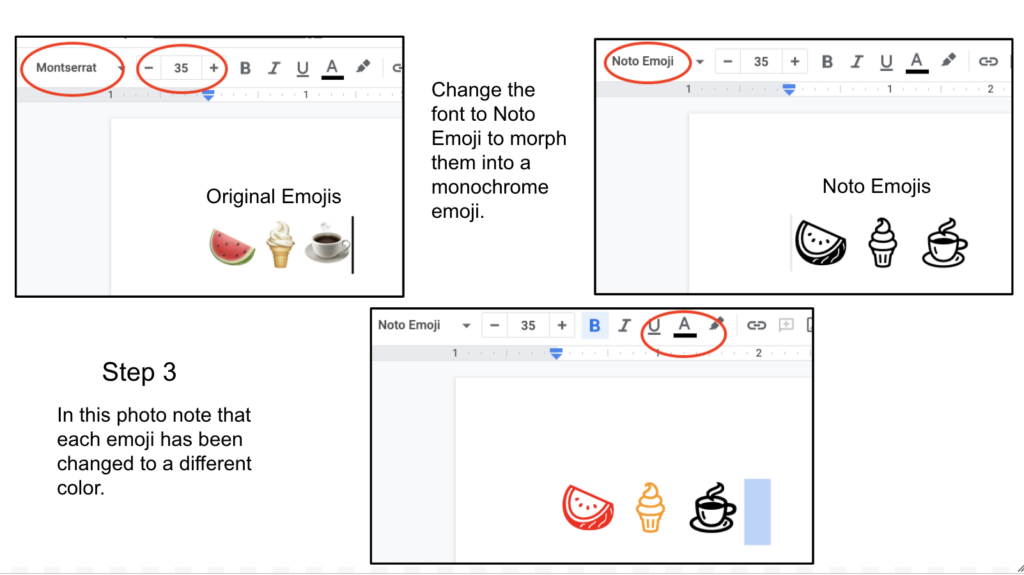
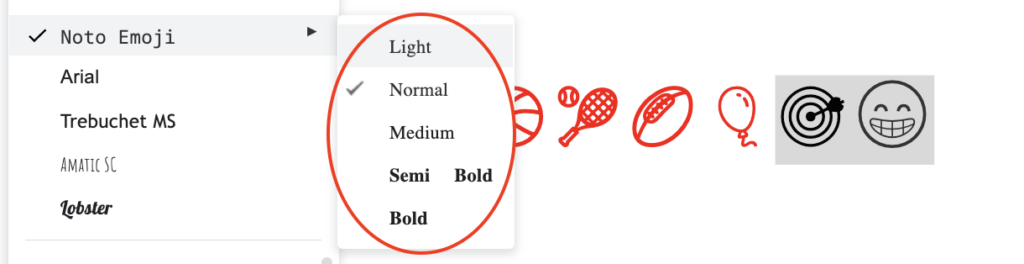
Make the lines darker by clicking on the “B” for bold or you can also change the saturation of the emojis when you change the font to Noto Emoji. The side pointing arrow opens up a menu with different ink saturations for you to choose from.
It’s Simple But Has a Big Impact
This is a skill that is easy to master but has the potential to help you personalize your work. Icons and emojis are a simple way to convey a message or feeling without using a lot of words. This editing technique can help you communicate your message more precisely, personalize your work, and make things more visually pleasing.
5 comments
I can’t wait to share this! We have been using emojis and icons instead of more traditional bulletpoint but they sometimes were not quite “right”. This will be a big help. Thank you!
Thanks Jean! I’m glad it was useful.
How do I change the color of my emojis on a Chromebook?
Hi Shelby! If you are using Google Workspace on a Chromebook, you should be able to follow the instructions in the article to change the color of your emojis. If you have any problems, please write back and let me know!
Can you copy and paste it onto another app. If so how?