

One of my favorite Google tools? Google Drive. It’s a phenomenal mixing board for getting things done, saving files, and more. If you have a Google Workspace for Education account, Google Drive is where you start and end. In some ways, it’s the Alpha and Omega of cloud storage. Let’s explore some ways Google Drive is so amazing, and play bingo, too.
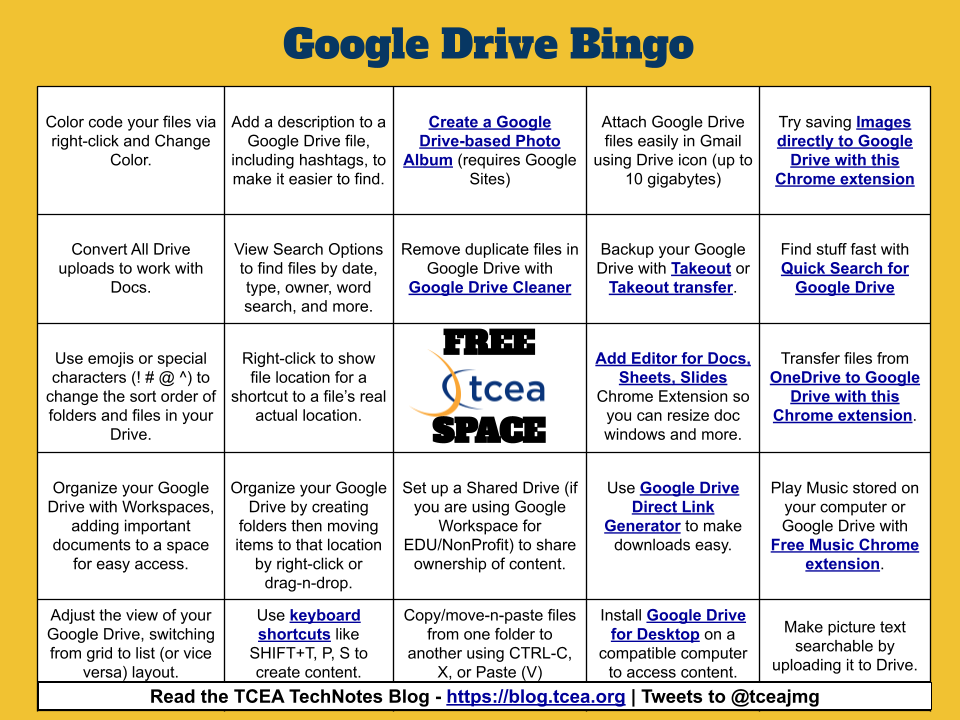
To get you started, here are some of my essential Google Drive tips. I’ve followed them up with some extras you may appreciate. Each tip comes with a resource link, either to a video or a blog entry. Ready to get started?
Grab your Bingo Dauber
Here are a few of the Google Drive tips featured in your virtual Bingo card. How many of them can you check off your list? Get your ink dauber and worksheet, and let’s get started. Sing out when you get four corners, cover all blocks, or get a straight line, ok?
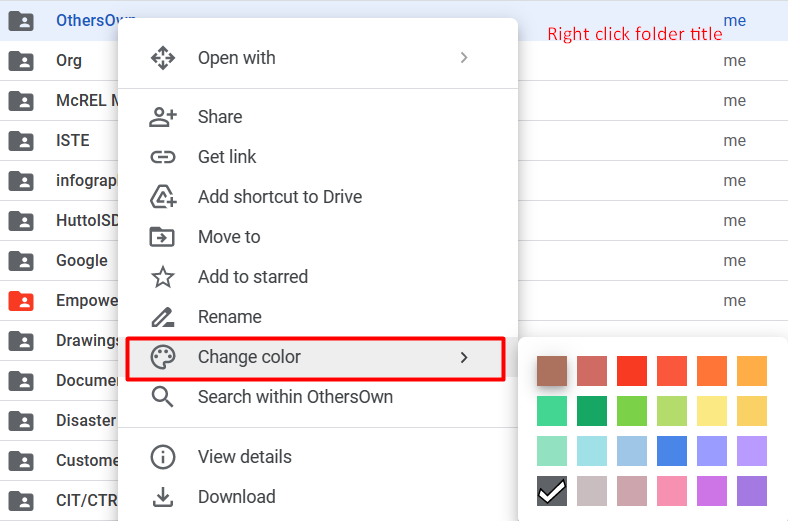
1. Color code your files.
Wish you had an easy way to call your attention to your own folders in Google Drive? I don’t know about you, but I love relying on colored folders (e.g., green, red, blue, purple) when working with paper. I do the same digitally with Google Drive, adjusting the colors as needed. Just right click on the file name and select “Change color.”
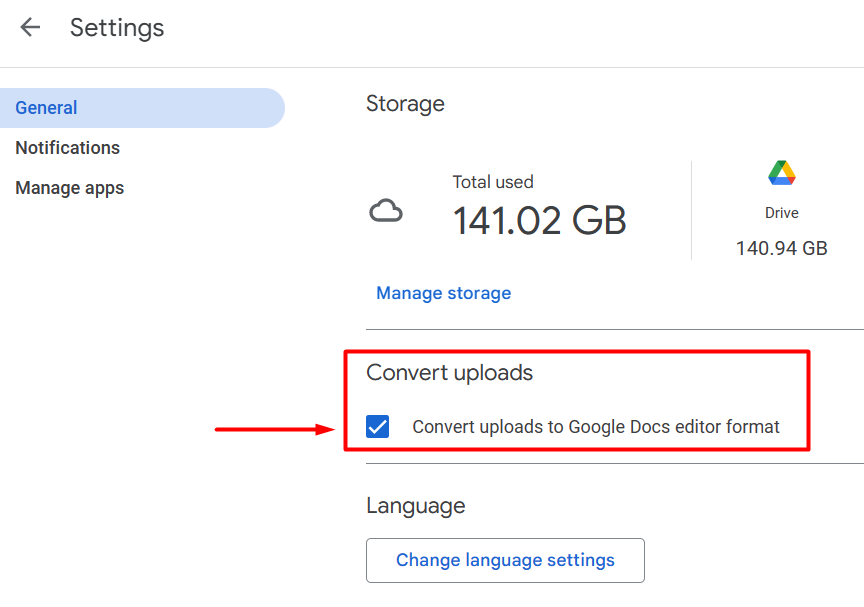
2. Convert all Drive uploads to work with Docs.
When you know how much space you have allocated for Microsoft Office documents (XLS, PPT, DOC), this option makes sense. Instead of using your precious Google Drive space, have Google Drive automatically convert MS Office documents to Google Docs. You’ll save space, which is important because space, even in Google Drive, can cost you money.
3. Use emojis or special characters (! # @ ^) to change the sort order of folders and files in your Drive.
You can easily add emojis and special characters to the front of your folder title or filename. When you do this, you change the sort order of the folders and/or files.
This allows you to emphasize that certain files come first no matter what their title is.
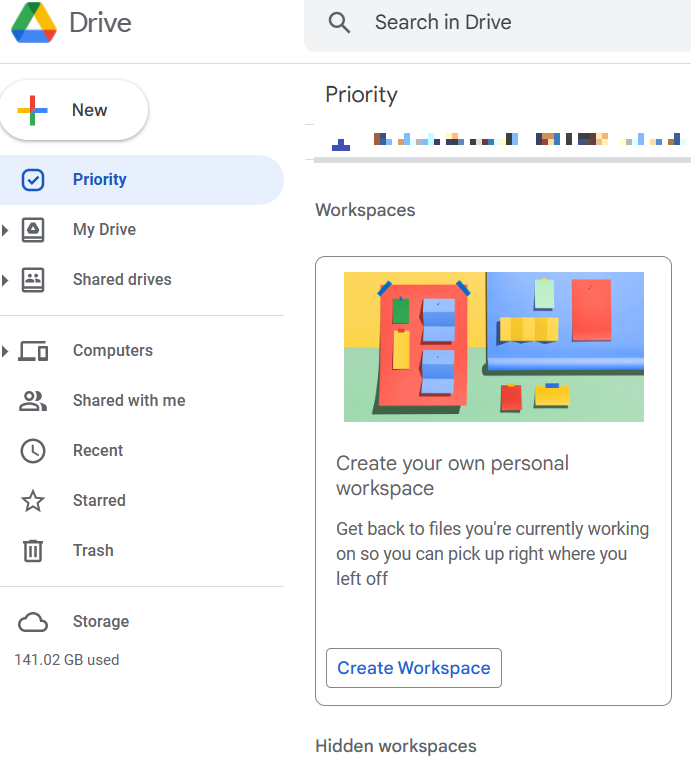
4. Organize your Google Drive with workspaces for easy access.
It’s so easy to add several files that are relevant to a common topic or purpose. When you group those files as a Workspace, they become easier to find. That’s a lifesaver in cloud storage where it can be easy to misplace items.
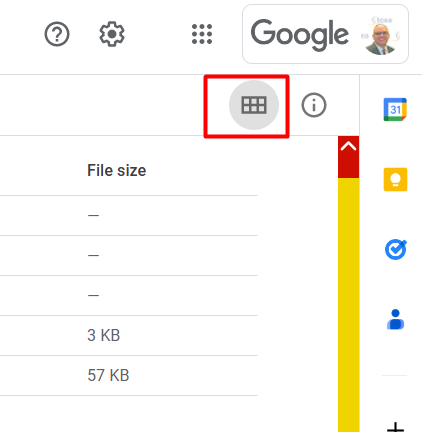
5. Adjust the view of your Google Drive by switching from grid to list view.
Want to see image thumbnails? Use grid view to get a preview of the images that you may have stored in Google Drive. Want an alphabetical list based on the title of a file? Use list view to get that sortable list of filenames.
6. Add a description and hashtag to a Google Drive file to make it easier to find.
Some folks put things in Google Drive, and absent a way to organize files (I organize by year, never deeper than two folder levels), they lose their marbles. Er, I meant to say, they lose their files and lose their marbles as a result. You can right-click and add a description to any Google Drive file. Add hashtags and they may help you find things more easily.
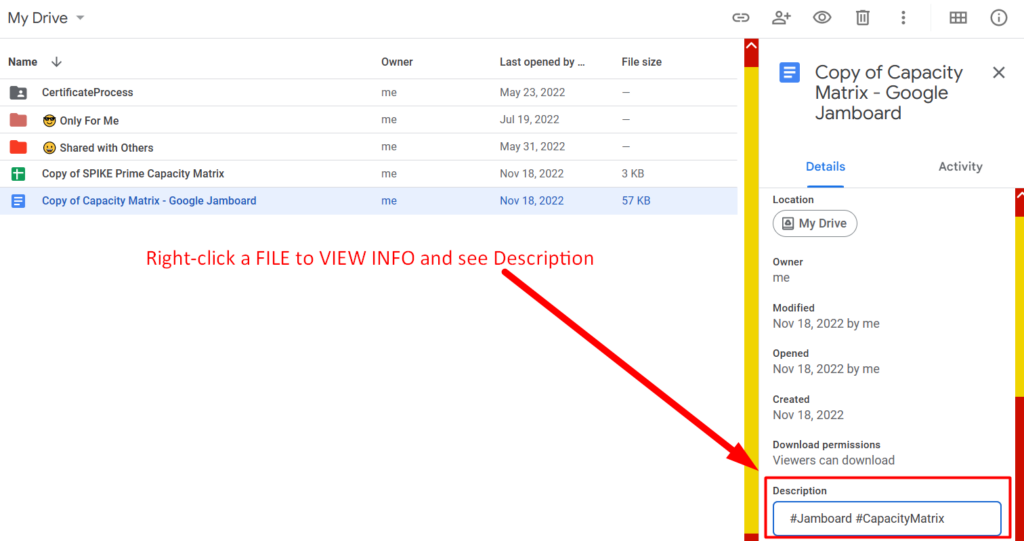
What’s more, you can see the file’s activity from the right panel that pops up. You can also open the file and view Activity Dashboard via Tools.

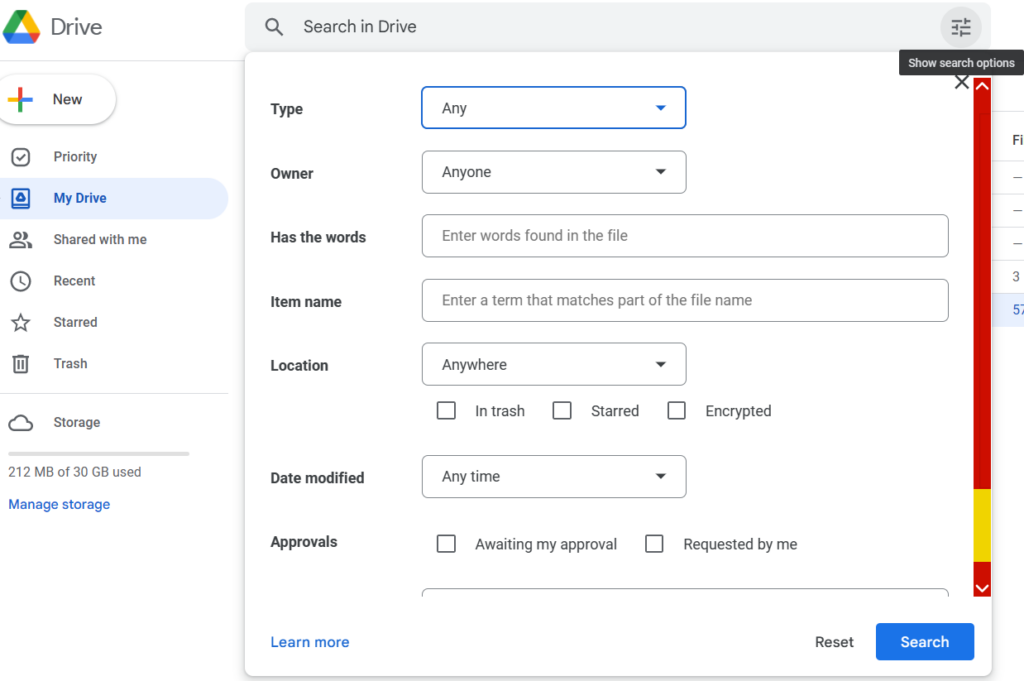
7. Refine a search by date, type, owner, word search, and more.
Make it easy for yourself to find files. If you’re not using hashtags in descriptions, then use Google Drive’s search options. You can narrow the search results if you use the search options available.
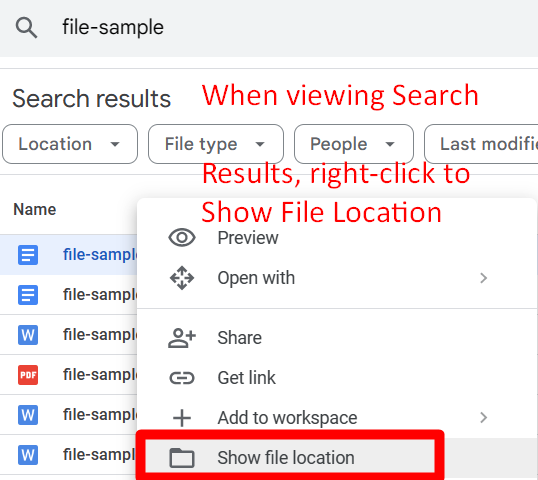
8. Show the file location for a shortcut.
Wish you knew where the file a shortcut links to is located? Right-click the file shortcut to see its actual file location. Another tip to keep in mind?
This next tip is a bonus tip, not included in Google Drive Virtual Bingo Card.
9. Easily open a file’s home folder from the open file.
It’s so easy to do a Google Drive search, find a file, open it, but then still not know where it is. To find the location of the original file, open the file from the search results. Then look for the small folder next to the document title. Click the arrow next to the folder. It will allow you to open the folder where the file resides. To find the file, look for it in alphabetical order.

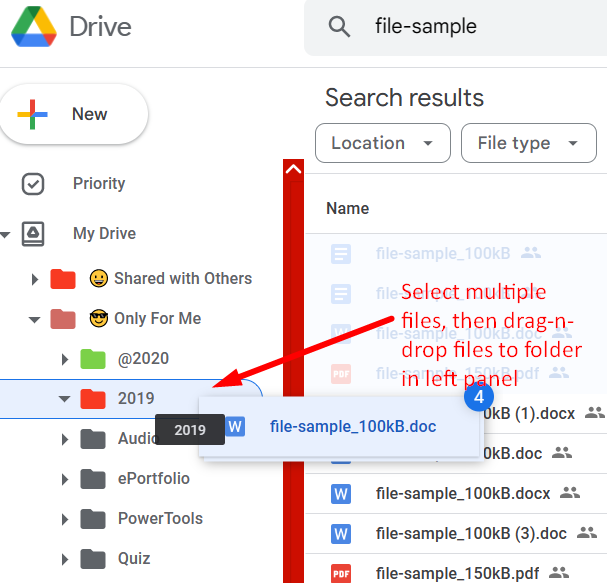
10. Organize and move items inside Google Drive.
There are three different ways to move items in Google Drive. Let’s discuss two of them in this tip (more later).
The first involves using the left sidebar. Navigate to the file(s) you want to move in the main screen, select them (shift or ctrl click works), then click and drag them to the folder in the left sidebar where you want the file(s) to reside.
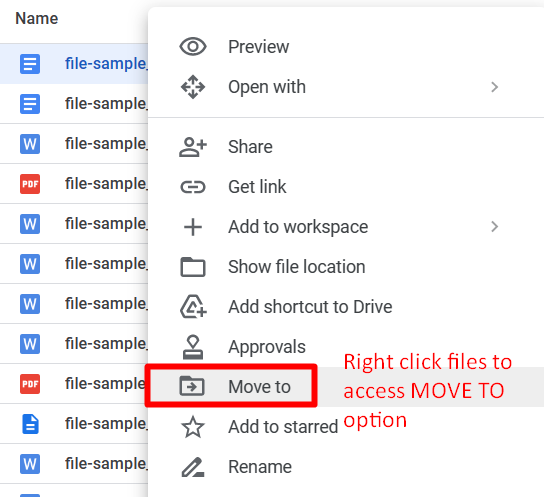
The second approach is to right-click and choose “Move to” to relocate files to a preferred location.
11. Use keyboard commands to copy and move files.
A new feature for those of using Chrome or Chromium browsers is using the shortcut Ctrl-C (copy) to copy several files. You can also move files using Ctrl-X in this manner. Once you have copied/cut files, go to your desired folder destination. Then, press Ctrl-V to paste the file(s) in.
12. Use keyboard shortcuts to create content.
Did you know you can create content using keyboard shortcuts? In Google Drive, you can use the following keyboard shortcuts to create new documents:
- Shift – T to make a Google Doc
- Shift – P for Google Slides
- Shift – S for Google Sheets
These documents come up as untitled, blank documents in whatever folder you happen to be in when you create them.
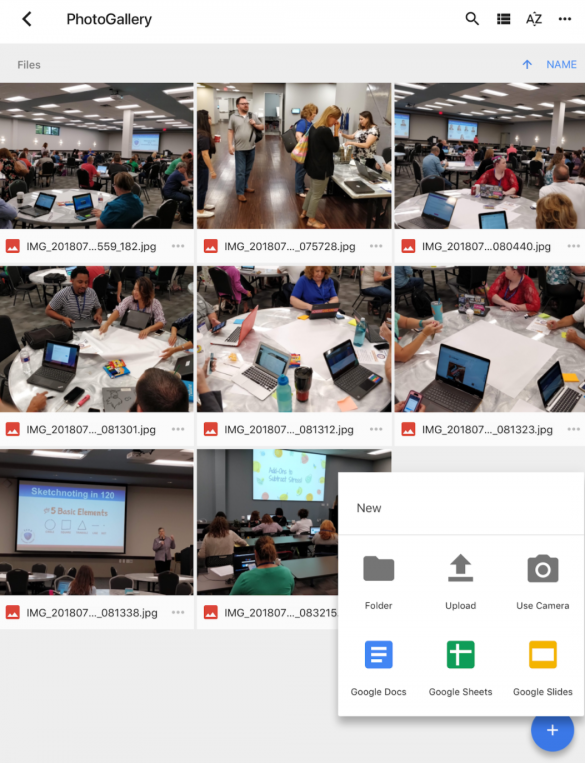
13. Create a Google Drive-based photo album.
Do you like storing photos in Google Drive? It’s an easy place to drop images off your phone. You can even set it up so that images get placed there via Google Forms, or you can share a Google Drive folder with others. Then, they can place images and media files in a shared collaborative space. Using Google Drive and Google Sites, you can even create a website photo album!
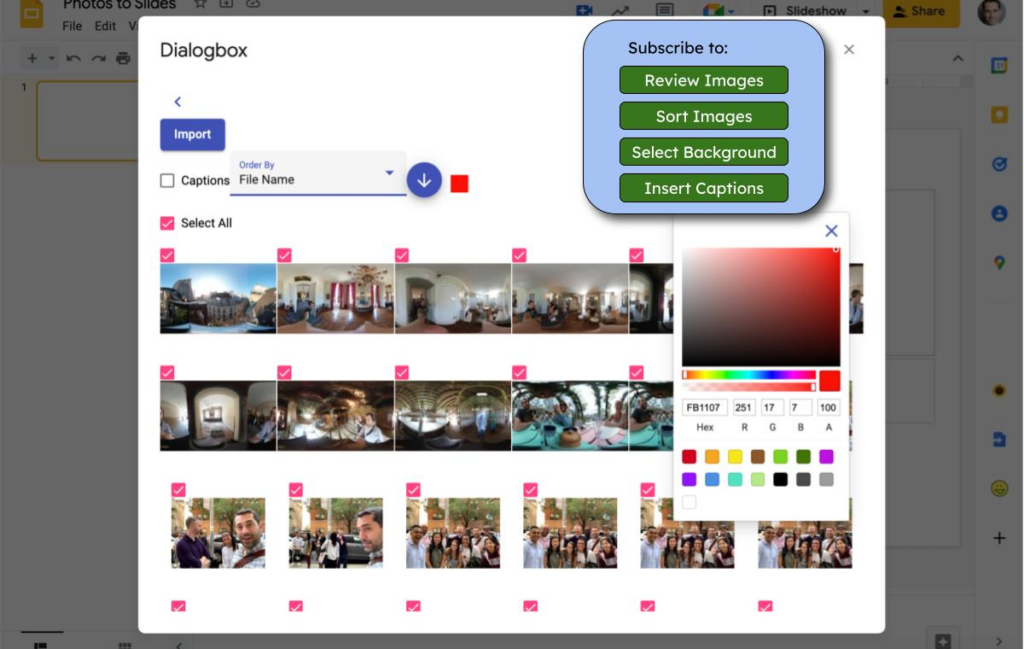
If you simply want to use pictures from a Google Drive folder in a Slides presentation, try this approach. Use the Photos to Slide Chrome add-on. It makes it easy to select the images you want to use, then shuffle slides to arrange pictures. You can import up to 1,000 images at a time and sort them by time, filename, or description.
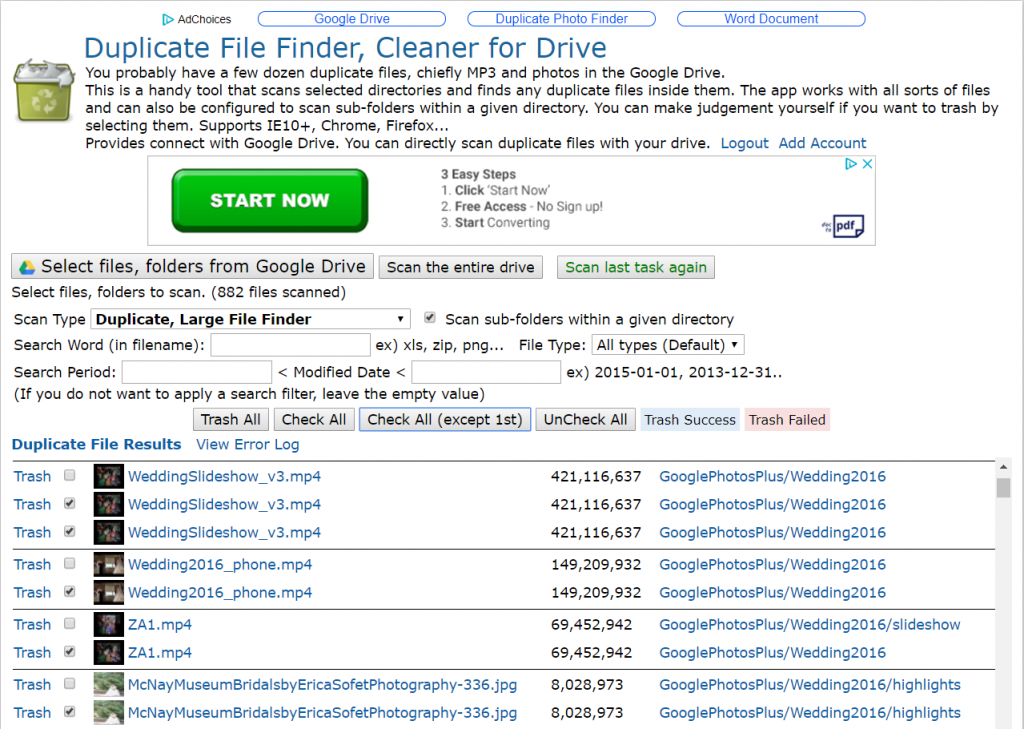
14. Remove duplicate files.
Need to remove duplicate files, but you’re not sure where they might be? Sometimes, when you drag and drop, your finger slips, and who knows where those copies went. The Google Drive Cleaner is my go-to solution for removing duplicates.
15. Set up a Shared Drive to assign to the team.
If you’ve worked with Google Documents, you know what a pain it is when someone leaves. What happens is the Google Admin deletes that user’s account. Even if everyone said that they “got” the files, there’s always one missing. To make sure that critical files for a team don’t go missing, put them in a Google Shared drive. That way, they belong to the team, not to one person.
Want More? Time for Google Drive Bingo
Looking for extra tips? Be sure to play Google Bingo. Get your card here for 10 additional Google Drive tips.