

“What’s the best way to collect and share photos for my journalism class?” a high school journalism teacher asked me. The answer, without a second thought, was, “I’m not sure.” A few years later, a middle school journalism teacher asked me the same question. “I’m not sure. I could rig up an FTP solution. A PHP-based photo gallery would make it easy to share images via the web.” The question always arose though, “Why can’t I use Flickr?” Now, however, you can use Google Photos within the G Suites for Education to get the job done. It’s so easy. Let’s explore Google Photos as a tool for capturing and sharing images. Of course, Google Photos can do so much more.
Exploring Google Photos as a Collaborative Tool
If you’re not using Google Photos to back up your photos to the cloud, you need to consider using it. Most cloud storage solutions (e.g. OneDrive, Dropbox) offer quick back up of photos to the cloud. The nice thing is that Google Photos offers unlimited storage. If you have a school district G Suite for Education account, then use Google Photos. It works great as a collaborative tool to back up and share pictures. Let’s explore some tips (view a detailed feature list).
Tip #1 – Back Up Personal Photos and Free Up Space
Ready to take school-related pictures with your personal smartphone? Let’s take a few steps to avoid confusion down the road.
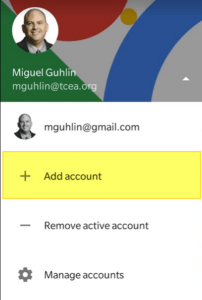
Note: If you are using a school-owned iPad or Android tablet, then you can ignore this tip. You need to use your G Suite for Education account on that device.
First, make sure to add the Google Photos app to your smartphone. Second, log in with your G Suite for Education account. You may have to click on manage accounts to add your G Suite for Education account. You can be log in with many accounts.
To clear your phone of personal images with a backup your personal images, begin with step #1 below:
- Clear your phone of personal images. The easiest way is to have the Photos app back up all photos you take on that device to the cloud. When the process is complete, move to step #2.
- Select the option to “Free up space.” This action will remove images from your phone AFTER the app backs them up. You can double-check. Go to the Google Photos app on your phone and view your images there.
 Still not sure? Go to http://photos.google.com and you will see your images there.
 - Go to the Google Photos app and log in with your G Suite for Education account.
- Set your G Suite for Education as the account to back up photos to.
- Now you are ready to take school-related pictures.
All done? Let’s begin with Tip #2 below to snap pics of school events.
Tip #2 – Snap Pics of School Events
Now that you have set your device to back up new photos to your G Suite for Education account, take lots of pictures. As you take pictures, Google Photos will back up your snapshots as bandwidth allows (e.g. WiFi). You can choose to back up pictures when you are on WiFi or using your phone’s network provider (e.g. AT&T, T-Mobile, Sprint). On the Photo app, go to “Settings” and then choose “Back up & sync”. You will see that you can turn cellular data to back up on or off.
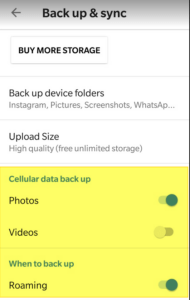
The highlighted section refers to Cellular Data on/off for photos/videos, as well as roaming (good to know if you are at a football game in outside your cellular coverage area)
If you are capturing video, make sure to turn your smartphone or tablet sideways. This will ensure your videos will not need post-event editing. If you forget to turn your device sideways during video recording, there’s an easy fix. The Google Photos app offers the option of flipping your video sideways. How cool is that? Read Simple Video Tricks Tip #3 to learn how.
Google Photos makes editing via your web browser easy. It offers red-eye reduction, cropping, image rotation, and more.
Tip #3 – Create Photo Albums
“Could you take pictures of the awards ceremony?” asks your superintendent one evening at a board meeting. Your smartphone is the only thing you have available. “Sure,” you reply. “I can do it. Would you like me to share the photo album with you?”
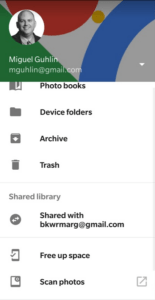
With Google Photos, you can drop photos into an album. This makes it easy to share photos via a link with others. As you can see from the options available, you can do more than create an album or shared album others can add to. More options include:
- Animation – Take any series of photos and display them as an animation, like an animated GIF. You can’t change the speed of the animation like you can with GIFmaker.me. View an example of a Google Photos animation.
- Collage – Create a simple collage of two to nine photos.
- Photo book – Create a printable photo book of a particular set of photos.
As mentioned earlier, you can create a Shared Album in Google Photos that others can add to. Like a regular album, select the photos you want to share as an album or shared album. A shared album allows others, such as a select group of students or team members, to also add pictures. A regular album is one you create and then you can share the link to.
Explore these features. One of the best aspects of Google is that you can take that link and share it. You can do that off your mobile device or online. Isn’t that amazing?
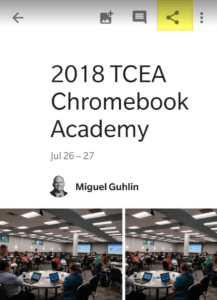
Click the SHARE button in the top right (yellow highlight) to see all the options possible
Tip #4 – Drop Photos into Google Drive
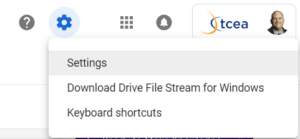
You can display Google Photos in Google Drive with a settings change in Google Drive. Enable that change with these steps:
Organize photos and videos using Google Drive
- On your computer, open drive.google.com.
- Click Settings.
- Check Create a Google Photos folder.
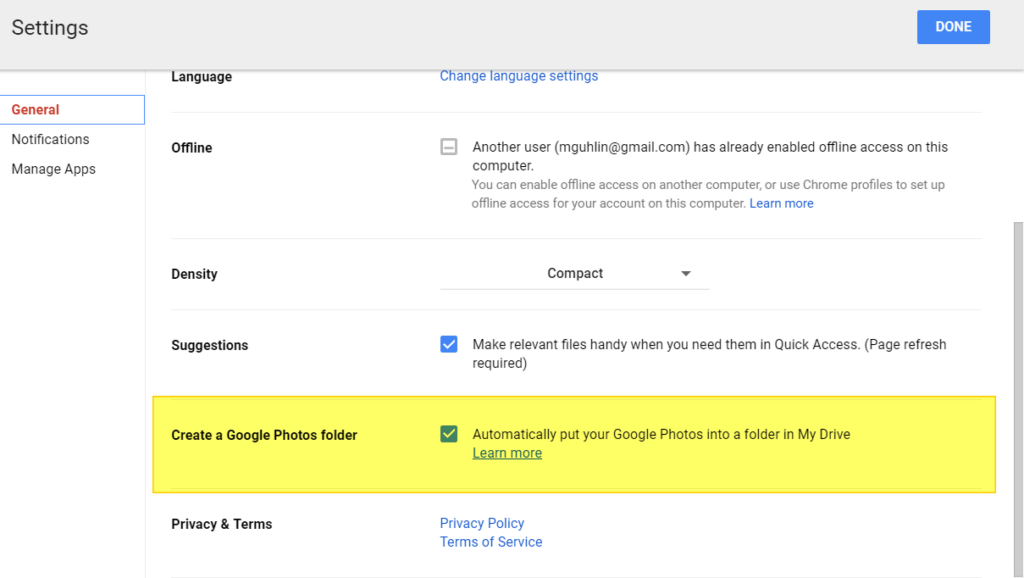
- Click Done.
Once Google Photos appear in Google Drive, you can see the photos in Google Drive. Google organizes these photos/videos according to Year and Month:
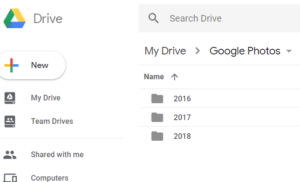
Having access to your Google Photos makes it easy for you to copy your photos to specific folders in Drive. That’s important because you can use that to organize and share the way you want to.
Tip #5 – The New Google Sites
The new Google Sites offers many great features. You can make it a virtual meeting space to showcase exciting events. It makes embedding Google Photos in your Google Drive on a Sites web page easy. You can embed documents, videos, and images. Place animated photos into a Google Sites page. Here are two ways to view Google Photos images that are saved to Google Drive. You can view the new Google Sites setup to show these off.
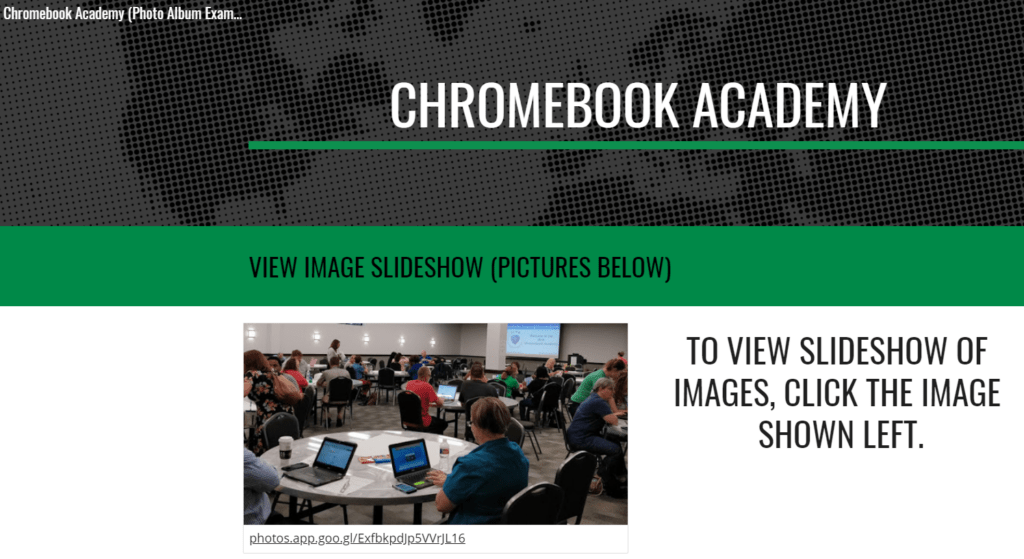
Approach #1 – Embedded Picture Slide Show
In this example, to view the slideshow, you must click the image shown.
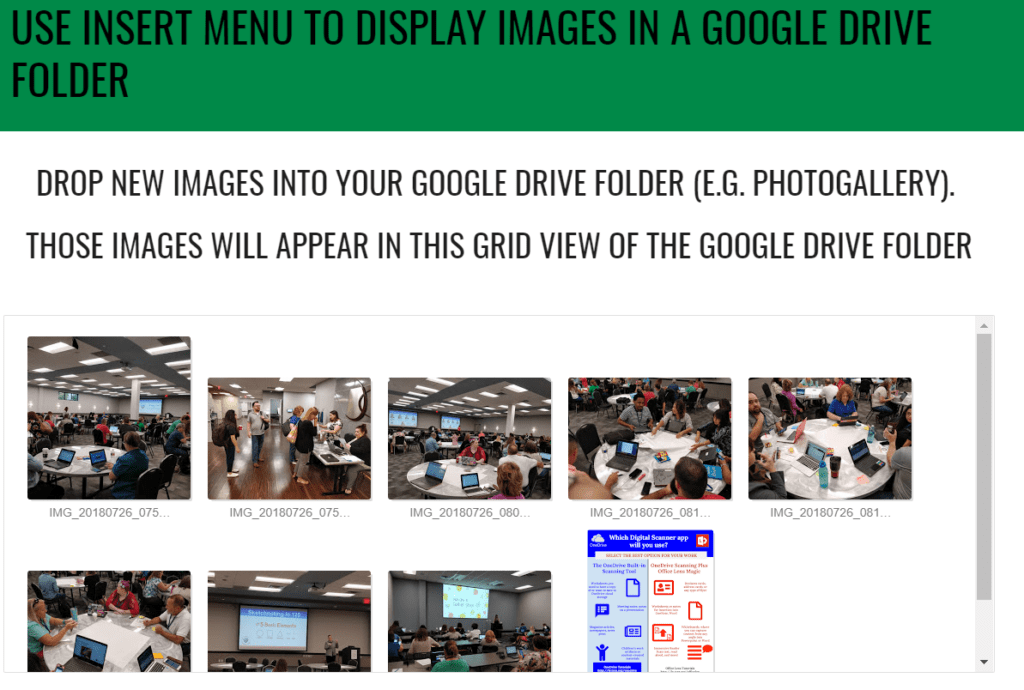
Approach #2 – Grid view of images
In this example, to view the images, you scroll down to see images.
See this in action in this new Google Sites.
A Final Tip
As mentioned, Google Photos on the web offers additional features. My favorite options include auto correct on lighting, crop, and/or flip or rotate an image. Isn’t Google Photos on the web amazing?
