

If you happen to be using a PC or Mac (not a Chromebook) to connect with Zoom, then you may have noticed that you have the ability to do virtual backgrounds (assuming it has been enabled in the settings). Other than using the background photos that Zoom provides, where can you find additional great choices that will set you apart in your next Zoom meeting? Continue reading to find out!
The Specs for Zoom Backgrounds
Before we jump in, we should clarify that photos for Zoom virtual backgrounds should be in 16:9 ratio with the ideal resolution of 1920 px by 1080 px. If you use a photo with a different ratio, then you can expect to have black bars appearing on the sides since Zoom will fit the photo in the 16:9 space. This will definitely identify you as a newbie.
GIF, JPG/JPEG, or 24-bit PNG images can be used. Be aware that, if you have a photo with any transparent pixels, these will show as white. Also, if you are planning to add a logo or text, don’t add them to the bottom of the background photo, as Zoom may superimpose your name over it while in the meeting.
Step 1: Find Good Photos
Having a great photo is the key. You don’t want something that is too busy or distracting and you do want something that is true to who you are. Be sure to check out the copyright to see what attribution is required.
Here are five websites to get you started with finding great photos.

Pixabay has so many great photos for you to choose from. Plus, they offer some fantastic ways of filtering through the photos so that you can find that perfect graphic quicker. After you search for the topic of background (i.e. wall, nature, sunrise, clouds, celebration, trail, etc.), set the orientation to horizontal and choose the most relevant category; I usually choose backgrounds/textures.
NOTE: If you create a free account with Pixabay, you don’t have to identify that you are not a robot each time; logging in with your username/password allows you to skip that step.

Pexels is another great tool for finding images that you can use with hesitation. Be aware that there is an overlap between Pixabay and Pexels so you will find some commonality in the search results. But there is enough difference to check out each. Similar to Pixaby, just type in the topic of interest.
Though Pexels doesn’t provide as many filters, you can set the orientation of choice as horizontal. You can’t specify the ratio or the pixel width/height, but you can choose the size (small, medium, or large). I recommend choosing large and seeing if you are satisfied with the results. You can always trim down a photo, but you run the risk of pixelating the photo if you try to enlarge it to fit the Zoom ideal.
A few other sites to consider include Unsplash, Reshot, and RawPixel. Each has its own interface, so you’ll have to explore each one and learn how to best search and filter to find the photo that you want to use.
Step 2: Edit Your Photo
You can use a simple online photo editor such as Pixlr, BeFunky, Fotor, or Adobe Spark if you need to work in the cloud to edit your chosen image. Here is how I go about creating Zoom backgrounds in Photoshop, PowerPoint, or Google Slides. The main thing to remember is that the end result should be a photo that is preferably 1920 px by 1080 px, but at least fits the 16:9 ratio.
Editing in Photoshop
Begin by opening your photo and select the Rectangle Marquee Tool. For the sake of instructions, we’ll assume we don’t know what ratio the photo is. With the Rectangle Marquee Tool selected, choose Fixed Ratio from the dropdown and set the width to 16 and height to 9 (refer to the image below).

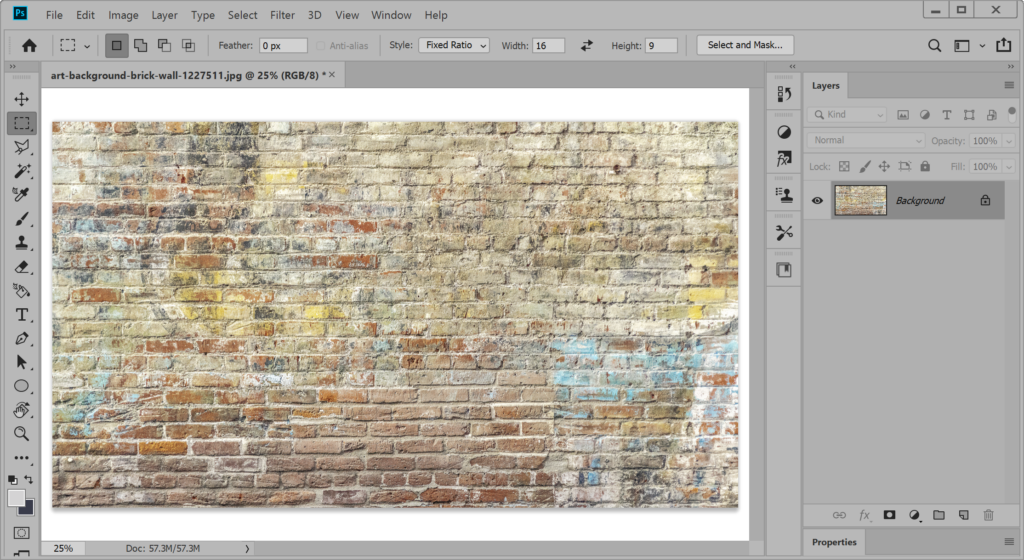
You are now able to click and drag a selection area of the photo. If the photo is already 16:9, you should be able to drag from one corner diagonally to the opposite corner and encompass the whole photo. If the photo is NOT 16:9, you’ll notice that the selected area doesn’t fit perfectly. That’s okay since we can move the selection around to choose the area we want to use. Once you have a 16:9 area selected to use, click on Image –> Crop. If this photo is now the finished product you want, click on File –> Export –> Quick Export PNG. If you would like to continue editing to add a logo or text, save your file now as a Photoshop (PSD) file; this will allow us to continue editing it with layers which we are about to add.
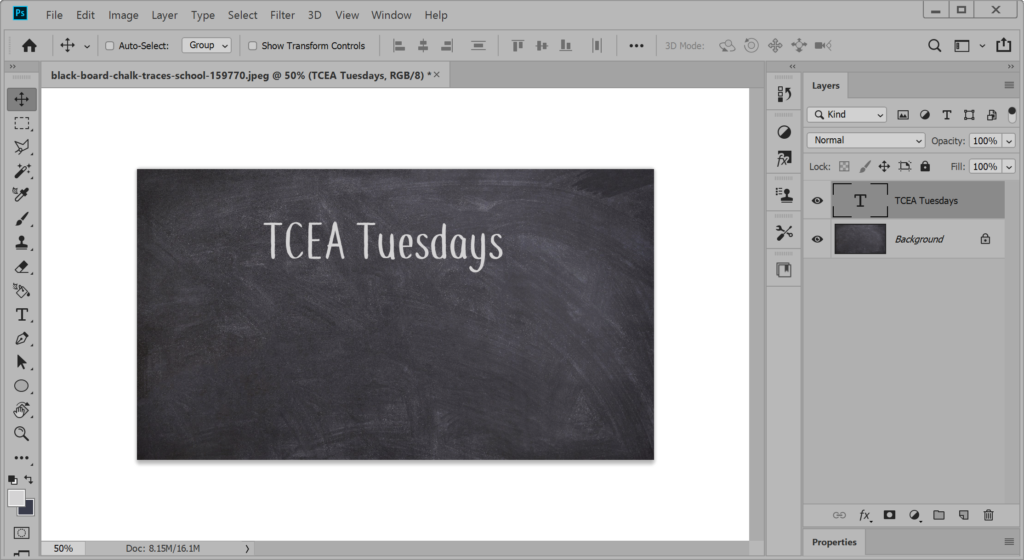
Now to add text to our image. This could be your district or school name or it could be some other information that better identifies you and/or connects you with other viewers in the Zoom meeting.
Let’s begin by clicking on the Horizontal Type Tool and then click on the photo where you would like to start typing – but don’t start typing just yet. On the screenshot below, you’ll notice what appears when you are using the Horizontal Type Tool. Select your font from the drop-down list and set the size. Click on the appropriate alignment option and confirm the color of your text (indicated by the color box just to the right of the alignment options). Once you have these set, it is now time to start typing. NOTE: We can start typing before setting these options, but I typically find that I have to select the text and go back and change the options afterwards when I’m in a hurry.

You may have noticed that a new layer appeared when you click on the photo. Though it looks like you are typing on the photo, you are really adding text over the photo in a transparent layer. If you realize that your text should be moved some, then click on the Move Tool and then click and drag the text to the new area; be sure that your mouse is over some of the text itself as it will assume you want to move whatever is under the cursor.
If you are looking for fonts to use, my go-to sites include dafonts, FontSpace, and 1001 Free Fonts. You’ll find plenty of fun, festive, and even professional-looking fonts to use on your background.
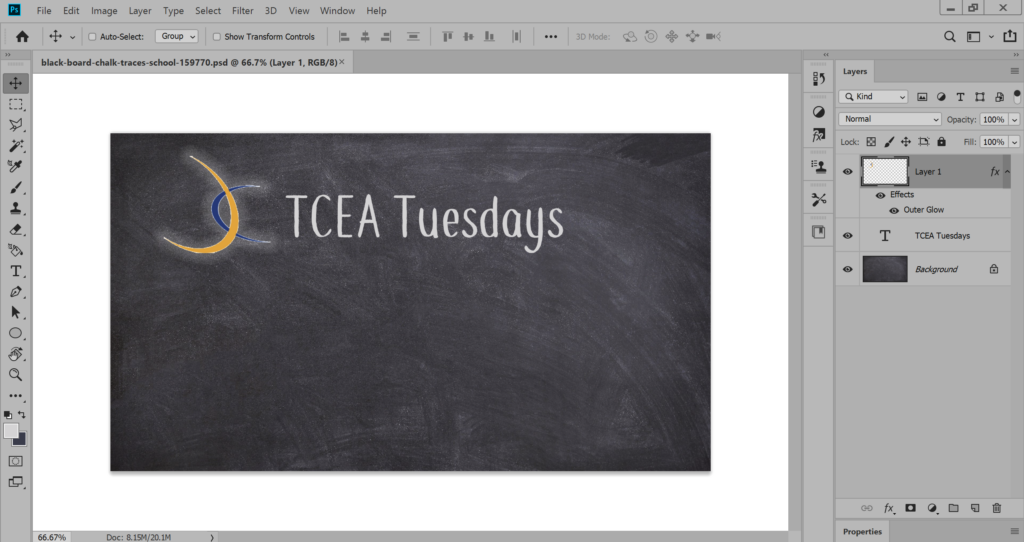
In our final step, let’s add a logo. This could be a school mascot, your bitmoji, or other image. Open the logo in Photoshop as you initially did the original photo. Click Select –> All to copy the logo to the clipboard. Now go to the Photoshop tab with your Zoom background photo. Click Edit –> Paste. If your image does not have a transparent background, you may need to remove it.
You may also need to resize the image. Click on the image to the right to view the brief tutorial showing how to insert, remove the background, and resize the logo.
Editing in PowerPoint
You don’t have to have a high end photo editing tool to get great results. And you might find that using more simplistic tools (or actually re-purposing such tools) may make the process much faster.
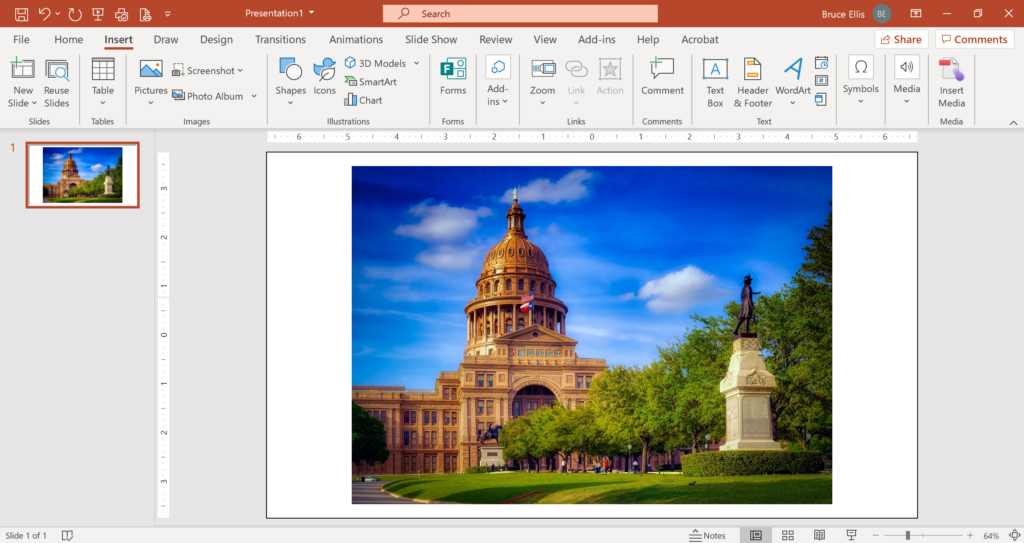
I prefer to start with a blank slide in PowerPoint – that is, no text boxes for the title or anything. Click on the Design menu –> Slide Size –> Wide Screen (16:9). We now know that the ratio will match that of the Zoom background. Insert your photo and resize to perfectly fit the slide. If it doesn’t fit perfectly and you don’t want to stretch part of it, consider centering the photo on your slide and adding a border to hide the gap, similar to adding a mat over a photo that doesn’t fit a picture frame perfectly.
We’ll use the border of a transparent rectangle placed over the image for our border. Begin by inserting a rectangle. With the rectangle selected (and sized to fit the slide), set the shape fill to transparent (Shape Format menu –> Shape Fill –> No Fill); you should now be able to see the photo. Now make the border coordinate with the photo by clicking on Shape Format menu –> Shape Outline –> Eye Dropper. As you move the eye dropper around, you will notice that a small color square is indicating what color will be picked if you click at that location of the photo. Click somewhere to choose a color.
Now let’s make the border thick enough to cover those gaps. We don’t want to add a border directly to the photo because it will just highlight the fact that it is a different ratio; adding the border to the transparent rectangle on top retains the 16:9 ratio and hides the imperfection. With the rectangle still selected, click on the Shape Format menu –> Shape Outline –> Weight –> More Lines. Increase the width until all gaps are covered. Don’t be surprised if the number is large.
You are now ready to save the slide out as an image. To do so, click on the File menu –> Save As and locate the folder where you want to save the Zoom background. For the file type, choose PNG Portable Network Graphics Format. When asked if you want to save All Slides or Just This One, choose Just This One. Your background is now ready to be used in Zoom.
Editing in Google Slides
Editing in Google Slides is very similar to the PowerPoint process. Begin by clicking on the Insert menu –> Image. You have several options as to where get your image (upload from the computer, search the web, Drive, Photos, by URL, or camera).
Once you’ve located your image and added it to your slide, resize the photo (making it larger or smaller) to cover the slide area. If you want a logo, locate that image and add to your photo noting that the ideal placement is most likely the top left or right corner but allowing a bit of a gap between it and the edge of the photo.
Since Zoom will have your name showing at the bottom (assuming that the host did not turn off showing names), any text that you add to your background should probably avoid the bottom third (where the name may appear) or the middle section (where you will appear). You may find it helpful to put contact information such as a phone number, email address, or social media identifier to encourage other users to connect with you outside of meeting times.
Knowing that these words may not be very legible if other participants are looking at a small stream of you, consider keeping the text to a few words at best. You don’t want the text to compete with you in the video stream, but you do want it to be readable.
Step 3: Enjoy
You are now ready to enjoy attending Zoom meetings with your fantastic virtual background. You may even find that other folks will ask you for a copy of your background or to create one for them. You don’t have to tell them how easy it was. That will be our secret.

So, what will you create? Will you use Photoshop, PowerPoint, Google Slides, or another tool to edit your image? The main thing to remember is to be creative without being distracting. We’d love to see what you create! Share your background via Twitter and use the hashtags #tcea and #zoombg.