

Isn’t it great when you take lots of photos of your kids or family and then take time to sit back and scroll through them, reflecting on the fun (and possibly chaos) that ensued? Unfortunately, sometimes when we do get a chance to scroll through the photos we realize there are some things we wish we could change. If you have found yourself in this situation at least once, then you’ll want to check out these three photo editing tools. I’m only going to share a brief bit about each, but these tools offer even more features for you to explore.
Cleanup.Pictures
Cleanup.Pictures is an online artificial intelligence (AI) photo editing tool that allows you to remove items from a photo. This technique is called inpainting. Have a photo where someone photo bombed you? Or did the crazy uncle want to be in the picture (be sure to put him on the end to make it easier to remove)? Or is there something distracting in the background? Use this tool to remove it from the photo.
The AI will inspect the photo and try to recreate what is behind the item you removed. This is a freemium site, so if you want to download your photos in HD, you will need to go with the Pro plan ($3/month) or ClipDrop Pro plan ($5/month). You can find out more about those plans on the pricing page. I’ve found that the free plan, which scales your photos down to 720p is more than sufficient for my tasks.
Here are the steps to follow:
- Go to Cleanup.Pictures.
- Drag/drop your photo in the target area, or click the target area to upload the photo.
- Adjust the size of your brush by moving the slider dot. Move your cursor over the image to see the current size. You want to use the smallest brush size possible for the item, so you don’t wipe out other items in the image.
- Click and drag the brush over an item to remove the item. It’s ideal if you can erase the whole item before releasing your mouse.
- If any artifact residue remains, you can touch it up. Sometimes it’s perfect, and other times it needs a little tweaking.
- To see the before/after of your image, click on the eyeball just to the left of the green Download button (top right).
- When satisfied, click the Download button. It will append the name of the file by adding “_cleanup” so your original file is untouched.
Adobe Photoshop
Adobe has included some cool features in Photoshop that make use of Sensei, its suite of AI and machine learning technologies. I’ll be referencing the neural filters in Photoshop – specifically the Landscape Mixer, but I encourage you to explore the other creative filters within the neural filter category. If you really want to apply more filters than it allows, you may need to repeat the steps below two or more times.
Here are the steps to follow:
- Open your photo in Adobe Photoshop 2022
- Click on FILTER –> Neural Filter
- Scroll down the All Filters list and turn on Landscape Mixer. If you have not used this yet, it may need to download on your computer before you can use it.
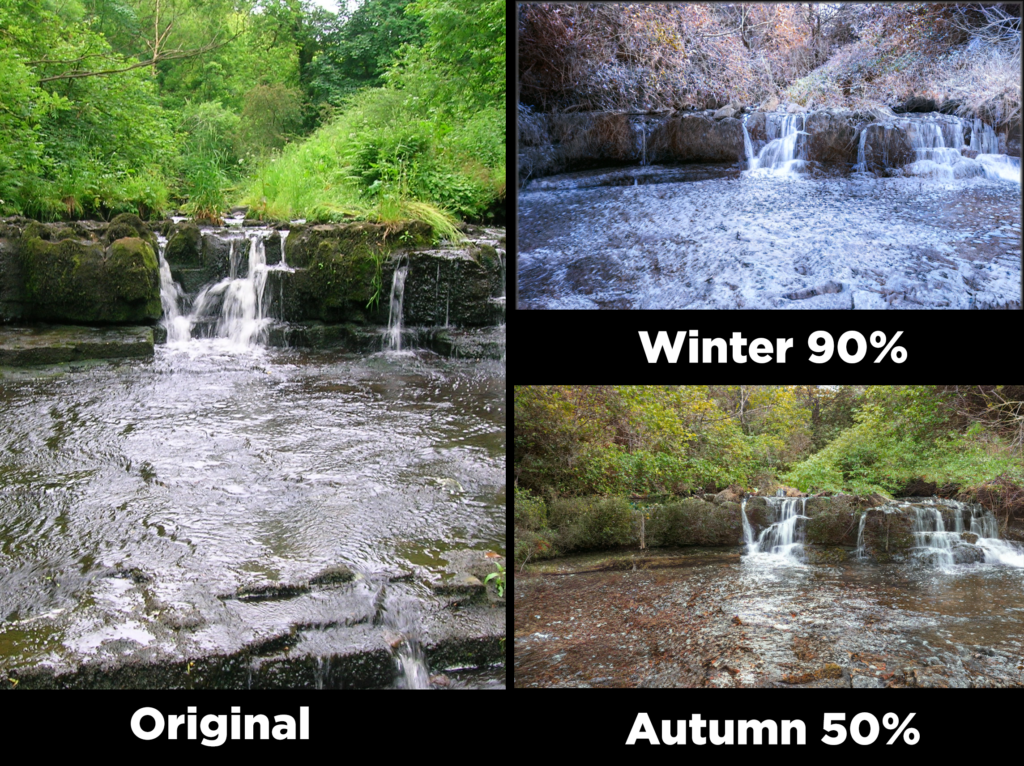
- Now select the preset slider scales on the right-hand side and adjust to the desired strength. The choices include: day, night, sunset spring, summer, fall, and winter. Below you can see the original image and then what it looks like when I set the Autumn to 50% or the Winter to 90%.
- Adjust the slider to get the desired strength applied. Note that this is most like rendering it on your computer so I suggest you don’t have other software running unless you have a good bit of RAM.
- If you do not want the AI to adjust your subject, then tick the Preserve Subject box. Whether you use this feature will depend on the colors that are in your subject.
- When you are satisfied with the filter, apply it by choosing the desired output (new layer, current layer, new layer masked smart filter, or new document). I prefer the New Layer option.
- Click OK to apply the filter and voila!
Canva
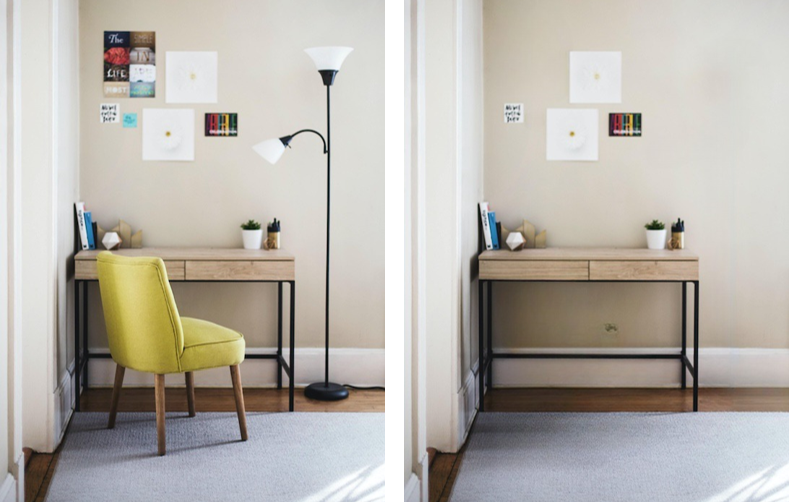
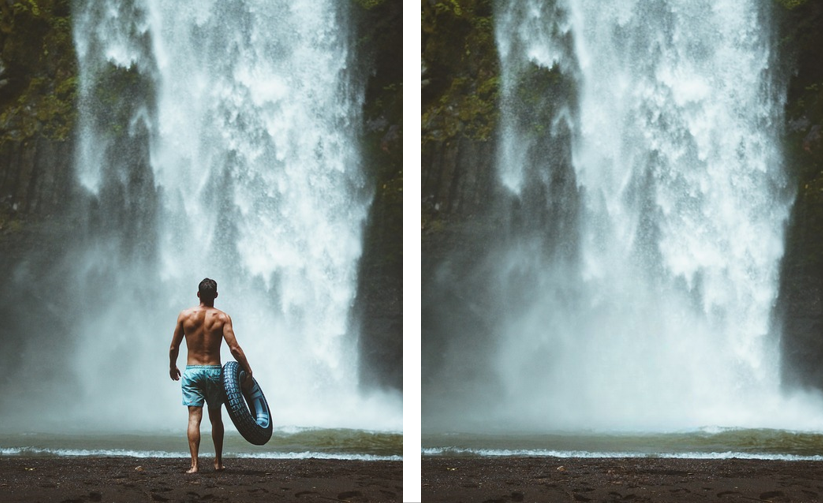
If you aren’t on the Canva bus yet, are you even online? Seriously though. Canva offers great features without the steep learning curve that comes with Photoshop. No, Canva isn’t an equal competitor to Photoshop, but they each are great design tools for their own target audiences and projects. The feature I’d like to share in Canva is the background remover. Yes, you can use a variety of websites that offer just that feature, but Canva is more than just a photo editing tool. It makes it easy to remove the background and then pull from a huge repository of photos to use as the new background. For the sample below I’m using a photo from a couple of years ago when I visited a friend in Houston. The setting was beautiful but the photo didn’t really capture it. Oh, and, no judging the main subject of the photo. ha! Here are the steps.
- Open Canva and begin a new project.
- Click on the Upload button (far left menu), and upload the photo that needs the background removed.
- Drag the uploaded photo to the stage area.
- Click on the photo if it not already selected (you’ll know it is selected if it has a purple border around it.). The resize handles on the corners of the photos and the crop handles are in the center of each edge of the photo.
- Click on Edit Image, above and to the right of the stage area.
- Click the BG Remover icon. It will analyze your selected image and remove the background.
- You can tweak its work by using the Erase and Restore tools.
- When done, click on the Apply button.
- To put a new background behind you, click on the Photos icon (far right menu panel) and search for an image.
- Place the new background image behind you by clicking CTRL+[ or set the photo as the background by clicking on the More icon and selecting Set Image as Background.
- When done, click the Share button (top right) and select the share option of your choice. If you choose to download, you may select what file type in which you’d like to download the image (I usually choose PNG).
- Click the Download button and save to your device.

So, which photo editing tool do you prefer? And, how will you (or your students) use these tools to enhance photos? Drop us a comment below, we’d love to hear from you. Feel free to share another photo editing tool to add to the list!
1 comment
Such a useful guide on photo editing tools! The tips on Cleanup.Pictures, Adobe Photoshop, and Canva are really insightful. Thanks for sharing!