

Google has recently made some major improvements to their solution for scheduling appointments using Google Calendar. Appointment Schedules make it possible for any individual to use the system regardless of what email server they use. This new solution also sets up a booking page making it super easy for individuals to find and use.
Getting Started with Appointment Schedules
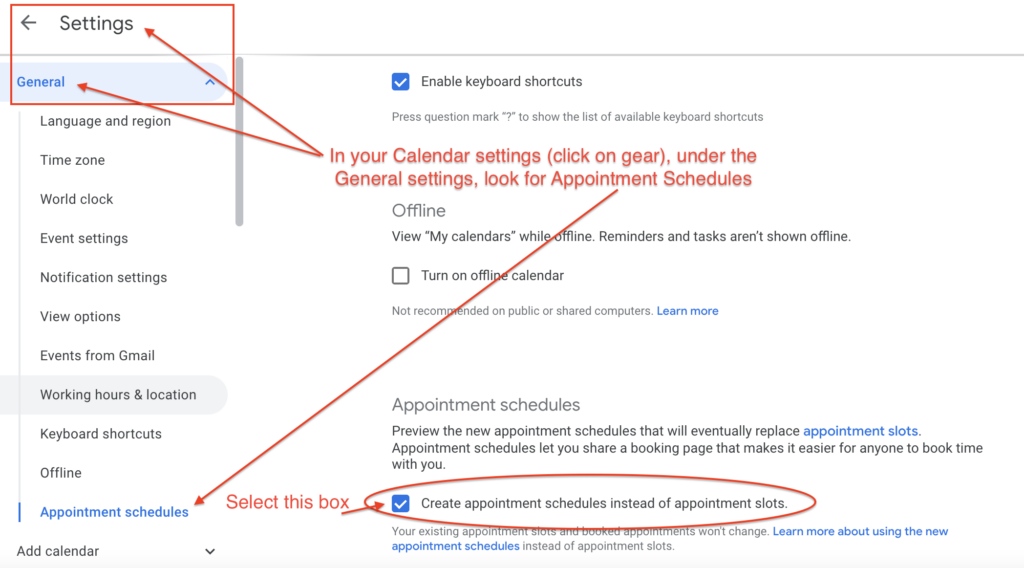
In order to get started using the new Appointment Schedules, you first need to turn it on in your Google Calendar settings.
- On a computer, open Google Calendar.
- Click on the gear icon and scroll through the general settings to Appointment schedules.
- Check the box next to Create appointment schedules instead of appointment slots.
- To turn off appointment schedules, uncheck the box.
Create an Appointment Schedule
You can only create an appointment schedule on your calendar in week or day view, so make sure one of those two views is enabled.
1. Create an event as you normally would, but select Appointment schedule instead of Event, and then title it.
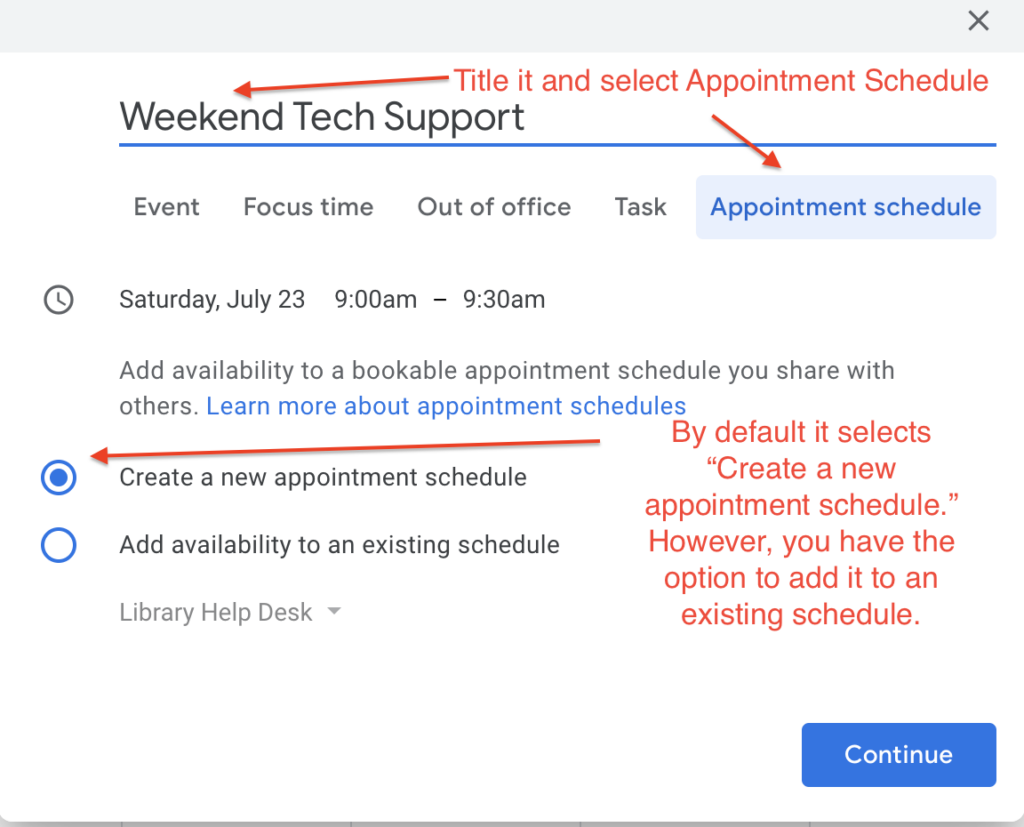
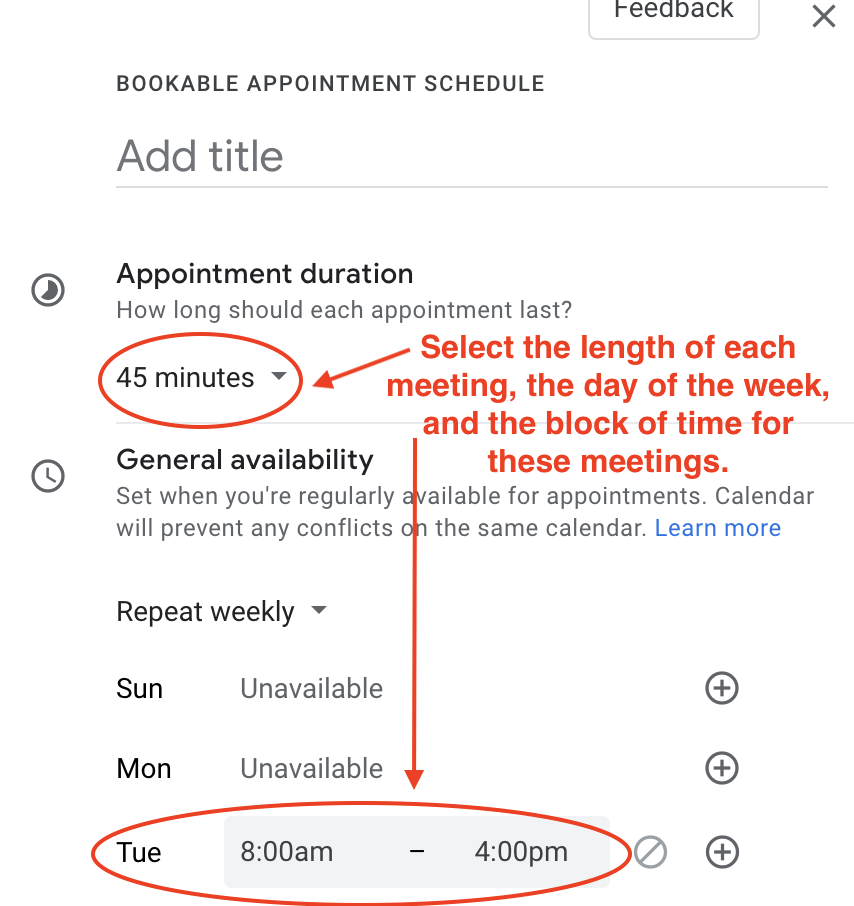
2. Determine how long each meeting will last and choose the block of time for these appointments.
Scheduling Options
You have some options for when the scheduling window will open, how far in advance individuals can sign-up for an appointment, and when individuals may reserve an appointment. It is important to remember that time slots won’t show up on your calendar until they meet the criteria you set in the Scheduling Window. For example, if you determine that individuals cannot sign up for an appointment until two weeks before the appointment, you won’t see any available slots on your calendar three weeks from now. However, in a week, they will be there because you are now two weeks before that date.

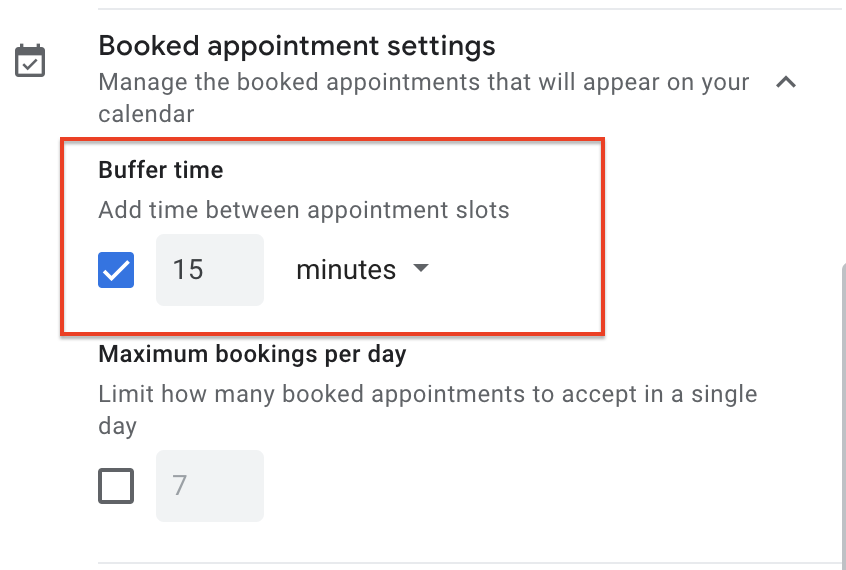
Create a Buffer Time
You can also add some buffer time between appointments and choose how many bookings you want in a day. This is nice if you want to give yourself some time to take care of personal needs or take breaks between appointments.
Booking Page
As mentioned above, one of the best features of Appointment Schedules is that you direct individuals to your Appointment Schedules webpage, not your calendar. For each schedule, you have the ability to pre-determine if these appointments will be in person, on the phone, via Google Meet, or to be determined later. You can also provide a description of the appointments.
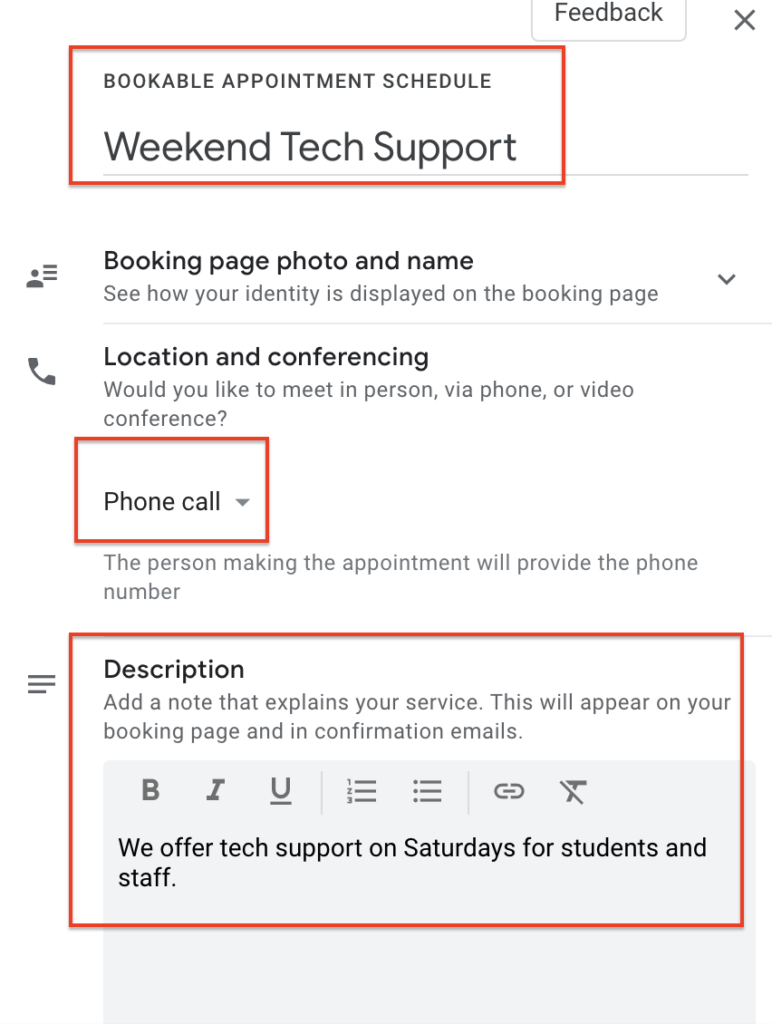
To sign-up, individuals will click on a slot and insert their information. Because I set up the example below as phone call appointments, the phone number field is required.
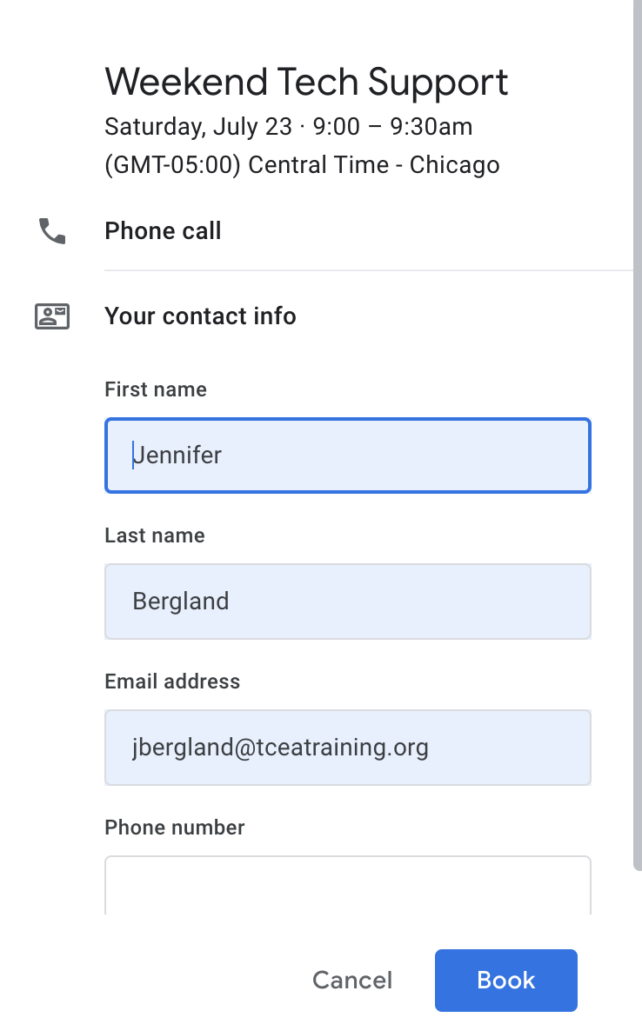
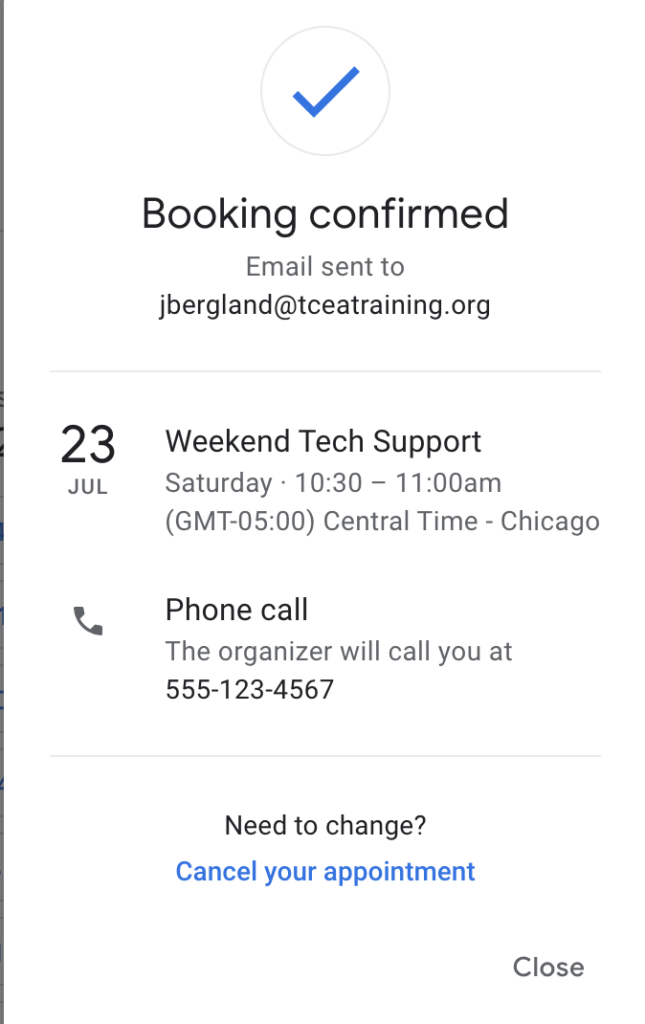
Once they complete the set-up process, individuals will get a confirmation for their appointment in their email as well as a calendar invite to add it to their calendar.
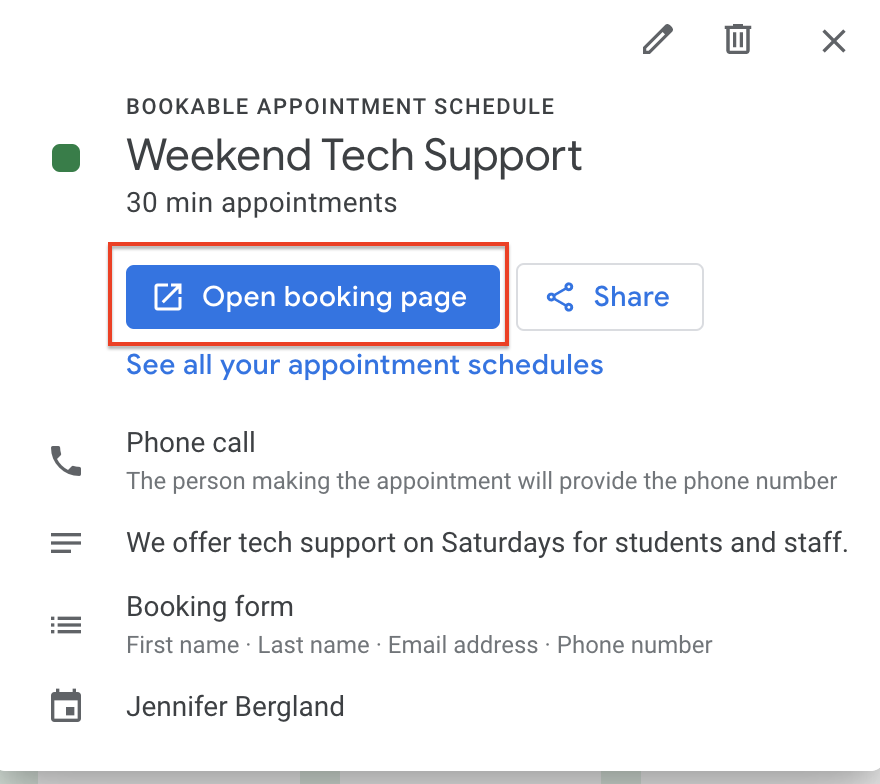
To get to your booking page, click on one of the appointment schedule events on your calendar. It will open up a box that has a link to your booking page.
Practice Makes Perfect
Since Google has given us more options, it may take some practice for you to become familiar with how appointment scheduling works. So my advice is to create some to practice! Google has all the information you need to use this new feature on their Google Calendar Support site.
5 comments
I believe that I will love Google appointment setting more than outlook.
Having google calendar will help everyone be organize with scheduling meetings or anything else we might need. Great information shared with us.
Class was imformative.
Excellent course.
Create an appointment schedule
Scheduling options
Create a buffer time
Booking page