

If you are like me, you enjoy getting and sending handwritten notes, so much so that, for several years, I had a side business where I did calligraphy for people. I scripted wedding invitations, framed poems, witty quotes, and the like with a variety of fonts.
Give me a good flourish any day and I can be amazed for hours. But with the convenience of so many fancy fonts available, the art of actually writing by hand seems to be a fading skill. So what do you do when you want the look of your handwriting but the convenience of speed? Create your own font, of course!
Why Customize?
Why might you want to make your own font? Here are just a few reasons for you to review:
 You may be a person who has hoarded fonts on your computer in the past, only to use the basic 10 fonts that came installed … but you have those other 300 specialty fonts just in case the perfect occasion arises.
- You may find that you type much faster and could use your own printed handwriting as a font to give a personal look without sacrificing the time. Hey! You are still putting the thought into the letter that you are writing, so it should be acceptable.
- You might be a pre-kindergarten or first grade teacher who is going to create a class font to use for your newsletter. Each of your students gets to contribute their best letter to the font so that it is celebrated with each time you type that letter.
- Maybe you are a teacher (or student) who isn’t interested in typing letters, but has a need for specific dingbats … no, not the people that annoy you but those fonts that are made up of icons and images instead of letters.
- Or you may be a math teacher who wants to use specific math symbols instead of some of the lesser used characters on the keyboard.
Whichever scenario resonates best with you, you will enjoy how easy it is to create your own font.
Making Fonts
Microsoft Font Maker is a great and simple tool to help you create your font. You don’t have to be able to name the top 10 fonts used by professional graphic designers or even define what kerning is. You will, however, need a Windows 10 computer or tablet with a stylus. Once you create your font and save it as a true type font, you can share it with anyone you want. Just follow these simple steps and you’ll be on your way to adding Font Designer as just another skill to your resume!
Step 1: Download and Install
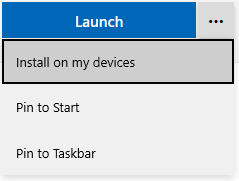 On a Windows 10 computer or tablet (that has a stylus), locate Font Maker in the Microsoft store and install. While you are still at that page in your browser, click on the “more” icon (the three dots just to the right of the launch button) and select both options – Pin to Taskbar and Pin to Start. If you fail to pin the application, just type Font Maker in the Windows 10 search box. If your search box is not shown (hidden), then right-click on the task bar and select Search –> Show search box.
Step 2: Start Designing
Font Maker gives you a design grid in which you write each letter in a specified box using your stylus (shown below). The one downside of the program is that it does not have an undo feature built in. Depending on the stylus you are using, you may have a button you can click to toggle from pen to eraser or you may be able to reprogram your pen to assign an undo feature to one of the buttons.
As you will notice from my “M” below, my stylus lacks all those features. I’ll just call it a design modification and say it is artistic!

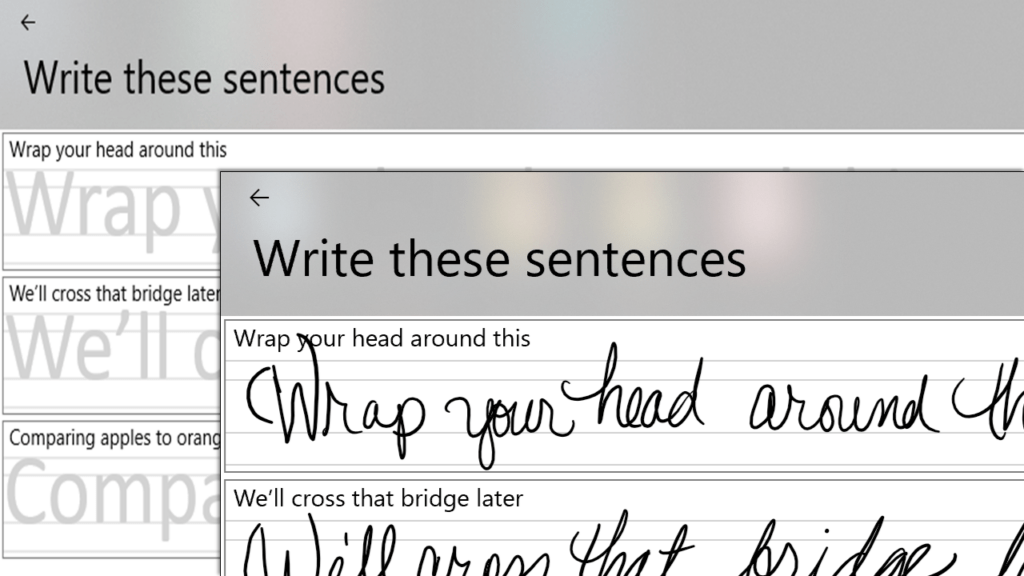
Once you have completed each letter, symbol, and punctuation mark, you will then need to click on the Next button (top right). You will now be given three random phrases to write. To be honest, I’m not sure how this helps. I experimented with writing in cursive for a print design and a few other ways, but it didn’t seem to cause any problems.
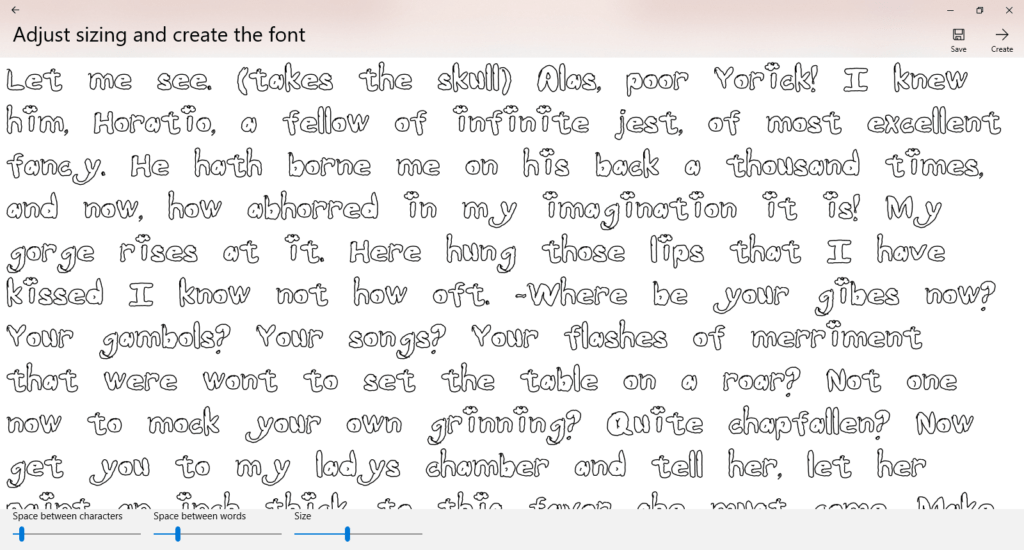
You can click on the Save button (top right) to save your font in an editable format. Go ahead and click on Next. Here, you will see the format that will allow you to adjust the space between the letters (kerning), space between words, and the size of your font.

It will adjust your font on the fly and allow you to preview the changes. Below is my [poor] attempt at bubble letters. If you install the font (links below), you will see the dingbats I used for some of the characters (lightning bolt, star, etc.).
When done, click the Create link (top right) and save your masterpiece font as a true type font that can be installed on your PC and easily shared with others. Congratulations, you have successfully created a font!
To install the font on your computer, right-click on the font and select Install. It will install a copy on your computer and leave the one you clicked on alone. If you double-click on the font file, it will generate a preview of the font so you can review it and decide if you want to install it. This is handy if you have multiple versions saved as it allows you to review each one prior to installing.
What Font Will You Create?
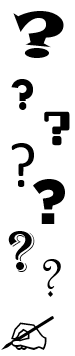
So, what type of font will you create? (pun intended) Will it be functional or one to support your content area? Will it be to express your creativity or minimalistic design preferences? If you need more inspiration, just go to dafont and search to view various fonts that other folks have created; all the fonts used in the featured image for this post came from that site. Because some font sites may have inappropriate fonts for your students, you may want to refrain from having them search without supervision.
To view my three sample fonts that I made while writing this post, click on the appropriate image below. I hope this lack of skill demonstrated in my writing with a poor stylus motivates you to consider the great potential you have and how much more fantastic your font will be! Enjoy!


